Mystery Blanket Club 2025: post 9, October
Debbie AbrahamsWELCOME TO THE PENULTIMATE INSTALMENT OF THE 2025 MYSTERY BLANKET CLUB! We are now just nine squares away from completing this year’s Mystery Blanket, and oh my goodness – hasn’t it flown by!?! I can hardly believe that we are at this point already, with the blanket reveal so close. I think most of you have guessed the title, but there are a few new clues this month if you are still trying to work out what it is.
I am busy preparing to venture out on my first Stitchtopia holiday for many years, and am looking forward to seeing some of you in Ireland in County Kerry very soon. I’ve been working on a cute little project for the holiday, alongside a new festive KAL for Black Sheep Wools (to be revealed imminently!), plus the final instalment of this year’s Mystery Cushion. So it’s been an extremely busy month with little time to do anything else but knit – but then, that’s not such a bad thing, is it!?! We are in the perfect season for staying in and knitting, with the daytime temps cooling down and the evenings beginning to draw in. So I’m quite a happy bunny!

You have five squares to knit this month which completes two whole strips. So as well as knitting, you could also really get ahead and do some sewing up too. There are tips in this blog to help you with that, plus lots of other news including the ten lucky winners in our 2026 Mystery Blanket Early Bird Prize Draw, updates on our special offers and festive promotions, and a couple of really lovely member stories.
I will record a final intro next month when I reveal the title of the Mystery Blanket and talk you through my design process and inspiration for the project. So this month it’s a read-only blog, but there are plenty of tech vids from previous blogs to dip into if you need some guidance.
In case you need some help with a knitting technique, this is a list of all the tech vids we have available in our Tutorials:
- How to pick up stitches to knit the next square (Tutorials: Knitting Basics)
- Mattress stitch (horizontal) (Tutorials: Knitting Basics)
- Mattress stitch (vertical) (Tutorials: Knitting Basics)
- How to carry yarns up the side of the work (Tutorials: Knitting Basics)
- How to thread beads onto yarn (Tutorials: Beading Techniques)
- Slip-stitch beading (Tutorials: Beading Techniques)
- Hooked-in beads (Tutorials: Beading Techniques)
- How to cable (Tutorials: Fancy Stitches)
- Understanding lace stitches (Tutorials: Fancy Stitches)
- How to knit contrast-coloured bobbles (Tutorials: Fancy Stitches)
- How to knit fairisle (Tutorials: Colour Knitting Techniques)
- How to knit Intarsia (Tutorials: Colour Knitting Techniques)
- How to add Swiss-darning to your knitting (Tutorials: Embroidery on Knitting)
- Chain stitch (Tutorials: Embroidery On Knitting)
- Square 2, Gentle Waves (Tutorials: Mystery Blanket 2025)
- Square 3, Shells (Tutorials: Mystery Blanket 2025)
- Square 16, Sandy Squiggles (Tutorials: Mystery Blanket 2025)
- Square 17, Fishbones (Tutorials: Mystery Blanket 2025)
- Square 37, Barnacles (Tutorials: Mystery Blanket 2025)
- Square 39, Salt Water (Tutorials: Mystery Blanket 2025)
THE OCTOBER PRINTED PATTERNS HAVE BEEN POSTED TO THE MEMBERS WHO OPTED FOR THEM, and this month I managed to get them shipped in pretty good time, so hopefully you have your copy. And if not and you are eager to see the patterns and make a start, then you can download the digital version of the file from your Debbie Abrahams account on our website.

It’s simple to do, just log in to your Debbie Abrahams account and hit the Downloads button, and bingo! – you can access all the files for the Mystery Blanket plus the patterns for any other kits that you have purchased from our online shop.
IMPORTANT INFORMATION ON THE LAUNCH OF MAIL-OUT 10 (NOVEMBER PATTERNS). I am hardly in the country this month, with the Stitchtopia trip to Ireland happening really soon at the beginning of October, closely followed by two weeks of annual leave with the family, with a big family celebration in between. We don’t return home from Rhodes until the 31 st October, so I have decided to delay the launch of Mail Out 10 until the Saturday 8 th November, giving me sufficient time to get all the preparation done for the final reveal. This gives everyone an extra week to catch up, and for those members who are up to date, it gives you a week to work on other things (and I am sure you have plenty!). Apologies in advance for this delay, but I thought it was the sensible thing to do in light of my totally super busy calendar.
SINCE WE LAUNCHED SIGN-UPS FOR THE 2026 MYSTERY BLANKET CLUB AT THE END OF AUGUST, WE HAVE SOLD THREE-QUARTERS OF THE MEMBERSHIPS! So a huge thank you goes out to everyone who has decided to join me next year on another super exciting blanket adventure. You are in for a real treat, with a gorgeous palette of vibrant colours and a very inspirational theme to keep you going for most of next year!

Although our Early Bird special offer has expired, you can still sign up if you want to jump on board and join me next year on my next ‘mystery’ knitting journey. All non Early Bird members can still enjoy a fabulous 10% discount off all of the kits in our online shop for a whole year.
So now it’s time to announce the winners of the MBC26 Early Bird Prize Draw!
1 st Prize: 2025 Mystery Blanket Club membership (for the package you’ve purchased, we will refund what you have paid in full): David Burghes (UK).
2 nd Prize: A Festive Mystery Knit Box (with a value of over £80): Deborah Steiner (USA).
3 rd Prize: A Mother’s Day Box (with a value of over £60): Jennifer Stilwell (UK).
4 th Prize: Set of 10 printed patterns for the 2026 Mystery Blanket Club: Alice Espey (USA).
5 th & 6 th Prizes: Knitting kit from a selection in our online shop (up to the value of £50): Nicola Stevenson (UK) and Lavonna Young (USA).
7 th & 8 th Prizes: Four packs of beads (colour/s of your own choice, size 8 or size 6): Christine Lane (BELGIUM) and Chris Wandrag (UK).
9 th & 10 th Prizes: set of three Winter Wonderland ready-made socks: Rachel Pettinger (UK) and Laurie Park (CANADA).
Well done to all of you!!!
If you are unable to decide whether or not to commit to another Mystery Blanket next year, then here are a few reminders of what I have in store for you, which might just help you make your mind up…
For each new blanket I focus on a totally different theme, and try and make it as different as I can to the previous year’s design, which not only gives you a refreshing new project to work on, but for me it’s great to have a drastic change of direction too! So you can probably guess that next year’s colours are far from quiet and peaceful, like this year’s blanket. The 2026 colour palette is super colourful, with vibrant pinks, teal, sunshine yellow, emerald green and rich red contrasted against brilliant white and deep indigo blue. There’ll be lots of interesting stitch patterns, some beautiful cables, stripes, beads, fairisle and intarsia, so it’s a knitting journey you won’t want to miss out on if colour is your thing!

I am absolutely delighted to be back working with James Laxton and his wonderful team in West Yorkshire in the UK, who are busy creating eleven exciting new colours in my exclusive Light Merino Wool (see image below). I am combining my own-branded yarn with some of my favourites from the Rowan collection – Felted Tweed, Alpaca Soft and Pure Alpaca. So you’re in for a real treat next year, with a selection of some of the most luxurious yarns combined together in one unique blanket project!

If you want to pay for your Mystery Blanket Club membership in instalments then opt for our Splitit payment plan. You can choose from between 2-4 monthly payments to suit your finances, and can still take advantage of our Early Bird Special Offer.
To find out more and to place your order, visit the online shop on our website: https://debbieabrahams.com/products/mystery-blanket-club-2026
IF YOU ARE LOOKING FOR A UNIQUE FESTIVE GIFT (OR A WELL DESERVED TREAT FOR YOURSELF!) THEN YOU MIGHT WANT TO PUT A FESTIVE MYSTERY KNIT BOX AT THE TOP OF YOUR SHOPPING LIST. We are taking pre-orders from Friday 17 th October for our hugely popular Festive Mystery Knit Boxes.
 Debbie’s Mystery Box includes ten mystery gifts including a brand-new festive knitting kit. Orders will commence delivery from mid November. The number of boxes is limited to 150 this year, so be sure to make a note on your calendar if you want to grab yourself one as we are expecting them to sell out fast.
WE HAVE SOME FABULOUS KITS ON SPECIAL OFFER IN OUR FESTIVE SALE WHICH EXPIRES ON THE 10 TH OCTOBER! So if you haven’t grabbed yourself a kit from the collection in our online shop, there is still time. All our festive kits are discounted by 10%, so you can treat a friend or family member, or yourself, to something very unique and special. Happy shopping!

I’M GIVING NO MORE LETTERS AWAY IN THE CLUE BELOW TO THE TITLE OF THE MYSTERY BLANKET. In fact, there is only one more letter to add to it and the whole of the title will be revealed. So if you have not guessed it yet, strap on your thinking caps and let me know if you have any ideas…
T H _ / S _ A S H O R _
The final reveal is coming next month, so make sure you tune into my November blog to find out all about the inspiration for this year’s design!
THERE ARE FIVE SQUARES TO KNIT THIS MONTH:
Square 12, Option One, Shell – shell motif with hooked-in beads and chain stitch embroidery:

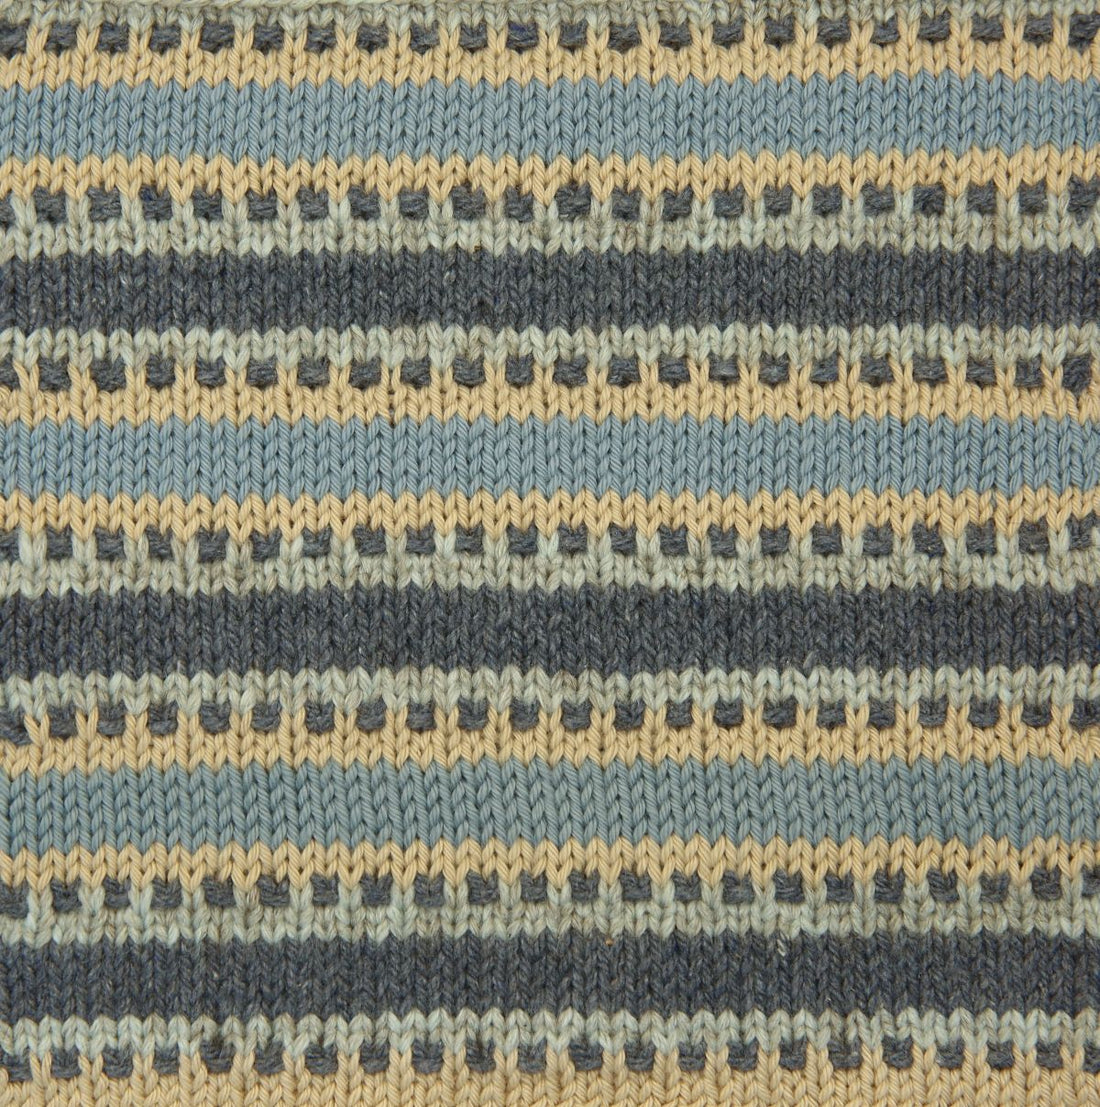
Square 12, Option Two, Seaweed Stripe – stocking stitch stripes with contrast-coloured textured stitches:

Square 13, Barnacles – lace stitch with slip-stitch beads (same for both options):

Square 14, Surf – garter stitch and moss stitch stripes (same for both options):

Square 34, Sandy Squiggles – moss stitch and textured stitch stripes (same for both options):

Square 35, Shallow Pools –hooked-in beads on stocking stitch (same for both options):

On each pattern page there is a list of Pattern notes and tips that are worth reading before you start to knit each square. These bits of advice will help you and give pre-warnings as to what to look out for in the pattern instructions. Also take note of the description under the title of each square as this tells you what the stitch structure is.
There is just one brand new square to knit in the October instalment, so you’ll be taking a trip down memory lane this month with some familiar squares to knit up from previous mail-outs.

SQUARE 12, SHELL (Option One): a shell motif with hooked-in beads and embroidered swirls adding extra colour and texture.
Videos to watch for assistance with this square:
- How to pick up stitches to knit the next square (find it in Tutorials: Knitting Basics)
- Mattress stitch (horizontal) (find it in Tutorials: Knitting Basics)
- How to knit intarsia (find it in Tutorials: Colour Knitting Techniques)
- Hooked-in beads (find it in Tutorials: Beading Techniques)
- Chain stitch (find it in Tutorials: Embroidery On Knitting)
There are two options for this square, and I would advise you to choose the same option that you chose for Square 38 to keep the overall design balanced.
I would say that this is one of the easiest of the intarsia squares to knit as all of the finer details are added to it with beads and embroidery. So if you’ve knitted all the other Option One squares, you should find this relatively easy in comparsion. I used two balls of Linen plus one long length, and one ball of Silt, with the second ball of Silt introduced on Chart row 11. I used the long length of Linen to knit the two indents at the bottom of the Shell (on rows 11-14). There was a little bit of carrying across of yarns at the back of the work at this point, but it was minimal.
 Lines of Grey and Black beads are hooked-in to create the textured spokes of the shell, so make sure that you hook the correct colour beads onto the stitches as you work up the chart as they are a little tricky to see on the chart and on the image.
The shell really comes to life when you add in the embroidery, and this is the final job to do on this square after it has been blocked and pressed. A bead is sewn onto the end of three of the swirls, and although the colours of these beads are written onto the chart, if preferred, feel free to use your own choice.
If you need a reminder of any of the techniques used in this square then there are several tech vids you can access in our Tutorials to assist you.
SQUARE 12, SEAWEED STRIPE (Option Two): this is the alternative option if you don’t fancy tackling the shell, and it's exactly the same as Square 38, Option Two.
Videos to watch for assistance with this square:
- Picking up stitches to begin a new square: (Tutorials: Knitting Basics).
- Mattress stitch (horizontal): (Tutorials: Knitting Basics).
- How to carry yarns up the side of the work (Tutorials: Knitting Basics).
- Square 2, Gentle Waves (textured slip-stitch pattern) (Tutorials: Mystery Blanket 2025).
As I mentioned above for Option One, I would recommend that you choose the same option that you chose for Square 38.

I really enjoyed knitting this option as it is basically stocking stitch stripes interspersed with rows of textured contrast-coloured stitches – so it’s a much easier one to knit than some of the others in the blanket. It’s one of those squares that you can settle down with and knit without too many worries – wonderful! It’s a straight repeat of the second option for Square 38, so if you’ve already knitted this square it’s going to be an even easier task for you.
If you need a reminder of the textured stitch pattern on rows 3-4 and 13-14 (and their subsequent repeats), then there is a tech vid for Square 2, Gentle Waves which uses the same technique, and therefore will help you through these trickier rows.
SQUARE 13, BARNACLES: this all-over lace pattern with slip-stitch beads will take you way back to the very first mail-out in February when you knitted this square for the first time.
Videos to watch for assistance with this square:
- Picking up stitches to begin a new square (find it in Tutorials: Knitting Basics).
- Mattress stitch (horizontal) (find it in Tutorials: Knitting Basics).
- How to thread beads onto yarn (find it in Tutorials: Beading Techniques).
- How to bead, the slip-stitch method (find it in Tutorials: Beading Techniques).
- Understanding lace stitches (find it in Tutorials: Fancy Stitches).
- Square 37, Barnacles (lace and bead stitch) (find it in Tutorials: Mystery Blanket 2025).
The needle size used for this square is smaller than the main recommended size, and you can see it in the boxed information on the far left-hand side of page 10, it’s 3.25mm. This is one metric size smaller than the recommended needle size for the project.

Before you cast on you will need to pre-thread the beads, the instructions for which are on page 10 after the Pattern notes and tips. The colours of the beads are difficult to see on the image on this page, but if you check that you’ve threaded them on correctly, they will knit up in the correct sequence.
Lace patterns can be complex, but in this square all of the lace instructions are only on right-side rows – some patterns have lace instructions on both right-side and wrong-side rows and these can be tricky to knit. So you only have right-side rows to concentrate on, with beads being placed on some of the wrong side rows. If you need a reminder of how to knit lace stitches then there is a tech vid in our Tutorials which demonstrates all the different varieties of increasing and decreasing which are used in this square.
It would be a good idea to get into the habit of counting the stitches at the end of all right-side rows. There is nothing more frustrating than having to undo rows because on a right-side row you forgot to do an increase or a decrease. So to avoid any tears or upsets do regular stitch counts and then you will be fine and will really enjoy knitting up this square again!
Enjoy your trip down memory lane!
SQUARE 14, SURF: this square was also included in the first mail-out in February, and combines moss stitch with garter stitch in an all-over textured, striped pattern.
Videos to watch for assistance with this square:
- Picking up stitches to begin a new square (find it in Tutorials: Knitting Basics).
- Mattress stitch (horizontal) (find it in Tutorials: Knitting Basics).
- How to carry yarns up the side of the work (find it in Tutorials: Knitting Basics).
The first thing to note about this square is that it uses a smaller size needle than the main recommended one for the blanket, which is 3.50mm. If you look at the far left-hand side of page 12 you will see the boxed needle information which states a 2.50mm needle. This is four metric sizes smaller than the main recommended needle size. The reason for using such a small needle is because moss stitch and garter stitch are looser in stitch tension in comparison to stocking stitch. Therefore a smaller needle is essential to keep the knitting neat and the measurements of the finished square in line with the other squares in the blanket.

You will notice too that there are many more rows in this pattern than in the other squares (the average is 60-62 rows). This is because moss stitch and garter stitch condense down row tension, which means you need to knit more rows in this stitch structure than stocking stitch to achieve the correct measurement.
There are a few rows of Silver Haze in this square. This is the yarn that combines together Alpaca Classic Blue Haze and Silver Lurex. It is advisable to wind both of these yarns onto separate bobbins before you start knitting with them as you might find it very tricky to knit with them straight off the ball.
SQUARE 35, SANDY SQUIGGLES: you’ve already knitted this square in a previous mail-out, plus a variation of it too later on in this project. So this one goes back to the first version you knitted in April.
Videos to watch for assistance with this square:
- Square 16, Sandy Squiggles (find it in Tutorials: Mystery Blanket 2025)
- Picking up stitches to begin a new square (find it in Tutorials: Knitting Basics).
- Mattress stitch (horizontal) (find it in Tutorials: Knitting Basics).
- How to carry yarns up the side of the work (find it in Tutorials: Knitting Basics).
The needle sizes used for this square are smaller than the main recommended size, which you can see in the boxed information on the far left-hand side of page 14 (3.25mm and 2.50mm). It is important to change needle size when instructed to keep the square a uniform width. The smaller needles are used for the moss stitch stripes in Camel which are a different tension to the stripes in Mocha.

If you need a reminder about how to knit the textured purl stitch, there is a tech vid in our Tutorials which is definitely worth a watch before you start knitting. Basically it is created by increasing into every stitch purlwise on a wrong-side row, then purling these two stitches together on the following right-side row. This means that at the end of Row 10, for example, there will be almost twice the number of stitches on your needle, but these are decreased back to the original number on Row 11.
Once Mocha has been joined in there is no need to cut it off as you will always be at the correct end of the row when you need it next. However, to avoid long loops at the side edges, you will need to remember to carry it up the side of the work when it is not in use.
SQUARE 36, SHALLOW POOLS: this is the final square to knit this month, and it’s another repeat of what you have knitted before, way back in the second mail-out in March.
Videos to watch for assistance with this square:
- Hooked-in beads (find it in Tutorials: Bead Knitting).
- Picking up stitches to begin a new square: (find it in Tutorials: Knitting Basics).
- Mattress stitch (horizontal): (find it in Tutorials: Knitting Basics).
The needle size used for this square is smaller than the main recommended size, and you can see it in the boxed information on the far left-hand side of page 16, it’s 3.25mm. This is one metric size smaller than the recommended needle size for the project.

The pattern itself is easy to knit, but you will need to pay extra attention to the different coloured beads as these are hooked in on a continuous rotation. This caused a bit of confusion when it was first knitted back in March, so I have added in an extra tip in the Pattern notes and tips on page 16 to clarify this (see fourth bullet). It says that whichever bead is used at the end of a beaded row, the next colour bead in the sequence is used to start the next beaded row. So it is a continuous rotation of the colours throughout the whole square.
On page 17 you will see that there is a sequence for the beads to follow, it is: 1 Grey, 1 Clear, 1 Blue, 1 White. It is really important that you follow this sequence to get the beads in the right order. I found it easier to pre-thread all the beads onto a piece of spare yarn, and then I did not need to think about which colour to pick up and hook-in, they were all lined up and ready to go.
This is an easy square to knit, but a little fiddly and time-consuming. But it’s the last time you will knit it, so make yourself a cuppa, settle down in your favourite chair and enjoy!
WITH TWO MORE STRIPS COMPLETED AFTER THIS INSTALMENT, YOU COULD GET AHEAD AND SEW SOME OF THEM TOGETHER SO THAT THERE IS LESS FINISHING TO DO NEXT MONTH. If you decide to make a start on this, I gave you lots of tips and advice in the previous blog (September) to guide you through the process. So if you need any reminders, I would recommend that you take another look at it.

These are my guidelines for sewing strips 1 and 2 together, but they do not have to be followed if you prefer to use your own method and calculations.
SEW STRIP 1 (squares 1-7) TO STRIP 2 (squares 8-14)
Sew Square 1 (62 rows) to Square 8 (62 rows): there are no rows to be eased in.
Along the edge of Square 1 place a marker between Rows 31 and 32.
Along the edge of Square 7 place a marker between Rows 31 and 32
Sew the squares together, making sure that the markers match up.
Sew Square 2 (Option One) (61 rows) to Square 9 (79 rows): you need to ease 18 rows of Square 9 into Square 2 (Option One).
Along the edge of Square 2 (Option One) place a marker on Row 31.
Along the edge of Square 9 place a marker on Row 40.
Ease in 18 rows as evenly as you can across the whole length of the squares, making sure that the marker on Square 2 (Option One) is matched to the marker on Square 9.
Sew Square 2 (Option Two) (66 rows) to Square 9 (79 rows): you need to ease 13 rows of Square 9 into Square 2 (Option Two).
Along the edge of Square 2 (Option Two) place a marker between Rows 33 and 34.
Along the edge of Square 9 place a marker on Row 40.
Ease in 13 rows as evenly as you can across the whole length of the squares, making sure that the marker on Square 2 (Option Two) is matched to the marker on Square 9.
Sew Square 3 (85 rows) to Square 10 (Option One) (60 rows): you need to ease 25 rows of Square 3 into Square 10 (Option One).
Along the edge of Square 3 place a marker on Row 43.
Along the edge of Square 10 (Option One) place a marker between Rows 30 and 31.
Ease in 25 rows as evenly as you can across the whole length of the squares, making sure that the marker on Square 3 is matched to the marker on Square 10 (Option One).
Sew Square 3 (85 rows) to Square 10 (Option Two) (86 rows): you need to ease 1 row of Square 10 (Option Two) into Square 3.
Along the edge of Square 3 place a marker on Row 43.
Along the edge of Square 10 (Option Two) place a marker between Rows 43 and 44.
Ease in 1 row across the whole length of the squares, making sure that the marker on Square 3 is matched to the marker on Square 10 (Option Two).
Sew Square 4 (62 rows) to Square 11 (65 rows): you need to ease 3 rows of Square 11 into Square 4.
Along the edge of Square 4 place a marker between Rows 31 and 32.
Along the edge of Square 11 place a marker on Row 33.
Ease in 3 rows as evenly as you can across the whole length of the squares, making sure that the marker on Square 4 is matched to the marker on Square 11.
Sew Square 5 (58 rows) to Square 12 (Option One) (60 rows): you need to ease 2 rows of Square 12 (Option One) into Square 5.
Along the edge of Square 5 place a marker between Rows 29 and 30.
Along the edge of Square 12 (Option One) place a marker between Rows 30 and 31.
Ease in 2 rows as evenly as you can across the whole length of the squares, making sure that the marker on Square 5 is matched to the marker on Square 12 (Option One).
Sew Square 5 (58 rows) to Square 12 (Option Two) (66 rows): you need to ease 8 rows of Square 12 (Option Two) into Square 5.
Along the edge of Square 5 place a marker between Rows 29 and 30.
Along the edge of Square 12 (Option Two) place a marker between Rows 33 and 34.
Ease in 8 rows across the whole length of the squares, making sure that the marker on Square 5 is matched to the marker on Square 12 (Option Two).
Sew Square 6 (Option One) (61 rows) to Square 13 (67 rows): you need to ease 6 rows of Square 13 into Square 6 (Option One).
Along the edge of Square 6 (Option One) place a marker on Row 31.
Along the edge of Square 13 place a marker on Row 34.
Ease in 6 rows as evenly as you can across the whole length of the squares, making sure that the marker on Square 6 (Option One) is matched to the marker on Square 13.
Sew Square 6 (Option Two) (66 rows) to Square 13 (67 rows): you need to ease 1 row of Square 13 into Square 6 (Option Two).
Along the edge of Square 6 (Option Two) place a marker between rows 33 and 34.
Along the edge of Square 13 place a marker on Row 34.
Ease in 1 row across the whole length of the squares, making sure that the marker on Square 6 (Option Two) is matched to the marker on Square 13.
Sew Square 7 (64 rows) to Square 14 (88 rows): you need to ease 24 rows of Square 14 into Square 7.
Along the edge of Square 7 place a marker between Rows 32 and 33.
Along the edge of Square 14 place a marker between Rows 44 and 45.
Ease in 24 rows as evenly as you can across the whole length of the squares, making sure that the marker on Square 7 is matched to the marker on Square 14.
SEW STRIP 2 (squares 8-14) TO STRIP 3 (squares 15-21)
Sew Square 8 (62 rows) to Square 15 (59 rows): you need to ease 3 rows of Square 8 into Square 15.
Along the edge of Square 8 place a marker between Rows 31 and 32.
Along the edge of Square 15 place a marker on Row 30.
Ease in 3 rows as evenly as you can across the whole length of the squares, making sure that the marker on Square 8 is matched to the marker on Square 15.
Sew Square 9 (79 rows) to Square 16 (75 rows): you need to ease 4 rows of Square 9 into Square 16.
Along the edge of Square 9 place a marker on Row 40.
Along the edge of Square 16 place a marker on Row 38.
Ease in 4 rows as evenly as you can across the whole length of the squares, making sure that the marker on Square 9 is matched to the marker on Square 16.
Sew Square 10 (Option One) (60 rows) to Square 17 (53 rows): you need to ease 7 rows of Square 10 (Option One) into Square 17.
Along the edge of Square 10 (Option One) place a marker between Rows 30 and 31.
Along the edge of Square 17 place a marker on Row 27.
Ease in 7 rows as evenly as you can across the whole length of the squares, making sure that the marker on Square 10 (Option One) is matched to the marker on Square 17.
Sew Square 10 (Option Two) (86 rows) to Square 17 (53 rows): you need to ease 33 rows of Square 10 (Option Two) into Square 17.
Along the edge of Square 10 (Option Two) place a marker between Rows 43 and 44.
Along the edge of Square 17 place a marker on Row 27.
Ease in 33 rows as evenly as you can across the whole length of the squares, making sure that the marker on Square 10 (Option Two) is matched to the marker on Square 17.
Sew Square 11 (65 rows) to Square 18 (71 rows): you need to ease 6 rows of Square 18 into Square 11.
Along the edge of Square 11 place a marker on Row 33.
Along the edge of Square 18 place a marker on Row 36.
Ease in 6 rows as evenly as you can across the whole length of the squares, making sure that the marker on Square 11 is matched to the marker on Square 18.
Sew Square 12 (Option One) (60 rows) to Square 19 (59 rows): you need to ease 1 row of Square 12 (Option One) into Square 19.
Along the edge of Square 12 (Option One) place a marker between Rows 30 and 31.
Along the edge of Square 19 place a marker on Row 30.
Ease in 1 row across the whole length of the squares, making sure that the marker on Square 12 (Option One) is matched to the marker on Square 19.
Sew Square 12 (Option Two) (66 rows) to Square 19 (59 rows): you need to ease 7 rows of Square 12 (Option Two) into Square 19.
Along the edge of Square 12 (Option Two) place a marker between Rows 33 and 34.
Along the edge of Square 19 place a marker on Row 30.
Ease in 7 rows as evenly as you can across the whole length of the squares, making sure that the marker on Square 12 (Option Two) is matched to the marker on Square 19.
Sew Square 13 (67 rows) to Square 20 (75 rows): you need to ease 8 rows of Square 20 into Square 13.
Along the edge of Square 13 place a marker on Row 34.
Along the edge of Square 20 place a marker on Row 38.
Ease in 8 rows as evenly as you can across the whole length of the squares, making sure that the marker on Square 13 is matched to the marker on Square 20.
Sew Square 14 (88 rows) to Square 21 (85 rows): you need to ease 3 rows of Square 14 into Square 21.
Along the edge of Square 14 place a marker between Rows 44 and 45.
Along the edge of Square 21 place a marker on Row 43.
Ease in 3 rows as evenly as you can across the whole length of the squares, making sure that the marker on Square 14 is matched to the marker on Square 21.
SEW STRIP 5 (squares 29-35) TO STRIP 6 (squares 36-42)
Sew Square 29 (85 rows) to Square 36 (88 rows): you need to ease 3 rows of Square 29 into Square 36.
Along the edge of Square 29 place a marker on Row 43.
Along the edge of Square 36 place a marker between Rows 44 and 45.
Ease in 3 rows as evenly as you can across the whole length of the squares, making sure that the marker on Square 29 is matched to the marker on Square 36.
Sew Square 30 (75 rows) to Square 37 (67 rows): you need to ease 8 rows of Square 30 into Square 37.
Along the edge of Square 30 place a marker on Row 38.
Along the edge of Square 37 place a marker on Row 34.
Ease in 8 rows as evenly as you can across the whole length of the squares, making sure that the marker on Square 30 is matched to the marker on Square 37.
Sew Square 31 (59 rows) to Square 38 (Option One) (59 rows): there are no rows to be eased in.
Along the edge of Square 31 place a marker on Row 30.
Along the edge of Square 38 (Option One) place a marker on Row 30.
Sew the squares together, making sure that the markers match up.
Sew Square 31 (59 rows) to Square 38 (Option Two) (66 rows): you need to ease 7 rows of Square 38 (Option Two) into Square 31.
Along the edge of Square 31 place a marker on Row 30.
Along the edge of Square 38 (Option Two) place a marker between Rows 33 and 34.
Ease in 7 rows as evenly as you can across the whole length of the squares, making sure that the marker on Square 31 is matched to the marker on Square 38 (Option Two).
Sew Square 32 (71 rows) to Square 39 (65 rows): you need to ease 6 rows of Square 32 into Square 39.
Along the edge of Square 32 place a marker on Row 36.
Along the edge of Square 39 place a marker on Row 33.
Ease in 6 rows as evenly as you can across the whole length of the squares, making sure that the marker on Square 32 is matched to the marker on Square 39.
Sew Square 33 (53 rows) to Square 40 (Option One) (60 rows): you need to ease 7 rows of Square 40 (Option One) into Square 33.
Along the edge of Square 33 place a marker on Row 27.
Along the edge of Square 40 (Option One) place a marker between Rows 30 and 31.
Ease in 7 rows as evenly as you can across the whole length of the squares, making sure that the marker on Square 33 is matched to the marker on Square 40 (Option One).
Sew Square 33 (53 rows) to Square 40 (Option Two) (86 rows): you need to ease 33 rows of Square 40 (Option Two) into Square 33.
Along the edge of Square 33 place a marker on Row 27.
Along the edge of Square 40 (Option Two) place a marker between Rows 43 and 44.
Ease in 33 rows as evenly as you can across the whole length of the squares, making sure that the marker on Square 33 is matched to the marker on Square 40 (Option Two).
Sew Square 34 (75 rows) to Square 41 (79 rows): you need to ease 4 rows of Square 41 into Square 34.
Along the edge of Square 34 place a marker on Row 38.
Along the edge of Square 41 place a marker on Row 40.
Ease in 4 rows as evenly as you can across the whole length of the squares, making sure that the marker on Square 34 is matched to the marker on Square 41.
Sew Square 35 (59 rows) to Square 42 (62 rows): you need to ease 3 rows of Square 42 into Square 35.
Along the edge of Square 35 place a marker on Row 30.
Along the edge of Square 42 place a marker between Rows 31 and 32.
Ease in 3 rows as evenly as you can across the whole length of the squares, making sure that the marker on Square 35 is matched to the marker on Square 42.
THERE ARE A COUPLE OF MEMBER STORIES THIS MONTH WHICH ARE TRULY INSPIRING! The first one is from Annabel Casey from Bloxham in Oxfordhsire, UK who has created this totally amazing blanket from all the leftover bits and pieces of yarn from her previous Mystery Blanket projects.

Annabel says: “ Here is something a bit different. I have knitted this mitred square blanket over seven months using Mystery Blanket leftovers. Every colour/yarn used has been part of one of your blankets! Half a dozen fellow Blanketeers helped me out with leftover part balls when I ran out of certain colours. There are 289 squares in total and I really enjoyed knitting this. So technically, not one of your designs, but very definitely your choice of colours and yarns . I loved playing with the colours and it’s such a simple technique but looks fab!”
 What a wonderful and innovative way to use up leftover yarn. This is absolutely stunning Annabel, and if I had time I would love to make one myself. Maybe some of the other members will be inspired to follow in your footsteps. Thanks so much for sharing!
AND HERE’S A LOVELY STORY FROM BRIDGET CODDINGTON FROM CAMBRIDGESHIRE, UK, who after knitting the Now I Know My ABC’s baby blanket from the kit she bought from our online shop, has reknitted it in the most adorable colourway. Isn’t it beautiful!
![]()
Bridget says: “Now that I’ve finished the baby blanket in my colours and Chloe Ella has been born, here are some photos. Part way through I realised that the dark beige was looking more like brown so I removed the three blocks and reknitted them with an alternative shade. As Rowan only make four shades in the white cream and beige colours I needed to use two shades from the Stylecraft range. Thanks for the inspiration and I’ve loved making every stitch the second time too!”
![]()


Thank you so much for sending this in Bridget! I am fascinated by your design process and planning of this blanket. It’s not easy recolouring a design - getting the balance of colours right is no easy task. So this is a great achievement and I am sure will be absolutely loved and adored by little Chloe!
OUR NEXT MYSTERY CLUB MEETING AT YARN LOFT IN NOTTINGHAM IS ON WEDNESDAY 1st OCTOBER. It will be the day of the October pattern launch, so it will be exciting to share the new patterns with whoever comes along to the meeting.
Our last meeting in September was a small gathering, but highly enjoyable and full of laughter and giggles. Despite all the animated conversation and varied things we talked about, we did manage to get some knitting done. And I was really impressed with what the ladies have knitted so far. They are all keeping up with the project, so they will be well and truly ready for the October patterns!

After the October meeting there will be two more meetings before the end of the year, the next one is on Wednesday 5 th November. If you decide to join us then bring along all your 'mystery' Debbie knits, both old and new, cushion and blanket are all welcome! Yarn Loft is at 118 Hucknall Road, Carrington, Nottingham, tel number 07825 702433, website: www.yarnloft.co.uk . Meetings are held between 4-6pm and to cover the costs of hosting the meeting there is a small sub to pay (£3.00), which can be paid to Doreen on the day.
FOLLOW US AND JOIN IN ALL THE FRIENDLY BANTER ON OUR SOCIAL MEDIA PLATFORMS!
If you are not already a Ravelry member, then it is very easy (and free!) to join. Just follow the instructions on their website: http://www.ravelry.com
The Debbie Abrahams Mystery Knitters group on Facebook is another fun way to keep in touch with other members. It was set up a few years ago and has grown in size to over 800 members, so that’s well worth joining too.
We also have our own Facebook page where you will find regular updates on everything we are doing from knitting kits to workshops and events!
Instagram: debbieabrahams_knitting
Pinterest: debbieabrahams@debbieabrahamsk
Facebook: Debbie Abrahams Mystery Knitters
Facebook: Debbie Abrahams Handknits
Ravelry: Debbie Abrahams Handknits
AND FINALLY, IT’S TIME TO ANNOUNCE THE WINNER OF THE NINTH 2025 MYSTERY BLANKET CLUB PRIZE DRAW!!! Each month a member is picked at random to win a Debbie Abrahams prize. So it is worth reading right the way to the end of each blog to see if you are that lucky member!
PRIZE DRAW NINE (OCTOBER): this month’s winner is member 487, Diane Weiss from Atlanta, Georgia, USA. Well done Diane! Please choose a prize from the following selection:
- Your choice of one of Debbie’s knitting kits up to the value of £30.00 (take a look at them in our online shop).
- Six packs of Debbie Abrahams Beads (size 8/0 or 6/0) from the selection on http://www.debbieabrahamsbeads.co.uk
- A £30 voucher towards the 2026 Debbie Abrahams Mystery Blanket membership (we will refund you £30 for the membership you’ve purchased).
- A Mystery bag of five gifts!
We will notify Diane to let her know the good news!

With just one more instalment to go, the finishing line is well and truly in sight. And very soon the ‘mystery’ which has been keeping us inspired (and some of us guessing) for the past ten months is soon to be revealed. As you make a start on your October Mystery Blanket squares, I am off to pack my bags for my trip to Ireland this weekend. I am super excited about it and can’t wait to see some of you there. I’ll report back next month with some pics, along with all the latest club news for the final instalment. Oh, and if you have any ideas about what the centre square might be, write into me to let me know your thoughts. You never know, you might be right! Happy knitting everyone! Debbie x


