Mystery Blanket Club 2024: post 1, February
Debbie AbrahamsHELLO AND WELCOME TO THE 2024 MYSTERY BLANKET CLUB! I am absolutely thrilled to be launching Mystery Blanket Club number 17 in my collection, and I am so happy that you have decided to join me! It’s fabulous to see lots of familiar faces in the club this year, but we have many new members signed up too, so thanks to everyone for taking the leap and jumping on board. For the next ten months we will be knitting our way through forty-nine squares which will give you the opportunity to try out different stitches and learn new knitting techniques. And at the end of it you will have your very own beautiful blanket to wrap yourself up in and enjoy! Life just couldn’t get any better than that, could it!?!

This is our virtual meeting place each month and it is advisable to come here and have a read of my blog before you make a start on your squares. My blog has lots of very helpful information and advice about the club and the squares you are knitting each month so that you can start each mail out fully prepped and ready for what lies ahead.
In addition to the written blog there will be knitting technique demos which will help you learn new skills or master your existing ones. There won’t be a tech vid for every technique in the blanket, but when there is a tricky one or something a little more advanced, I will offer you this extra bit of support. Some of them are generic and some of them are specific to this year’s blanket, but hopefully you will find them all helpful. Here is a list of the tech vids for this month, beginning with my intro. This month there are nine tech vids:
- Debbie’s February intro!
- Square 8, Tranquility: Japanese short-row shaping
- How to carry yarns up the side of the work
- How to add Swiss darning to your knitting
- How to thread beads onto your yarn
- How to bead, the slip-stitch method
- How to bead, the hooking-in method
- How to knit fairisle
- Picking up stitches to begin a new square
- Mattress stitch (horizontal)
Mystery Blanket Club 2024 - Mailout 1 Intro
Square 8 Tranquility: Japanese Short-Row Shaping | MBC2024
How to carry yarns up the side of the work | MBC2024
How to add Swiss Darning to your Knitting | MBC2024
How to thread beads onto yarn | MBC2024
How To Bead: The Hooking In Method | MBC2024
How to knit Fairsle | MBC2024
Picking up stitches to begin a new square | MBC2024
Mattress Stitch (Horizontal) | MBC2024
YOU ARE PART OF A GLOBAL KNITTING CLUB, WITH MEMBERS PARTICIPATING FROM ALL OVER THE WORLD! And although this has always been the case since I started the Mystery Blanket Club way back in 2008, I still find it completely fascinating that so many knitters around the globe are working on the same blanket squares at the same time - I think that’s pretty cool! This year we have members from USA, New Zealand, Australia, Malaysia, Canada, Switzerland, Belgium, Finland, Norway, Sweden, Germany, Poland, Italy, the Netherlands, Ireland, and the UK. Thank you to all my lovely members for signing up and making this a truly global knitting club!
WE HAVE BEEN FLAT OUT PACKING AND POSTING THE KNITTING KITS FOR THE PAST MONTH, so hopefully you are sitting with your kit ready to make a start. However, we are aware that some of the parcels are still in transit, so if you are still waiting for yours, we ask that you stay patient and calm, and it will be with you soon.

We notified all the members by email at the beginning of January about the slight delay to the start of the club, which we decided to move from the 1st February to the 16th February following the Houthi rebel attacks on cargo ships crossing the Red Sea and Suez Canal. This impacted the journey of our beads which at that time were travelling from Hong Kong to the UK. And although much to our relief our cargo ship was not attacked, it was forced to change course and was diverted around the Cape of Africa, which added an extra 3-4 weeks onto our delivery.
However, as soon as the beads were delivered to our doorstep all hands were on deck to get them measured and bagged up for the kits. We were aware how important it was to get the overseas parcels posted first, so we used what stock we had here (before our big delivery arrived), hence the reason why some of the colours are part bags rather than full bags of beads. This means that in your second parcel you will receive more of some of these colours, plus some new ones too.

I was deeply touched by the amount of emails we received from our members who were all so supportive and understanding of the situation we were in. The delay was hugely disappointing for everyone (we were devastated), but our wonderful knitting community kept positive throughout and never grumbled once. So thank you to everyone for your patience, you made a very difficult and frustrating situation so much more bearable for us.
YOU SHOULD FIND AN EMAIL FROM US IN YOUR INBOX WITH A LINK TO THE FIRST SET OF PATTERNS FOR THE BLANKET. If you cannot find this email from us, then please check your Spam folder. Often our emails end up in there and are not seen. However, if you are still unable to find it please contact Sue and she will check that we have your correct email details in our database.

MEMBERS THAT PAID FOR PRINTED PATTERNS will receive them each month in a separate card-backed envelope. If you did not sign up for printed patterns but have changed your mind, contact Sue and she will be able to set this up for you for an additional cost. All members, including the printed pattern members, will be emailed the remaining nine mail outs each month from March - November.
EACH MONTH, IN ADDITION TO YOUR EMAILED PATTERNS, YOU WILL BE ABLE TO DOWNLOAD THE FILE FROM YOUR ACCOUNT ON MY WEBSITE. This is a quick guide to how you can do this:
- Log into the website with your username and password: https://debbieabrahams.com/account/login
- Under "MYSTERY CLUB DOWNLOADS" click "View all downloads"
- Your latest available mail-outs will be visible here in PDF format to download
PLEASE NOTE THAT THE COLOURS IN THE MAIL-OUTS MIGHT NOT BE COMPLETELY ACCURATE TO THE COLOUR OF THE ACTUAL YARNS – both in the printed paperwork and in the digital files. We have done our best to make sure that the colours are as accurate as possible, however some discrepancies might occur. Therefore, it is always best to read the name and shade number of the colours rather than going by the photographs of the knitting.
THE PIECING DIAGRAMS ON PAGE 4 OF YOUR FEBRUARY MAIL-OUT SHOW WHERE THE SQUARES ARE POSITIONED IN THE BLANKET. There are two diagrams – one for Option One and one for Option Two. Each month the new squares will be added to them so that you can see how the overall design is progressing.

TOWARDS THE END OF EACH MAIL OUT YOU WILL FIND THE ABBREVIATIONS. This will be updated each month with any new additions to the list, so make sure that you always check out the latest one for any recent updates.

IT IS ADVISABLE, ALTHOUGH NOT NECESSARY, TO WORK IN VERTICAL STRIPS. Not only does this make it easier to keep track of which squares are which - there will be some repeats. But it also means less finishing off at the end of the project as you will only have seven strips to sew together instead of forty-nine individually knitted squares. Over the ten months you will be sent the squares in such a way that they can be knitted in strips, so this is what I would advise you do. Instructions are included in the patterns for this, it’s done by picking up stitches along the cast-off edge of a square to begin the next one in the strip. And if you’re not sure how to do this, there’s a tech vid this month to help you. So if you don’t like picking up stitches or find it a struggle, hopefully my vid will go a long way to helping you master the technique, and you never know - you might actually enjoy it once you see how easy it is to do! For more advice about this read the info on page 3 of your February mail-out. You’ll find it on the right hand side of the page under the heading Working in vertical strips.
SOME OF THE SQUARES IN THE BLANKET HAVE A SECOND OPTION. This means that when there is a square that involves a more advanced technique such as fairisle or intarsia, you can opt to knit an alternative square, Option Two, which replaces it with something that is easier to knit. This will be either a textured, beaded or striped stitch pattern. It is clearly stated in the pattern instructions when there is an option – there is a note in the left-hand column of the first pattern page for each square - and you can also see it on the Piecing Diagrams. Throughout the project you can stick completely to either Option One (pink-headed pages) or Option Two (blue-headed pages), or, if preferred, you can choose to mix your options. Patterns that do not have an option are purple-headed. Mixing options is perfectly okay to do, so you can pick and choose and go for Option One for some of the squares and Option Two for others. This gives the project increased flexibility and means that although you are all working on the same design you can, if you choose, make your blanket unique. Occasionally it is important to repeat the choice of an option to keep the overall design balanced. When this happens there will be a note in the left column on the first page of each pattern advising you about this choice. I will also mention it in the written blog.
BLOCKING AND PRESSING THE SQUARES IS VERY IMPORTANT, and although it’s not everyone’s favourite task, it really should be done if you want to create a professional looking blanket. Blocking the squares ensures that they are all a uniform size, which in turn will make joining them together so much easier to do. You might find that you have to ease some of them in or stretch some of them out to get them to the same measurements as other squares, and within reason this is fine - I know I had to do this with some of mine. Alternatively, other squares may block out quite easily with no easing in or out required. If your individual squares are measuring slightly bigger or smaller than 18xm x 18cm, then this should not be a problem either. But you will need to decide on what size you are going to block them all to and stick to this throughout the whole blanket.

Above: a square from the 2023 Mystery Blanket blocked out on a board.
Blocking is the pinning out of your knitting, and, unless instructed otherwise, you should always pin it out with the wrong side facing upwards. Pin frequently along each edge, keeping all four edges as flat and even as possible. There is no need to use heat to press your squares. Much more preferable – and safer too – is cold water. So, if you have one available, fill up a plant spray bottle and use this to generously wet down the knitting, making sure that the water is dispersed right across the knitting from edge to edge. And then leave it to dry completely before removing the pins.
Pressing is the process of applying either heat or water to your knitting which relaxes the stitches and softens the fibres, resulting in a much more fluid and pleasant feeling fabric. After pressing you will find that your knitting drastically changes in quality and will feel beautiful and soft.
Blocking and pressing also helps the edges of the knitting stay flat rather than curling over, as is the tendency with most stitch structures.
I would suggest that you block and press your squares after you have knitted each one. I think it’s far easier to do this as you go along rather than leaving them all to the end. It also ensures that as you work through the squares, they are all knitting up to the correct measurements.
NOBODY LIKES AN ERROR IN A KNITTING PATTERN, AND I KNOW JUST HOW FRUSTRATING THEY ARE FOR EVERYONE. However, despite the test knits and numerous checks which are carried out before we sign off each set of patterns, unfortunately they do still occur sometimes. When an error is reported I check it and once it is confirmed I list it in the ‘Addendum’ section on the website. It can be accessed through a link at the bottom of the Homepage.

I would advise that you check this before you start knitting each square just in case anything has been found. It could save you a lot of time.
GOOD PREPARATION IS THE KEY TO SUCCESSFUL BLANKET SQUARE KNITTING! So here are a few things I would suggest you do before you make a start on your blanket.
First of all, have a good read of the February mail-out and familiarise yourself with the contents. The patterns are laid out in exactly the same way each month, so once you get familiar with them and how the patterns are written, they should be easy to follow.
On page 3 of your February mail-out there is lots of general information about the project including information about tension/gauge. It is very important that you test your tension before you start knitting.
The tension for this project is 24 stitches and 34 rows to 10cm (4in) measured over stocking stitch using 3.50mm needles and using Debbie Abrahams Light Wool DK yarn.
I suggest that you use shade 040 Serenity for your tension swatch as there is plenty of this in the kit, plus it’s a light shade which makes it easier to count the stitches and rows.
Any discrepancies in your tension could lead to shortages of yarn, especially if you knit looser than the given tension. So please take time to do this. Here are some tips about measuring tension:
- the tension sample should be longer and wider than the stated tension, so it is advisable to cast on a minimum of 30 stitches and work a minimum of 40 rows
- use a solid ruler rather than a tape measure to measure your stitches and rows
- start and finish counting the stitches and rows in from the edges of the knitting and not from edge to edge
- if your tension is too loose you will need to resample using a smaller metric size needle
- if you tension is too tight you will need to resample using a larger metric size needle
- if you need to change your needle size then you will need to change all of the other needles used in the project as well by the same number of sizes
- stitch tension is more important then row tension, so if you are unable to match both to the recommended tension, choose the needle size that gives you the closest match.
One more thing I would suggest you do before you start knitting is to set up your Colour coder. You will find this in your kit, it’s a piece of card onto which you can tie samples of each of the yarns in your kit and write their colour names and shade numbers. This is such a handy tool to have while you are knitting and means you can easily check yarns against the pattern instructions, especially as some of them are very similar in colour. Watch out for Tide (037) and Neptune (038), and Ghost (642) and Pearl (590), which could easily be mistaken for each another.

It's also a good idea to keep each colour of yarn in a separate bag with either its ball-band or a note of which colour and shade number it is. Then you can be sure to pick up the correct colour and not risk knitting with the wrong one. If you use the wrong colour, then you could run short of yarn.
THE LUREX ON CONES AND THE SMALL BALLS OF KIDSILK HAZE HAVE NO BALL BANDS ON THEM. On page 2 of your mail-out there is a note on the far right-hand side of the page which tells you about these yarns and how they are to be used in the project. We packed them in a separate bag to the other yarns, with the beads and Colour coder, so you should be able to find them quite easily when you open your parcel.

You will always be knitting one end of Kidsilk Haze with one end of 3-ply Lurex (this is the Lurex on the cones and NOT on the small cards). In each kit we placed each ball of Kidsilk Haze on the cone of Lurex that it is knitted together with:
Gold Pearl: Light Gold (3-ply Lurex) knitted with Pearl (Kidsilk Haze). Pearl is a light biscuit colour.
Silver Ghost: Silver (3-ply Lurex) knitted with Ghost (Kidsilk Haze). Ghost is a light grey colour.
Turquoise Daisy: Turquoise (3-ply Lurex) knitted with Blue Daisy (Kidsilk Haze). Blue Daisy is a blue/green colour.
It might be a good idea to put each of these is a separate bag so that you don’t get them mixed up.
IT IS ADVISABLE TO WIND THE KIDSILK HAZE AND THE 3-PLY LUREX ONTO SEPARATE BOBBINS BEFORE YOU KNIT WITH THEM. Then hold one strand of each and knit them together as one yarn. It might be tempting to wind them onto one bobbin, but I would advise against this as they are very different in their structure and therefore, they will wind quite differently to each other. I used the plastic Pony bobbins for this, but any other types of bobbins are fine. It’s a good idea to fill them right up, even if you don’t need all of the yarn for the square you are knitting. The bobbins can be put to one side and used for other squares later on.

THE CARDS OF LUREX ARE A DIFFERENT WEIGHT TO THE LUREX ON THE CONES AND ARE DOUBLE-KNITTING. These will not be knitted with in this project, but instead they will be used for optional surface embroidery. This will be either Swiss darning or chain stitch.

IT IS VERY IMPORTANT THAT WE HAVE YOUR CORRECT CONTACT DETAILS ON FILE, SO PLEASE NOTIFY US IMMEDIATELY IF ANY OF THESE DETAILS ARE INCORRECT. This goes for both your email and postal addresses. Any discrepancies in your postal address can affect the speed at which your parcels are delivered to you, or at worst they might not arrive at all. And an incorrect email address will mean that you will not receive our emailed patterns or club updates. So please let Sue know as soon as possible if we need to revise any of these details for you.
IF YOU HAVE ANY QUERIES OR CONCERNS WHILST WORKING ON YOUR MYSTERY BLANKET, please contact Sue at sue@debbieabrahams.com and she will assist you. Sue may pass your email onto me if it is knitting query, or onto Jason if you need technical support. Throughout the project we will do our best to assist you in every way we can to ensure that your knitting experience is as smooth and enjoyable as possible. So do get in touch if you have a query, we are always here to help!
THE TITLE OF THE MYSTERY BLANKET remains a ‘mystery’ until you guess it and is something to think about as you are knitting your squares each month. With each instalment comes more clues as you work your way through the design. If you think you might know what it is, then send in your guess and we will let you know if you are right. However, if you are still guessing in November, it will be revealed in the final instalment.
As well as clues in the monthly squares, I also give you extra help with your guesses by giving you a clue in the blog. Here is the first clue for the title of this year’s Mystery Blanket. In each blog I will give you another letter to help you guess the title. This month the letter I am giving you is “E”:
_ _ ‘ _ / _ _ _ _ _ E _ / _ _ / _ _ E / _ _ _ _ _
Please send your guesses to Sue. There are no prizes for the correct answer – it is simply a a bit of fun each month. And if you do guess it right, with your permission we will include your name in the next blog.
THERE ARE THREE SQUARES TO KNIT THIS MONTH:
Square 8, Tranquility – multi-coloured wave pattern using Japanese short-row shaping with optional embroidered details (same for both options):

Square 15, Taurus (Option One) – fairisle pattern with textured stripes and slip-stitch beads:
Square 15, Taurus (Option Two) – slip-stitch pattern with textured stripes and slip-stitch beads:

Square 16, Celestial – moss stitch stripes (same for both options):

On each pattern page there is a list of Pattern notes and tips that are worth reading before you start to knit each square. These bits of advice will help you and give pre-warnings as to what to look out for in the pattern instructions. Also take note of the description under the title of each square as this tells you what the stitch structure is.
You can use the video demos to help you knit your squares. But here are a few extra tips to assist you:
SQUARE 8, TRANQUILITY: this first square in your February mail-out uses the technique of Japanese short-row shaping, and if you haven’t tried this before, you are in for a real treat!
Videos to watch for assistance with this square:
- Square 8, Tranquility: Japanese short-row shaping
- How to carry yarns up the side of the work
- How to add Swiss darning to your knitting
This lovely fluid pattern is created by working and turning to create soft lozenge shapes and is a really fun square to knit. If you are new to it then I would advise that you watch my tech vid before you begin which demonstrates Rows 12 and 13. In my demo I show you how to turn the work, attach a marker, remove a marker and close a gap. This may sound quite challenging, but I guarantee that if you watch the vid you will be absolutely fine.
Just a few extra tips about this technique then before you make a start. You can carry Tide yarn up the side of the work for most of the square, but there are two times when you are instructed to cut off Tide and rejoin it. There is a tech vid that shows you a really neat way to take yarns up the side of the work and how to re-join a yarn at the beginning of a row.
When working the stitch after you’ve attached a marker, make sure that you hold the marker against the work and knit/purl the next stitch firmly so that the marker sits tight against the work. You will need three markers for this square.

When you remove the marker, pull firmly on the loop and make sure that it is not twisted as you place it on the left needle.
Remember to wind your Silver Lurex and Ghost yarns onto two separate bobbins and then you will find them much easier to knit with.
As well as watching the tech vid I would also advise that you read the Pattern notes and tips for this square which are on page 5 of the mail-out, where you will find more advice about how to knit this square.

If you look closely at the image on page 5, you will see that there is some embroidery along the top of the Electric Green lozenges. It is very subtle, but it just adds a hint of sparkle to the pattern. You need to use the Emerald Lurex for this, which is on a card, and the embroidery is Swiss darning. There is a tech vid for this if you need some assistance with the technique. This embroidery is, however, optional, so if you don’t want to add it, you don’t have to.
There are a few alternatives to Japanese short-row shaping, such as wrap and turn, and German short-rows. So if you are more comfortable using a different technique to knit this pattern, that is absolutely fine. As long as you get the same result, it does not matter how you knit it.
Have fun!
SQUARE 15, TAURUS (Option One): this is the first square where you will need to make a decision as to which option you want to knit. Option One is the trickier of the two because it has some fairisle in it. So, which one will you go for?...
Videos to watch for assistance with this square:
- How to carry yarns up the side of the work
- How to thread beads onto your yarn
- How to bead, the slip-stitch method
- How to knit fairisle
The square begins with a beaded stripe which uses the slip-stitch method of adding beads. This means that you need to thread them onto the yarn before you join it in. How many to thread on is listed on page 8 of the mail-out. On Row 6 you will slip alternate stitches, which on the next row is where you will knit the stitches in between where the beads are placed. The reason for doing this is to make the row much neater, and narrower too, which is important to achieve the correct length of the finished square.
You will also notice that there is a change to a smaller needle for the rows of garter stitch in the beaded stripes. This will keep the stitch tension the same as the rest of the square.

If you’ve not knitted fairisle before then this is a great opportunity to give it a go. There are three small sections of it in this square, all with the same pattern (see the chart on page 9), using Electric Green and Sapphire. If you need some guidance with fairisle there is a tech vid to help you this month. It is not specific to this square, but it shows you weaving in and stranding, which are the basic techniques used to knit fairisle patterns.
If you don’t want to knit this square then there is an alternative option…
SQUARE 15, TAURUS (Option Two): this is the easier alternative and uses the same colours as Option One.
Videos to watch for assistance with this square:
- How to carry yarns up the side of the work
- How to thread beads onto your yarn
- How to bead, the slip-stitch method
This square has the same beaded stripes as Option One, but the fairisle is replaced with a textured stitch. For those of you who knitted the 2023 Mystery Blanket, it’s the same stitch pattern that I used for Bracken. But in this version I have added in some slip-stitch beads across the middle of the square. They are difficult to see on the image on page 10 as they are Indigo, but they add a subtle sparkle to the pattern.

The stitch pattern itself is very simple and involves slipping stitches and moving the yarn back and forth between the needles. So there is no tech vid for this, but if you read the written instructions carefully, you should be fine. You work two rows in each colour, alternating between Sapphire and Electric Green. Once you get familiar with the pattern repeat, it’s a really lovely one to knit.
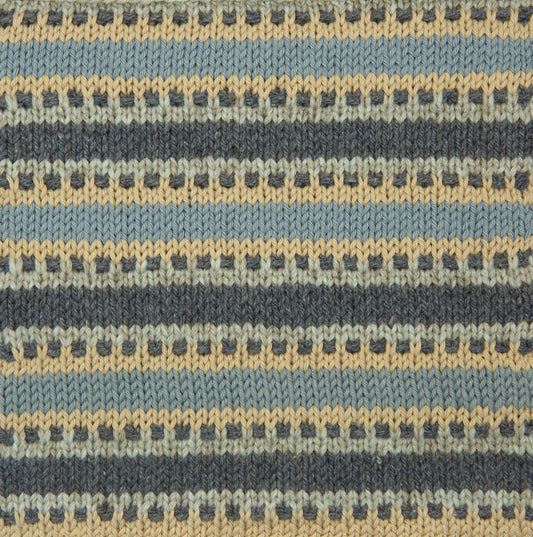
SQUARE 16, CELESTIAL: the final square to knit this month has no options and is an easy all-over moss (seed) stitch pattern which graduates from soft pale colours of blue and silver to rich vibrant shades of blues and greens towards the top.
Videos to watch for assistance with this square:
- How to carry yarns up the side of the work
- Picking up stitches to begin a new square
- Mattress stitch (horizontal)
The first thing to note about this square is the smaller needle that is used to knit it. Moss stitch (also known as seed stitch), is created by knitting one stitch and purling the next and repeating this across the whole row, and on every row. And because of the constant movement of the yarn, the tension is looser than stocking stitch, hence the smaller needle. If you find that the needle I have recommended is not achieving the correct tension and it is too loose, then try a smaller one - it is important that this square is knitted firmly so that it knits up to the same size as your other squares.

You can see in the image on page 1 that the colours graduate from the bottom of the square to the top, and moss stitch is a great way to achieve this as it softens the stripes. Once you’ve joined the first three colours in, you are rotating them every row until one of them is dropped and a new one is introduced. But essentially you are always working in a three-colour rotation. You just need to remember to change colour every row and not work two rows in one colour - which is quite easy to do so you’ll have to keep an eye on it.
Remember to wind Silver Ghost onto two separate bobbins before you begin – one of Silver Lurex and one of Kidsilk Haze Ghost. And you’ll have to do the same with Turquoise Daisy – that is one of Turquoise Lurex and one of Kidsilk Haze Blue Daisy. When your bobbins are wound, you are ready to go. So enjoy!
FOLLOW US AND JOIN IN ALL THE FRIENDLY BANTER ON OUR SOCIAL MEDIA PLATFORMS!
If you are not already a Ravelry member, then it is very easy (and free!) to join. Just follow the instructions on their website: http://www.ravelry.com
The Debbie Abrahams Mystery Knitters group on Facebook is another fun way to keep in touch with other members. It was set up a couple of years ago and has grown in size to over 500 members, so that’s well worth joining too.
We also have our own Facebook page where you will find regular updates on everything we are doing from knitting kits to workshops and events!
Instagram: debbieabrahams_knitting
Pinterest: debbieabrahams@debbieabrahamsk
Facebook: Debbie Abrahams Mystery Knitters
Facebook: Debbie Abrahams Handknits
Ravelry: Debbie Abrahams Handknits
THE MYSTERY CLUB MEETINGS AT ‘YARN LOFT’ IN NOTTINGHAM HAVE RESTARTED, SO COME ALONG AND JOIN US IF YOU CAN! If you live close to Nottingham and fancy a knit and natter while you knit up your blanket squares, then this is a great way to meet other members and share tips and advice. I attend the meetings and am on hand to help with any queries about your Mystery projects. We always have such a giggle and talk about all sorts of things – not always knitting related! And Doreen keeps us all going with hot drinks and cake – it’s a lot of fun!

Usually the meetings are held on the first Wednesday of the month, so the next one will be on the 6th March. Yarn Loft is at 118 Hucknall Road, Carrington, Nottingham, tel number 07825 702433, website: www.yarnloft.co.uk. Meetings are held between 4-6pm and to cover the costs of hosting the meeting there is a small sub to pay (£3.00), which can be paid to Doreen on the day.
I hope you will be able to join me!
ON FRIDAY 1st MARCH WE ARE LAUNCHING OUR 2024 MYSTERY CUSHION CLUB, and the opportunity for you to take part in a brand new Debbie knit-a-long! And the good news is that all 2024 Mystery Blanket Club members and 2023/24 Mystery Baby Blanket Club members who join will receive a discount off the cost of their membership. A unique discount code for this will be included in the emailed newsletter we will send you as soon as memberships are available to purchase. So keep an eye on your inbox!
The Mystery Cushion is a much smaller project than the blanket, lasting for five months from June to October. The theme is different to the Mystery Blanket but it works in the same way with a knitting kit sent out to members at the beginning of the project and monthly emailed patterns. I write a separate blog for the Mystery Cushion as well which will include knitting technique videos, so you can get all the help and support you need as you knit along.

Above: 2022 Mystery Cushion: Pure Nouveau
I never like to give away too much about a new Mystery project, but what I can tell you is that it is knitted in some of my most favourite Rowan yarns including Alpaca Soft DK and Felted Tweed. And it has oodles of beads in it – of course! - so it’s a super sparkly project knitted in luxuriously soft yarns. I will reveal a little more about it – including some hints about the colours – when we launch the sign-ups on 1st March.
In the lead up to the launch I will be posting each day on my Instagram an image of each of the thirteen cushions in my Mystery Cushion Club collection, with the first one dating back to 2011. So if you want to see the whole collection, make sure you are following me on Instagram and watch out for my daily posts, beginning on Saturday 2nd March.
PLEASE REMEMBER TO KEEP IN TOUCH AND SEND IN YOUR PICS AND STORIES ABOUT YOUR MYSTERY BLANKET KNITTING. It is alway great to hear from you and to see how you are getting on with your squares. And with your permission I will share your words and pics in the next blog. So please keep in touch and send them directly to me at debbie@debbieabrahams.com.
AND FINALLY, I AM THRILLED TO ANNOUNCE THE WINNER OF THE FIRST 2024 MYSTERY BLANKET CLUB PRIZE DRAW!!! Each month a member is picked at random to win a Debbie Abrahams prize. So it is worth reading right the way to the end of each blog to see if you are that lucky member!
PRIZE DRAW ONE (FEBRUARY): this month’s winner is member 40, Gillian Hanhart from London in the UK. Well done Gillian! Please choose a prize from the following selection:
- Your choice of one of Debbie’s knitting kits up to the value of £30.00 (take a look at them in our online shop).
- Six packs of Debbie Abrahams Beads (size 8/0 or 6/0) from the selection on http://www.debbieabrahamsbeads.co.uk
- A £30 voucher towards a Debbie Abrahams Mystery Club membership: 2024 Mystery Cushion Club or 2025 Mystery Blanket Club.
- A Mystery bag of five gifts!
We will notify Gillian to let her know the good news!
So now it’s time to settle yourself down in your comfiest chair and make a start on your first set of squares. I cannot tell you how excited I am about you embarking on this brand new knitting adventure with me. I hope that you enjoy knitting up the squares this month as much I loved designing them! Remember that you are part of a huge global knitting community and are never on your own. So reach out to those social media groups if you need some help or advice (or just want some friendly banter!), and remember that I am here too at the end of an email. Have fun everyone, and I will see you back here very soon at the beginning of March for Mail-Out 2! Debbie x