Mystery Baby Blanket Club 2019: post 7, March - the final instalment!
Debbie AbrahamsWELCOME TO THE FINAL INSTALMENT OF THE 2019 MYSTERY BABY BLANKET CLUB BLOG!

So here we are after seven months of ‘mystery’ knitting at the end of my first Baby Blanket Club. And I would like to begin by thanking everyone who signed up to it and embraced the project so enthusiastically. I know that many of you have been knitting this blanket for the new little person in your life, so I hope that they treasure it and enjoy it as much as you have enjoyed knitting it!
THE FINAL SET OF PATTERNS HAVE BEEN REVEALED AND WERE EMAILED TO ALL THE MEMBERS ON THE 1ST MARCH. Printed patterns for overseas members were posted on Monday 24th February, and the UK were posted on 27th February.
ADDENDUM ON PAGE 23 (printed patterns only): for the picking up instructions for bottom edge on page 23, it should say to pick up one stitch on the seam after squares 1, 8, 15, and 22. Unfortunately this has been omitted from the instructions in the printed patterns, however, in the digital file it has been included.
AND NOW FOR NEWS OF A BRAND NEW KAL…MY EXTRA SPECIAL TENTH ANNIVERSARY 2020 MYSTERY CUSHION CLUB IS NOW OPEN FOR SIGNING UP! So if you fancy another Debbie Abrahams knitting adventure why not pop across to our online shop to purchase your membership today?!?
Below: 2017 Mystery Cushion, Metropolis

This project is shorter than the Mystery Blanket, beginning mid-June and running for five months until mid-October. Each member receives a knitting kit with all the materials to make the cushion-cover, and patterns are emailed monthly – just like the Mystery Blanket Club. There is a dedicated monthly blog for the Club which gives lots of advice about the project as you knit along.

Above: 2016 Mystery Cushion, Geo Jungle
To celebrate the ten year anniversary of my Mystery Cushion Club we are producing a very lovely 2021 Mystery Cushion Club calendar. And the first fifty people who sign up to the Club will receive a free one. However, if you are not fortunate to win one it will be available to purchase in our online shop from 15th October.
Below: 2014 Mystery Cushion, Sugar Rush

I am going to tell you a little bit about the 2020 Mystery Cushion design – not too much, but just enough to see if I can tempt you! So, it’s knitted in Rowan Baby Cashsoft Merino – although it is NOT a baby themed project. The colour palette returns to my favoured vibrant and bright shades from the Rowan range, including fuchsia pink, vivid orange, deep jade and lime, with charcoal and cream details and a glimmer of neon. And it has, of course, plenty of sparkling beads, plus some beautiful rhinestone studs to add a touch more glamour. A mixture of techniques are involved including textured stitches, stripes, beaded patterns and some colour work. So it’s the perfect small project to brush up on your old skills and perhaps learn some new ones too!
Are you tempted?!? I do hope so!
SO NOW IT’S TIME TO REVEAL THE TITLE OF THE 2019 MYSTERY BABY BLANKET CLUB…
'L O V E Y O U T O T H E M O O N A N D B A C K'

The 2019 Baby Blanket Club was my first baby themed Mystery Blanket project, and it was important to me that it appealed to knitters of all abilities – from new mums-to-be learning how to knit to more experienced knitters who wanted to welcome the arrival of a new baby with a special knitted gift. So my challenge was to design a blanket that combined a mixture of patterns and knitted structures which were interesting and varied to knit but involved fairly basic techniques that would not be too overwhelming for a new knitter.

So there are lace patterns, cables, stripes and intarsia motifs, but each square is repeated several times in the design so that less experienced knitters can practise knitting each individual squares a number of times and hopefully improve their skills as they work their way through the blanket.

I chose the theme ‘Love You To The Moon And Back’ as this was something I found myself saying to my son Seth each night when I put him to bed. So it had a very special significance for me which I wanted to capture in the blanket design. When I went out to the shops on my baby buying sprees (and there were many!), I noticed how popular the phrase was on baby products – it was on everything from greeting cards to duvet covers and pillow cases. So I decided to make it the focus of my design for my first Baby Blanket.


Left: Classic colourway; Right: Contemporary colourway
I chose to make the blanket gender-neutral and in the two colour palettes – Classic and Contemporary – which combine together shades of pinks and lavenders through to blues and greys. It was an interesting exercise in colour choice as I – being a fan of bright, vibrant colours – thought that the Contemporary colourway would outsell the Classic. However, it turned out to be the other way round.
The heart, moon and star motifs are obvious links to the theme. However, there are more subtle links in some of the other squares. For example, the circular eyelets and single contrast coloured stitches in Galaxy were inspired by planets and stars, whilst the Soft Chevron lace pattern with its diagonal chevrons was designed to represent space rockets.

I have thoroughly enjoyed designing the Baby Blanket (although I have to admit that the omission of beads was a very difficult thing for me to come to terms with!), and I hope that you have enjoyed your journey with me. Just in case you are wondering, there won’t be a 2020 Mystery Baby Blanket Club, but I do have plans to launch another one at some point, so watch this space if you are tempted to join me again!
Love You To The Moon And Back will be available to buy as a kit in our webshop from 1st April 2020.
THESE ARE THE FINAL FIVE SQUARES THAT YOU WILL KNIT THIS MONTH:
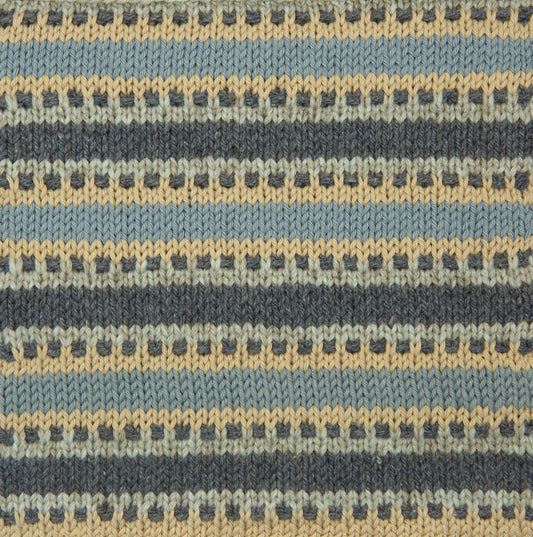
Square 17: Hush! – stripe pattern with rows of garter stitch:
Below: Colourway 1


Above: Colourway 2
Square 18, Option One: Little Star – intarsia motif with Swiss darned stitches:
Below: Colourway 1


Above: Colourway 2
Square 18, Option Two: To The One I Love – striped pattern with embroidered personalised message:
Below: Colourway 1


Above: Colourway 2
Square 19: Hush! – stripe pattern with rows of garter stitch:
Below: Colourway 1
Above: Colourway 2
Square 20: Spacey Lace – lace pattern:
Below: Colourway 1


Above: Colourway 2
Square 21: Sleep Well My Love 2 – intarsia squares with Swiss darned motifs:
Below: Colourway 1


Above: Colourway 2
In addition to the Pattern notes and tips in your mail out, here’s some extra advice about this month’s squares…
SQUARE 17, HUSH!: this is one of two brand new squares in this final batch of patterns, and it’s a nice easy one to start you off this month. It combines stocking stitch stripes with rows of garter stitch and uses two different needle sizes to maintain an even tension.
To avoid multiple colour joins, all yarns can be carried up the side of the work for Colourway 1. However, this is not possible for Colourway 2 as it uses one extra colour. Before starting some of the rows you are instructed to slide your stitches onto the other needle so that you are at the correct end of the knitting to pick up the next colour you need to use. If you use a circular needle or double pointed needles to knit this square then you can simply slide the stitches to the other end of the needle and continue with the next row.
SQUARE 18 (Option One), LITTLE STAR!: this is the first time in the blanket that you have been given a square with an option. So you’ll have to make a decision here about which one you want to knit. If you have enjoyed knitting the intarsia squares then maybe you should opt for this one.
It follows the same rules for intarsia as the moon and heart motifs, and requires two balls for the background and one ball for the star motif. On Chart Row 15 you will need to carry the Cream yarn across the back of stitches 23-29 so that it is in the correct place to use on Row 16. Likewise, on Chart Row 16 you will need to carry the background colour across the back of stitches 13-7 so that you can use it for stitches 6-1 on this same row. You will be in a similar situation on Chart Rows 32 and 33, so make sure that you analyse them carefully before you knit them to make sure that you carry the correct yarns in the right direction across the correct number of stitches.
The star motif is embroidered with a Swiss-darned outline. The stitches under the embroidery should be the background colour, so knit them in Mint for Colourway 1 and in Lily for Colourway 2. Alternatively you may decide to knit in the outline instead of embroidering it on afterwards. It really doesn’t matter what you choose to do as long as you are happy with the result.
SQUARE 18 (Option Two), TO THE ONE I LOVE: this is the alternative option to Little Star and it gives you the opportunity to personalise your blanket with your own message.
This square is knitted in three striped sections and then the words, numbers and or heart motifs are embroidered onto them afterwards. In the images on page 10 I have given examples of what you could write and opted for a name and date of birth. But you might want to embroider on initials, a nickname, a message or something else - the decision is up to you! Just remember that you are working within a limited number of stitches so you might have to tweak your message to make it fit.
I have given some advice about how to plan out your embroidery on page 11. It might be a good idea to print a few copies of this page with the charts on it so that you can try out several variations. And if you work in pencil rather than pen you can erase any errors and redraw your design if necessary. The chart with the letters and numbers is overleaf on page 12, so you might want to print an extra copy of this page aswell so that you can work with it positioned next to page 11.
SQUARE 19, HUSH!: this is exactly the same as Square 17 from this mail out.
SQUARE 20, SPACEY LACE: this is an exact repeat of Square 16 from Mail Out 3 – which was some time ago now!
Smaller needles are needed to knit this square, so make sure that you grab your 3.00mm needles rather than your 3.25mm ones! Because lace stitches are an open structure they loosen up the tension. So the smaller needles will keep the stitches neat and even and to the same tension as the other squares in the blanket.
SQUARE 21, SLEEP WELL MY LOVE 2: this is similar to Square 32 from Mail Out 3, but the colours have been changed in both colourways.
The colours on the chart for Colourway 1 are quite pale and might be hard to see. So if you are struggling with this you can read the pattern from the chart for Colourway 2 but use the colours in the key for Colourway 1. You can also refer to the images of the squares on the first pattern page for Square 32 to see the colours more clearly.
AFTER KNITTING ALL YOUR SQUARES IT’S TIME TO MOVE ON TO THE FINISHING AND EDGING, instructions for which are given on pages 20-23.
In the January blog I gave you some advice about Mattress stitch, but here’s a reminder…
The Grid for Stitch and Row Reference on page 5 of your March mail out will help you work out where you will need to ease squares together.
First of all you need to decide which yarn to use for sewing the squares together. And to be honest it really does not matter as Mattress stitch – which I recommend – is an invisible seam. So if you have any short lengths left over, you could use these. If not, then opt for a colour that you have plenty of (you should have plenty of all of the colours), and use this.
If you haven’t tried Mattress stitch before then this would be a great opportunity to give it a go. You can use it for sewing together both vertical and horizontal seams. So if you have knitted your squares individually and need to sew them together first before sewing together the strips, here are a few tips on both types of seam:
You work with the right-side of the work facing towards you, so at all times you can see how the seam is progressing. And if you do happen to go wrong, it is very easy to undo. First of all you need to look very closely at your knitting and identify the edge stitch. In stocking stitch this is an open ‘V’. Then you need to find the bar (‘running thread’) between the edge stitch and the next stitch in – there is one for each row. It is these bars, between the edge stitch and the next stitch in, that you need to insert your needle under to sew up. These bars exist in every piece of knitting, even in textured knitting. So you need to get yourself familiar with them and where they are as they are sewing up as follows using a blunt-ended needle.
- Horizontal (if you have not worked in strips and need to sew the squares together): with right sides facing, lay the squares flat with square one at the bottom and square two above square one (and so on throughout the strip). Beginning at the right-hand side of the work, take the needle from back to front of work through half a stitch of square one, inserting the needle just below the cast-off edge. Then take the needle under one whole stitch of square two, inserting the needle just above the cast-on edge. After this continue to take the needle under one whole stitch on each square. This means that on square one the needle is always coming up through the middle of stitches and on square two the needle is coming up between the stitches.
- Vertical (to sew together your strips): with right sides facing and with two strips sitting next to each other, take the needle from the back to the front of the work under two bars at a time, inserting the needle under the bar between the edge stitch and the next stitch in. To keep the edges level at the bottom, begin by taking the needle under the first bar of the first square (the one on the left), then take the needle under the first bar and the next one up (two bars) of the second square (the one on the right). After this take the needle under two bars on each side, zig-zagging back and forth between the two strips, and making sure that your needle always goes back into the same gap between the bars each time you take it under the bars.
So what happens when two squares need to be sewn together but they have a different numbers of rows in them? For example, Square 1 has 47 rows and Square 8 has 52 rows. The answer is very simple and easy to do. In this example there are five more rows in Square 8 than there are in Square 1. So you would need to ease in five rows of Square 8 into Square 1. You can ease using Mattress stitch by taking the needle under one bar instead of two. So in this example you would need to ease in five stitches by taking the needle under one bar along the edge of Square 1, five times, spacing them evenly between the first and last row of the square. And if with other squares there are a different number of stitches to be eased in then you can repeat this as many times as required along the edge that needs to be eased in, dividing the number of easings as equally as possible along the seam. It is easy to do and you won’t be able to see the easing on the seams – it’s invisible and actually quite brilliant! So give it a go!
THERE IS A SLIGHTLY DIFFERENT PATTERN FOR THE EDGING FOR EACH COLOURWAY, or if you feel adventurous you could create your own from what colours you have left over. As a guide, each garter stitch stripe (which is two knit rows) along one long edge uses approximately 3g of yarn.
Below: Colourway 1 edging


Above: Colourway 2 edging
You are advised to knit the left and right edgings first ahead of joining all the strips together. This is because it will be easier to manage the weight of the blanket while you are picking up and knitting these stitches. Therefore, I would suggest that you knit the edgings in this order: right side and left side of the blanket first, and then the top and bottom. This is the order that the edging pattern has been written in.
You are instructed to knit the edging on one circular needle. This will be long enough to comfortably accommodate all the stitches –there are a maximum of 271 after the increase on the final row of the right and left edgings. I have advised that you use a slightly larger needle to cast off the edging to stop it from being too tight (see page 20).

If throughout this blanket you have not been able to match my tension and have therefore used different size needles to the suggested ones, it is essential that you grade the needles you use for the edging up and down by the same number of sizes to ensure that it sits to the correct tension and is neither stretched or floppy.
AND NOW FOR SOME TIPS ON PICKING UP STITCHES (for the edging)… I would advise that you use the Stitch and Row Reference Diagram on page 5 of the March mail out which shows the number of stitches and rows in each square. And this, together with the instructions for the edging on pages 21-23 - where I have given you the amount of stitches to pick up along the edge of each square - should help you with this task.
There are several ways that you can pick up stitches. However, along a cast-off or cast-on edge (horizontal) I prefer to pick up through the middle of stitches (rather than through the cast-on or cast-off edges). And along a selvedge (vertical) edge I prefer to pick up in the gaps between the bars that exist between the edge stitch and the next stitch in from the edge:
- Along a vertical (side) edge: usually the basic rule to follow here is to pick up 3 out of 4 stitches, however, this will not work with every square in this blanket as the row count is not always the same. So the best way to do this is to plan out the pick up along the edge of each square separately. Place markers at equal points of measurement along the edge of the square and then divide the total number of stitches you need to pick up by the number of sections you have marked out. For example, Square 29 has 36 stitches to pick up, so if you separate the edge into four sections of equal measurement you would pick up 9 stitches in each of the four sections. My suggested technique for how to pick up stitches is as follows: with the right-side of the work facing, take the needle through the first gap between the bars (in the same place between the stitches that you inserted your needle for Mattress stitch, ie, between the edge stitch and the next stitch in). Loop the yarn around the needle and pull the new stitch through. Repeat this for all the stitches, skipping over some of the gaps when and if necessary to get the total number of stitches you need to pick up correct.
- Along a horizontal edge (cast-on/cast-off edge): usually the basic rule to follow here is to pick up every stitch. So with the right-side of the work facing, take the needle through the middle of the stitch just below the cast-off edge/above the cast-on edge. Loop the yarn around the needle and pull the new stitch through. Repeat this all the way along the edge, making sure that you pick up the correct number of stitches along the edge of each square. Remember that where the strips have been sewn together, one stitch from each edge of the squares are caught into the seam (apart from the first and last squares which have only one stitch caught in). But note that you are instructed to pick up one stitch on every seam between the squares, see pages 22-23. IMPORTANT NOTE (printed patterns only): for the picking up instructions for bottom edge on page 23, it should say to pick up one stitch on the seam after squares 1, 8, 15, and 22. Unfortunately this has been omitted from the instructions in the printed patterns, however, in the digital file it has been included.
SO WHAT IF YOU WANT TO LINE YOUR BABY BLANKET? Lining fabric is not included in your kit so you would need to buy something which is a suitable weight and complements the design of the blanket.
Jane Mckeag from Las Vegas, USA, is a pro at lining knitted blankets and has very kindly offered her expert advice about it to share with the members. It is something that I have never done before myself, but it is a lovely way to finish off your blanket - that is if you have the necessary sewing skills (or know of someone else who does!)
This is Jane’s advice:
“I’ve had several inquiries as to how to do the backing. So here’s some instructions based on my quilting experience. It is the same process as preparing the multiple layers for quilting.

I used a good quilting flannel (by Moda Fabrics), which is 44 inches wide. I bought a 1 1/4 yard (45 inches), then machine washed and dried it. I turned an edge all around which I machine sewed. I then pinned it all around to the inner border edges, and hand sewed it in place using a blanket stitch (not necessary but somewhat decorative). I laid the whole thing flat, and used large safety pins at each intersection, pinning through both layers. I used two strands of yarn from the blanket and came up from the back and down to the back at each intersection (they don’t show on the front). Then each time I turned it over and double tied the strands with square knots and clipped them close. For the tying I worked from the outside in to make sure it would stay flat. It takes quite a bit of time to finish this way, but the blanket took quite a bit of time to knit! It’s totally worth the effort, in my opinion.”

Thanks for your marvellous advice Jane! I am sure that many of the members will find it extremely useful and will, like you, successfully line their blanket!
So that’s it, the end of my blog and the end of the 2019 Mystery Baby Blanket! I do hope that you’ve enjoyed the journey and found it interesting as well as an educational experience. I would love to see your completed Baby Blankets, so when you finish yours, please send me a photo of it together with a few words and I will include it in a special Mystery Baby Blanket Gallery blog in a few months’ time. Thank you from the bottom of my heart for all your support over the past seven months – it’s been so much fun! Take care, Debbie x