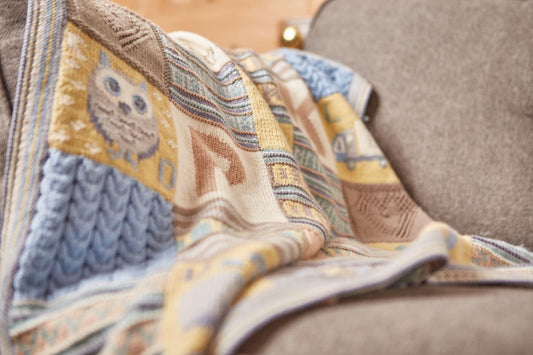
WELCOME TO THE 2023 MYSTERY BABY BLANKET CLUB! I ran my first Mystery Baby Blanket a few years ago, so this is the second one in the series. If you have taken part in one of my mystery clubs before, you will find that this club runs in exactly the same way. But if you are completely new to all of this, then it would be a good idea to listen to my intro and read this blog from beginning to end to ensure that you are prepped and ready for your first instalment.

A new blog will be launched on our website at the beginning of each new instalment, so this is the place to come every month before you start knitting your squares. Each blog will include tips and tricks about the squares you are knitting so that you can get the best out of your Mystery Baby Blanket adventure!
In addition to the written blog there will be knitting technique demonstrations included in the blogs which will help you learn new skills or master your existing ones. You will find all the tech vids for this month below, beginning with my intro. This month there are eight tech vids:
- Debbie’s intro!
- How to knit intarsia
- Picking up stitches to knit the next square
- Mattress stitch (horizontal)
- How to carry yarns up the side of the work
- How to knit fairisle
- How to add Swiss darning to your knitting
- How to cable
- How to knit a bobble
THE MYSTERY BABY BLANKET CLUB IS A GLOBAL PROJECT and this year we have knitters signed up from all over the world including Australia, New Zealand, USA, Canada, France, Netherlands, Germany, Belgium, Iceland, Ireland and the UK. I would like to say a big thank you ‘hello’ to each and everyone of you - it’s going to be a fantastic adventure!...
YOU HAVE ALL BEEN GIVEN A UNIQUE MEMBERSHIP NUMBER, so please can you quote it in any correspondence to us. We can locate your details such as postal address and email much more quickly if we have your number, and this means that your query will be dealt with more efficiently. Your membership number was included in the confirmation email we sent to you when you signed up to the club.
IT IS VERY IMPORTANT THAT WE HAVE YOUR CORRECT CONTACT DETAILS ON FILE, SO PLEASE NOTIFY US IMMEDIATELY IF ANY OF THESE DETAILS ARE INCORRECT. This goes for both your email and postal addresses. Any discrepancies in your postal address can affect the speed at which your parcel and/or printed patterns are delivered to you, or at worst they might not arrive at all. And an incorrect email address will mean that you will not receive our emailed patterns or club updates. So please let Sue know as soon as possible if we need to revise any of these details for you (especially if you move house).
ALL OF THE KNITTING KITS HAVE NOW BEEN POSTED, so if you have not received your parcel yet it will be with you very soon. We have a tracking number for all the overseas members, so if you would like us to email it to you just let us know. And if you have any worries about your parcel then you can contact Sue at: sue@debbieabrahams.com and she will do her best to help you.
When you receive your parcel, please can you check the contents of it against the list on page 2 of Mail Out 1. And if anything is missing, please let us know immediately and we will post it to you.
When you placed your order for this club you opted for a colourway - Silver or Rosy. However, if you have received the incorrect colourway, please let us know as soon as you can and we will check your order: sue@debbieabrahams.com
IN YOUR KNITTING KIT THERE IS A LUXURY WOVEN GIFT BAG, which could be used to keep your yarns in while you are knitting the project. Alternatively, if your completed blanket is going to be given away as a gift then you could use it as a gift bag. Either way round I hope you find it useful!

YOU WILL ALSO FIND IN YOUR KNITTING KIT A SMALL COLOURED ENVELOPE, and inside it you will find your woven label for the blanket. It has the title of the blanket on it, so if you want to keep this a secret put it in a safe place and open it when you have guessed it correctly (or given up and want to know what it is!).
MAIL OUT 1 HAS BEEN EMAILED TO ALL THE MEMBERS ON 1ST OCTOBER. If you cannot see it in your inbox, then check your Spam folder as our email might be sitting in there unread.

Members that paid for printed patterns will receive them each month in a separate card-backed envelope. If you did not sign up for printed patterns but have changed your mind, contact Sue and she will be able to set this up for you for an additional cost.
All members, including the printed pattern members, will be emailed the remaining mail outs each month from November - April.
EACH MONTH, IN ADDITION TO YOUR EMAILED PATTERNS, YOU WILL BE ABLE TO DOWNLOAD THE FILE FROM YOUR ACCOUNT ON OUR WEBSITE. This is a quick guide to how you can do this:
- Log into the website with your username and password: https://debbieabrahams.com/account/login
- Under "MYSTERY CLUB DOWNLOADS" click "View all downloads"
- Your latest available mail-outs will be visible here in PDF format to download
PLEASE NOTE THAT THE COLOURS IN THE MAIL-OUTS MIGHT NOT BE COMPLETELY ACCURATE TO THE COLOUR OF THE ACTUAL YARNS – both in the printed paperwork and in the digital files – so please be aware of this when working each square. We have done our best to make sure that the colours are as accurate as possible, however some discrepancies might occur. So it is always best to read the name and shade numbers of the colours rather than going by the photographs of the knitting and the graphics in the mail-outs.
THE PIECING DIAGRAMS ON PAGE 4 OF MAIL OUT 1 SHOW WHERE THE SQUARES ARE POSITIONED IN THE BLANKET. There are two diagrams – one for Colourway 1 (Silver) and one for Colourway Two (Rosy). Each month the new squares will be added to these diagrams so that you can see how the overall design is progressing.

ON THE PENULTIMATE PAGE OF EACH MAIL OUT YOU WILL FIND THE ABBREVIATIONS. This will be updated each month with any new additions to the list, so make sure that you always check out the latest one for any recent updates.

IT IS ADVISABLE, ALTHOUGH NOT NECESSARY, TO WORK IN VERTICAL STRIPS. Not only does this make it easier to keep track of which squares are which - there will be some repeats - but it also means less finishing off at the end of the project as you will only have five strips to sew together instead of thirty-five individually knitted squares. Over the seven months you will be sent the squares in such a way that they can be knitted in strips, so this is what I advise you do. Instructions are included in the patterns for this, it’s done by picking up stitches along the cast-off edge of a square to begin the next one in the strip. And if you’re not sure how to do this, there’s a tech vid this month to help you. For more advice about this read the info on page 3 of Mail Out 1. You’ll find it on the right-hand side of the page under the heading Working in vertical strips.
If you decide to knit the squares separately then you will need to sew them together to create strips. I recommend Mattress stitch (horizontal) for this, and there is a tech vid in this blog to assist you with this technique.
SOME OF THE SQUARES IN THE BLANKET HAVE A SECOND COLOUR OPTION. So you will need to follow the instruction for the colourway that you are knitting - that will be either Colourway 1 (Silver), or Colourway 2 (Rosy). The instructions for both colourways are written within the same pattern, but when there is a change to them, Colourway 1 is written first with Colourway 2 in brackets and bold. You can read more about this on page 3 of Mail Out 1.
BLOCKING AND PRESSING THE SQUARES IS VERY IMPORTANT, and although it’s not everyone’s favourite task, it really should be done if you want to create a professional looking blanket. Blocking the squares ensures that they are all a uniform size, which in turn will make joining them together so much easier to do. You might find that you have to ease some of them in or stretch them out to get them to the same measurements as other squares. Alternatively, other squares may block out quite easily with no easing in or out required.
If your individual squares are measuring slightly bigger or smaller than the recommended size of 14cm x 14cm, then this should not be a problem either. But you will need to decide on what size you are going to block them all to and stick to this throughout the whole blanket.

Blocking is the pinning out of your knitting, and, unless instructed otherwise, you should always pin it out with the wrong side facing upwards. Pin frequently along each edge, keeping all four edges as flat and even as possible. There is no need to use heat to press your squares. Much more preferable – and safer too – is cold water. So, if you have one available, fill up a plant spray bottle and use this to generously wet down the knitting, making sure that the water is dispersed right across the knitting from edge to edge. And then leave it to dry completely before removing the pins.
Pressing is the process of applying either heat or water to your knitting which relaxes the stitches and softens the fibres, resulting in a much more fluid and pleasant feeling fabric. After pressing you will find that your knitting drastically changes in quality and will feel beautiful and soft.
Blocking and pressing also helps the edges of the knitting stay flat rather than curling over, as is the tendency with most stitch structures.
I would suggest that you block and press your squares after you have knitted each one. I think it’s far easier to do this as you go along rather than leaving them all to the end. It also ensures that as you work through the squares they are all knitting up to the correct measurements.
I MENTIONED EARLIER ON HOW IMPORTANT GOOD PREPARATION IS BEFORE YOU START KNITTING, so here are a few things I would suggest you do before you make a start on your blanket.
First of all, have a good read of Mail Out 1 and familiarise yourself with the contents. The patterns are laid out in exactly the same way each month, so once you get familiar with them and how the patterns are written, they should be easy to follow.
On page 3 of Mail Out 1 there is lots of general information about the project including information about tension/gauge. It is very important that you test your tension before you start knitting.
The tension for this project is 25 stitches and 34 rows to 10cm (4in) measured over stocking stitch using 3.25mm needles.
I would suggest that you use Cream for your tension sample as you will have plenty of this in your kit.
Any discrepancies in your tension could lead to shortages of yarn, especially if you knit looser than the given tension. So please take time to do this. Here are some tips about measuring tension:
- the tension sample should be longer and wider than the stated tension, so it is advisable to cast on a minimum of 30 stitches and work a minimum of 40 rows
- use a solid ruler rather than a tape measure to measure your stitches and rows
- start and finish counting the stitches and rows in from the edges of the knitting and not from edge to edge
- if your tension is too loose you will need to resample using a smaller metric size needle
- if you tension is too tight you will need to resample using a larger metric size needle
- if you need to change your needle size then you will need to change all of the other needles used in the project as well by the same number of sizes
- stitch tension is more important then row tension, so if you are unable to match both to the recommended tension, choose the needle size that gives you the closest match.
One more thing I would suggest you do before you start knitting is to set up your Colour coder. You will find this in your kit, it’s a piece of card onto which you can tie samples of each of the yarns and write their colour names and shade numbers. This is a very handy tool to have while you are knitting and means you can easily check yarns against the pattern instructions, especially as some of them are similar in colour.
It's also a good idea to keep each colour in a separate bag with either its ball-band or a note of which colour and shade number it is. Then you can be sure to pick up the correct colour and not risk knitting with the wrong one. If you use the wrong colour then you could run short of yarn.
NOBODY LIKES AN ERROR IN A KNITTING PATTERN, BUT UNFORTUNATELY SOMETIMES THEY DO HAPPEN DESPITE RIGOROUS TEST KNITS AND CHECKS. When an error is reported I check it and once it is confirmed I list it in the ‘Addendum’ section on the website. It can be accessed through a link at the bottom of the Homepage. I would advise that you check this before you start knitting each square just in case anything has been found. It could save you a lot of time.

IF YOU HAVE ANY QUERIES OR CONCERNS WHILST WORKING ON YOUR MYSTERY BLANKET, please contact Sue at sue@debbieabrahams.com and she will assist you. If it is a knitting query Sue will pass it onto me to answer, or onto Jason if you need technical support. Throughout the project we will do our best to assist you in every way we can to ensure that your knitting experience is as smooth and enjoyable as possible. So please do get in touch if you have a query, we are always here to help!
GUESSING THE TITLE OF THE MYSTERY BABY BLANKET is a bit fun, and each month, here in the blog, you will be given clues to help you guess what it is. As well as clues in the monthly squares, I will give you some extra help with a "letter" quiz, and in each blog I will give you another letter to help you. This month the letter I am giving you is “I”:
_ _ _ / I / _ _ _ _ / _ _ / _ _ _ ‘ _
Please send your guesses to Sue at sue@debbieabrahams.com. There are no prizes for the correct answer – but wouldn’t it be good if you got it right!?! And if you do, with your permission, we will publish your name in the next Mystery Baby Blanket blog.
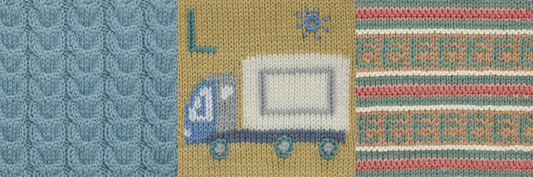
THESE ARE THE FIVE SQUARES TO KNIT IN MAIL OUT 1:
Square 22: The Letter ‘Y’ – intarsia letter motif:

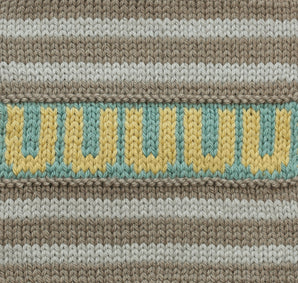
Square 23: The Letter ‘U’ – striped pattern with fairisle letter motifs:
Colourway 1: Silver

Colourway 2: Rosy
Square 24: ‘R’ is for Rocket! – intarsia rocket motif:

Colourway 1: Silver

Colourway 2: Rosy
Square 29: The Letter ‘Z’ – striped pattern with fairisle letter motifs:

Colourway 1: Silver

Colourway 2: Rosy
Square 30: Snuggle – cable and bobble pattern:

On each pattern page there is a list of Pattern notes and tips that are worth reading before you start to knit each square. These bits of advice will help you with, pre-warning you what to look out for and giving you some useful information about how to knit the square. In the following notes below I am going to give you a few extra tips about some of the squares, which should help you a bit more with your knitting.
SQUARE 22, THE LETTER ‘Y’: so we begin with intarsia, and the opportunity for anyone that is new to this technique to give it a go!
Tech vid to watch for assistance with this square:
- How to knit intarsia
You will find some advice about the intarsia technique on page 17 of Mail Out 1, but basically it means that you are using separate balls of yarn to knit each section of colour. I decided to use bobbins to wind my yarns onto as I find they help keep them organised and my tension neat and even.
Before I started to knit this square I wound off two bobbins of Duckling and two bobbins of Heavenly. I cast on using the ball of Duckling and then introduced the first bobbin of Heavenly on Chart row 6. And on this same row I introduced the first bobbin of Duckling (for the right side of the letter, as you look at the chart). On Chart row 29 I introduced the second bobbin of Duckling for the centre of the letter where it splits into two. Then on Chart row 32 I introduced the second bobbin of Heavenly. The letter splits into two 'branches' on Chart row 29, but I think it is fine to carry the existing bobbin of Heavenly across the Ducking stitches in the middle of the letter on Chart rows 29-31.

You may choose to work slightly different to what I have suggested, however, it is important that however you approach it, you keep the carrying across of yarns at the back of the work to a minimum, only carrying them across when it is absolutely necessary. You are creating a single-thickness fabric, so double thickness fabric is a no-no!
The tech vid shows how to join in a new colour on a RS row, however, in this square you will be joining in colours on both RS and WS rows. The technique is the same as on a RS row, but you are purling rather than knitting. Lay the yarn you are joining in over the right-hand needle so that it is in the way of the working yarn, and as you purl with the working colour, the new colour will be held in place, ready for you to use for the next stitch.
There is a half-page Notes section on page 7 which might be useful if you want to write down how you knitted this square and on which rows you joined in the yarns.
SQUARE 23, THE LETTER ‘U’: stocking stitch stripes frame a central fairisle pattern which gives you the opportunity to try out this colour-knitting technique within a small section.
Tech vids to watch for assistance with this square:
- Picking up stitches to knit the next square
- Mattress stitch (horizontal)
- How to carry yarns up the side of the work
- How to knit fairisle
You will find some advice about the fairisle technique on page 17 of Mail Out 1. It is very different to the intarsia technique - instead of winding off small balls for separate areas of colour, two colours are used on each row and the unused colour is carried across the back of the work.

There are two colour options for this square so make sure that you follow the correct instructions for the colourway you are knitting. Colourway 1 (Silver) is always written first with any changes for Colourway 2 (Rosy) written afterwards in brackets and bold.
On the striped section, stitches are transferred backwards and forwards onto the other needle so that you can pick up the yarn that is needed for the next stripe without the need to cut it and rejoin it. If you are working on a circular needle then all you need to do is slide the stitches to the other end of the needle and continue.
There are needle size changes in this square - smaller needles for the rows of garter stitch (the ridges that frame the fairisle section in the centre of the square), and larger needles for the fairisle. These needle size changes are important to maintain an even tension across the whole square, so don’t forget to change them over when instructed.
SQUARE 24, ‘R’ IS FOR ROCKET: this cute picture knit is the first of six in the blanket and has Swiss darned details that can be knitted in rather than embroidered.
Tech vids to watch for assistance with this square:
- Picking up stitches to knit the next square
- Mattress stitch (horizontal)
- How to knit intarsia
- How to add Swiss darning to your knitting
This is a little bit trickier to knit than Square 22, but it follows the same rules of intarsia which means winding off separate balls of yarn for each area of colour. There are some textured stitches too on the main section of the rocket, and these are indicated on the chart by an ‘X’.

You can choose to knit in the coloured ‘stars’, the letter ‘R’ and the outlines in Duckling on the rocket, or Swiss darn them afterwards. In the images of the squares on page 10, I knitted in the stars on Colourway 1 and embroidered them on Colourway 2. On both of these squares I embroidered the letter ‘R’. I would recommend that if you decide to Swiss darn these details, block and press the square before doing the embroidery as it will make the surface of the knitting flatter and thus easier to work on. If desired, you can also block and press it again after embroidering.
SQUARE 29, THE LETTER ‘Z’: garter stitch and stocking stitch stripes are combined with sections of fairisle.
Tech vids to watch for assistance with this square:
- How to knit fairisle
- How to carry yarns up the side of the work
As with Square 23, you can use the tech vids and the notes about fairisle on page 17 of Mail Out 1 to help you with this square.
There are two colour options for this square so make sure that you follow the correct instructions for the colourway you are knitting. Colourway 1 (Silver) is always written first with any changes for Colourway 2 (Rosy) written afterwards in brackets and bold.


Just make sure that you watch out for the changes in needle size which happen throughout the square. These changes will help keep your square the same width all the way from the bottom to the top.
SQUARE 30, SNUGGLE: Mail Out 1 concludes with a cable and bobble square in Heavenly for both colourways. The cables all twist the same way, with a bobble knitted in the centre of each of them.
Tech vids to watch for assistance with this square:
- Picking up stitches to knit the next square
- Mattress stitch (horizontal)
- How to cable
- How to knit a bobble
This pattern is presented as both a chart and worded instructions, so you can choose to work from whichever format suits you best. If you have not knitted from a chart before this would be a great opportunity to give it a go. The key below the chart tells you what all the symbols mean, so as long as you keep track of which row you are on and follow the symbols for the row you are knitting, you should be fine. You begin at the bottom right-hand corner of the chart for your first RS row (Row 1), and work all RS rows from right to left, and all WS rows from left to right.

You will find the explanation for ‘c7b’ (cable seven stitches to the back), in the Abbreviations section towards the back of Mail Out 1 on page 19. The central stitch is kept in the centre while the three stitches either side of it are crossed over. So if you have not knitted this type of cable before (a cable with an odd number of stitches and a central stitch), then read the explanation very carefully. Like any new technique, after repeating it a few times you should get the hang of it.

It can be tricky to keep the edges of cables neat, but if you pull firmly on the yarn when you change from a knit to a purl stitch (ie, on stitches 3-4 on the chart), this will help.
There is a tech vid for how to knit the bobbles, so it is advisable to watch this if you need some guidance. There are many different types of bobbles, but these are created by working several times into one stitch, knitting the stitches, purling them, then casting them off.
Now you have read all the tips and advice, you are ready to get going on your first set of squares - have fun!
IF YOU ENJOY SOCIAL MEDIA THEN YOU MIGHT WANT TO JOIN THE VERY FRIENDLY AND HELPFUL GROUPS ON RAVELRY AND FACEBOOK. Here you will find a bunch of very welcoming and informative members who will be only too pleased to chat to you about your project. It is a great way to get help and answers if you get stuck and need some quick advice.
If you are not already a Ravelry member, then it is very easy (and free!) to join. Just follow the instructions on their website: http://www.ravelry.com
The Debbie Abrahams Mystery Knitters group on Facebook is another fun way to keep in touch with other members. It was set up a couple of years ago and has grown in size to over 500 members, so that’s well worth joining too.
We also have our own Facebook page where you will find regular updates on everything we are doing from knitting kits to workshops and events!
Instagram: debbieabrahams_knitting
Pinterest: debbieabrahams@debbieabrahamsk
Facebook: Debbie Abrahams Mystery Knitters
Facebook: Debbie Abrahams Handknits
Ravelry: Debbie Abrahams Handknits
ALTERNATIVELY, IF YOU LIVE IN THE NOTTINGHAMSHIRE AREA YOU MIGHT WANT TO JOIN ME AT A ‘MYSTERY’ CLUB MEETING. Meetings take place at a delightful knitting shop in Carrington, close to the city centre of Nottingham, called Yarn Loft. It is owned by Doreen who looks after us with hot drinks and light refreshments while we knit and chat for a couple of hours.

If you belong to any of my mystery clubs, then you are welcome to join us. It’s a great opportunity to meet other members and have a chat while cracking on with your squares. It’s a lot of a fun and we have a lot of giggles too! And if you have any questions about the mystery projects, I will be on hand to answer any queries or help with techniques.

The meetings begin at 4pm and run until 6pm. Yarn Loft is at 118 Hucknall Road, Carrington, Nottingham, tel number 07825 702433, website: www.yarnloft.co.uk. To cover the costs of hosting the meeting there is a small sub to pay (£3.00), which can be paid to Doreen on the day.
Just send a quick email to me at debbie@debbieabrahams.com to let me know you are coming and we will make sure that we reserve a space for you!
Thank you for taking the time to read my blog, and hopefully all the tips and advice will steer you with great success through your first set of squares. Beginning a brand new project is always so exciting, and for the next seven months I promise to keep you busy and motivated with lots of interesting patterns to knit! We love to hear from our members, so if you have any photos or stories about your baby blanket that you would like to share with the other members, please send them into us and we will include them in the next blog – we always love to hear from you! I don’t want to hold you up any longer so I am going to sign of now so that you can start knitting. And remember that if you need any help or support along the way, please get in touch with us and we will do all we can to assist you. Until we meet up again next month, take care, enjoy the squares and have a fabulous October! Debbie x