HELLO AND WELCOME TO THE PENULTIMATE BLOG OF THE 2023/24 MYSTERY BABY BLANKET CLUB! First of all I must apologise for the delay in posting this blog. We had an extremely hectic week in the run up to the 1st March with some unexpected tasks to deal with (Mystery Blanket Club members will know what I am referring to!) and consequently there just wasn’t enough time to get it written. So here it is, a few days late, but hopefully you'll still find the tips and advice in it helpful this month.

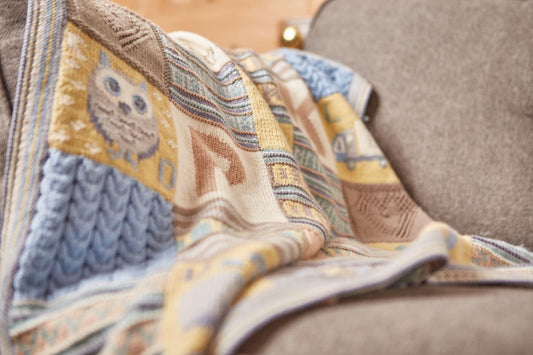
I can hardly believe that we are in the penultimate month of this club, with just one more instalment to go before the whole blanket is completed! Thirty out of the thirty-five squares in the blanket have been revealed, so that leaves just the remainder in the central strip to complete, which includes the centre square. Any ideas as to what that might be?!? We’ve had lots of correct guesses for the title of the blanket, but you’ve still got time to have one more go at guessing it before the reveal next month. A lot of the letters have now been revealed in the word puzzle, and with one more given to you in this post, the title might now become very obvious. So if you’ve got any ideas, be sure to write in and let us know!
There is no intro from me this month, but there is one new tech vid which demonstrates how to sew your strips together – with four strips completed, you could get ahead and make a start on the finishing!
- NEW! Mattress stitch (Vertical)
- How to knit intarsia (MO1 blog)
- Picking up stitches to knit the next square (MO1 blog)
- Mattress stitch (horizontal) (MO1 blog)
- How to carry yarns up the side of the work (MO1 blog)
- How to knit fairisle (MO1 blog)
- How to add Swiss darning to your knitting (MO1 blog)
- How to cable (MO1 blog)
- How to knit a bobble (MO1 blog)
- How to add Chain stitch to your knitting (MO2 blog)
New Tech Video: Mattress Stitch (Vertical) | MBBC2024
MAIL OUT 5 HAS BEEN EMAILED TO ALL THE MEMBERS ON 1ST MARCH, so if you can’t see an email from us, please check your Spam folder first before contacting us as this is usually where it ends up.

The printed patterns were posted to both the overseas and UK members last week, with the overseas posted just before the UK. If you are still waiting for your brochure to arrive then it will be with you very soon. I packed and posted them this month, so I know that they are definitely on their way to you!
FANCY A NEW 'MYSTERY' KAL THIS YEAR? THEN YOU MIGHT BE INTERESTED TO KNOW THAT SIGN-UPS ARE NOW OPEN FOR THE 2024 MYSTERY CUSHION CLUB! This year sees the launch of the fourteenth design in this collection, and with the few hints and tips (but not too much!) I am going to give you, I hope that you decide to sign up and join me!
Over five fun-packed months of inspirational knitting using some of Rowan’s finest and most luxurious yarns including Alpaca Soft DK and Felted Tweed, you will have the opportunity to create your very own Mystery Cushion.

If you’re new to the Mystery Cushion Club then it’s a smaller project than the blanket, beginning on 14th June and finishing mid-October. The theme is different to the Mystery Blanket, but it works in the same way with a knitting kit sent out to members at the beginning of the project and monthly emailed patterns. I write a separate blog for the Mystery Cushion as well which will include knitting technique videos, so you can get all the help and support you need as you knit along.
The knitting kit includes Rowan yarn, Debbie Abrahams Beads and buttons for fastening.
So what about some hints?!? If you like rich Autumnal colours with a hint of Vintage, then this could be the cushion you’ve always dreamed of knitting! Bold motifs are mixed with simple stripes and textured stitches, finished off with a sprinkling of sparkling beads and bronze stud details. The theme has several different strands to it, including a nod to one of the great masters of 20th century art…now there’s food for thought!

Discount for MBBC23 members: because you are a Mystery Baby Blanket Club member you get 5% discount off the cost of the basic membership whenever you decide to sign up before it begins in June. Simply input this code, LOYALTY5 into the coupon box at checkout to enable the discount.
In addition to the discount, if you are one of the first one hundred to purchase a membership you will receive some other amazing benefits (but hurry, as we are down to the last few!!!)…
Free pair of Debbie’s bespoke ready-made socks: receive a free pair of Debbie’s Winter Wonderland socks which were inspired by her 2019 Mystery Blanket design. They will be shipped in June with your knitting kit. Choose your pair from these three designs:

Free Prize Draw: in addition to this, everyone will be entered into a Free Prize Draw, with the chance to win one of five great prizes:
Prize 1: 2024 Mystery Cushion Club membership (we will refund what you paid in full)
Prize 2: 2024 Mystery Cushion Club set of printed patterns, five full-colour brochures in total (if you’ve added them to your order we will refund what you’ve paid in full)
Prize 3: 2024 Festive Mystery Knit Box (released in November)
Prize 4: A knitting kit of your choice up to the value of £40 from the selection on our website
Prize 5: Four packs of Debbie Abrahams Beads (you choose the colours and size).
There will be a download option only (no knitting kit) for this club, which will enable you to use yarns and beads from your own stash to knit the cushion. The list of yarns and beads for the knitting kit will be released a week before the project begins so you can get yourself prepped and ready. The five sets of patterns will be emailed monthly from June to October.
To make things easier you can choose to spread the cost of your payment. If you don’t want to pay in one go you have the option to pay in 2-4 instalments using our Splitit payment plan. There are no admin fees for splitting your payment so you can choose whatever is easiest for you and your finances. This can be used for the knitting kit option but not for the download pattern only option.

Feeling tempted?!? As with all my Mystery Clubs, memberships are limited and once they have sold out the Club will be closed. So don’t delay in getting yourself signed up, especially if you want to take advantage of our fabulous Early Bird offer! There are packages for UK, Europe and the World - it’s a global project and everyone is invited to join in!
OTHER NEW PRODUCTS COMING SOON! We are very excited about the launch of some other new products and special offers, so it might be worth marking these on your calendar…
- MARCH: Bespoke Mystery Boxes –tell us who it is for, choose your own bespoke message on the label, and we will create a bespoke box of eight treats which includes one of Debbie’s knitting kits (your choice from the selection on our website).
- MARCH: Easter sale! – special discounts on yarns, beads and kits for a limited time.
- APRIL: Fraggle Rock Cowl kit – released in a new colourway as an alternative to the original colourway that is currently available in our online shop (see original colourway below).

SO NOW IS YOUR CHANCE TO HAVE ONE MORE GUESS AT THE TITLE OF THE MYSTERY BABY BLANKET BEFORE THE BIG REVEAL NEXT MONTH! There must be a lot of you out there still trying to guess it as we have not had any more correct guesses since last month. So here you go, one last clue, and this month it’s the letter “B”:
_ O W / I / _ _ O W / M Y / _ B _ ‘ _
There are not many more letters to add to the puzzle, so this final clue might just tip the balance in your favour! Think children’s nursery rhymes and songs…any ideas?!? Send in your thoughts and ideas to Sue at sue@debbieabrahams.com and let’s see if you can get it right. There are no prizes for a correct guess, but think how fabulous it would be to guess it before the final reveal! Good luck everyone!
THESE ARE THE FIVE SQUARES TO KNIT IN MAIL OUT 6:
Square 14: The Letter ‘B’ – Intarsia letter motif:

Square 32: Love You 2 – lace heart motif:

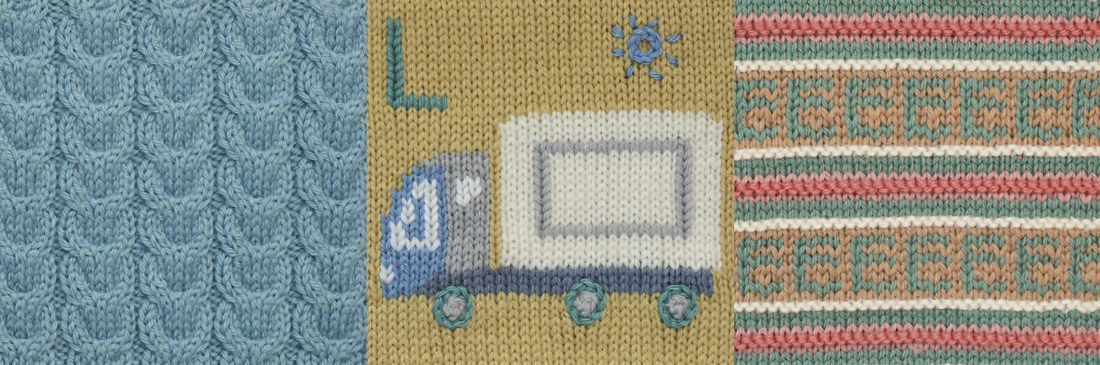
Square 33: ‘L’ is for Lorry! – intarsia lorry motif with contrast-coloured bobbles and embroidered details (tow colourways):

Square 34: Hug– cable pattern:

Square 35: The Letter ‘E’ – striped pattern with fairisle letter motifs:


On each pattern page there is a list of Pattern notes and tips that are worth reading before you start to knit each square. These bits of advice give you a pre-warning of what to look out for, as well as some useful information about how to knit each square. In the following notes below I am going to give you a few extra tips about the squares so that you can knit them with complete confidence.
SQUARE 14, THE LETTER ‘B’: this is the sixth and final large letter intarsia motif in the design, knitted in the same colours as Square 22, The Letter ‘Y’:
Tech vids to watch for assistance with this square:
- Picking up stitches to knit the next square (MO1 blog)
- Mattress stitch (horizontal) (MO1 blog)
- How to knit intarsia (MO1 blog)
By now you will be familiar with this type of square and know that it is intarsia which means using small balls or bobbins of yarn to knit it. I used the ball of Duckling (which I cast on with) plus two bobbins of Duckling, and two bobbins of Heavenly.

When you reach Chart Row 22 you can reduce the number down to one bobbin/ball of Heavenly and two of Duckling, and then reintroduce the others again on Chart Row 28.
There is a half-page Notes section on page 11 which could be useful if you want to write down how you knitted this square, and on which rows you joined in the yarns.
SQUARE 32, LOVE YOU 2: this is an exact repeat of Square 4, knitted in Taupe.
Tech vids to watch for assistance with this square:
- Picking up stitches to knit the next square (MO1 blog)
- Mattress stitch (horizontal) (MO1 blog)
- How to knit a bobble (MO1 blog)
The heart motif is created by knitting basic lace stitches (K2tog, yf, skpo and sk2po) with a self-coloured bobble in the centre. Having knitted this square before, and once using Camel (Square 16) as well, you will no doubt whizz through this one without any problems. But if you do get stuck, check out the Abbreviations list on page 19 of your mail out.

Looking at the Piecing Diagram on page 4, do you think there might be one more of these squares to come? You can make a pretty good guess at this, but you’ll have to wait until MO7 to be sure…
SQUARE 33: ‘L’ IS FOR LORRY!: so here is another picture knit, and this time it’s a Lorry which is presented in two colourways.
Tech vids to watch for assistance with this square:
- Picking up stitches to knit the next square (MO1 blog)
- Mattress stitch (horizontal) (MO1 blog)
- How to knit intarsia (MO1 blog)
- How to add Swiss darning to your knitting (MO1 blog)
- How to add Chain stitch to your knitting (MO2 blog)
Small balls or bobbins of yarn will need to be wound off for this square. But to keep them down to a minimum, you can choose to embroider on some of the smaller details. I embroidered onto the completed square the letter ‘L’, the two windows on the cab, the headlamp and the rectangular outline on the lorry using Swiss-darning. I found this much easier to do than knitting them in.

There are three contrast-coloured bobbles to knit for the wheels. Two separate ends of Silver (Colourway 1) or Vintage Pink (Colourway 2) are purled on chart row 10 so that you have them in place to knit the bobbles on the next row up. If you need a reminder of how to knit a contrast coloured bobble, you can scroll back to my 2023 Mystery Blanket for some assistance: https://debbieabrahams.com/blogs/news/mystery-blanket-club-2023-post-1-february
There are some chain stitch details to add to this square as well. The sun in the top left-hand corner of the square is embroidered using chain stitch, and the eight rays are running stitch (but you can use whichever embroidery stitch you prefer). The circles around each wheel are also embroidered on using chain stitch. If you need a reminder of this, or Swiss darning, then there are tech vids of these techniques in previous blogs for guidance.
Just one last thing, it is easier to embroider onto knitting that has been blocked and pressed, so it is advisable to do this before you begin stitching. I blocked and pressed my squares again after I had embroidered them, so I think that’s worth doing too if you want them to look super spectacular!
SQUARE 34, HUG: you’ll recognise this cable pattern from a previous mail out because it is exactly the same as Square 2 from Mail Out 3.
Tech vids to watch for assistance with this square:
- Picking up stitches to knit the next square (MO1 blog)
- Mattress stitch (horizontal) (MO1 blog)
- How to cable (MO1 blog)
This pattern is presented as both worded and a chart, so feel free to choose whichever suits you best to work from. You’ll remember from last time that it is a fairly simple cable to knit with a repeat every six rows of c4b and c4f which are knitted right next to each other. If you need a reminder of these cable abbreviations you will find them in the Abbreviations list on page 19 of your mail out.

As with all cable patterns, it is advisable to block and press this square with the RS facing upwards. There is a note about this in the Pattern notes and tips on page 13.
SQUARE 35, THE LETTER ‘E’: this square completes the outer corners of the blanket, and is similar to the other fairisle letters you’ve already knitted, ‘V’, ‘A’ and ‘Z’.
Tech vids to watch for assistance with this square:
- Picking up stitches to knit the next square (MO1 blog)
- Mattress stitch (horizontal) (MO1 blog)
- How to carry yarns up the side of the work (MO1 blog)
- How to knit fairisle (MO1 blog)
Having knitted several variations of this square a few times before, this should be a piece of cake! The two strips of fairisle are worked over eight rows, with two of these rows knitted in plain Camel (see chart on page 16). There are plain stocking stitch stripes in between with rows of garter stitch – remember to watch out for the needle size changes!

There are two colour options for this square so make sure that you follow the correct instructions for the colourway you are knitting. Colourway 1 (Silver) is always written first with any changes for Colourway 2 (Rosy) written afterwards in brackets and bold.
And that concludes the squares for this month, happy knitting everyone!
WITH FOUR STRIPS COMPLETED AFTER THIS INSTALMENT, YOU COULD GET AHEAD AND SEW THEM TOGETHER. If you decide to make a start on this, these useful tips will guide you through the process.
If you have knitted your squares separately then you will need to join these together first to create strips 1, 2, 4 and 5 (Squares 1-7, 8-14, 22-28 and 29-35). If you need some guidance with this, check out the tech vid in the first blog for horizontal mattress stitch which demonstrates this technique.
Once you have your four strips completed you can make a start. This is a guide to how to sew the squares together using Mattress stitch. It is important to note that these are my suggestions as to how to sew together the squares, but please feel free to use your own method and sequence if preferred.
In this blanket all of the squares are facing in the same direction, so this makes it much easier to sew them together. All you need to watch out for is the number of rows, which vary from square to square. This means that some easing in will be required.
These instructions are based on taking the needle under 2 ‘bars’ at a time as demonstrated in the tech vid for vertical mattress stitch. To ease in a row, you will need to take your needle under one less bar on the side you are easing the extra row into.
Before we make a start, these are a couple of tips about how to ease in rows:
- Garter stitch rows have a tighter row tension than stocking stitch, so for every row of garter stitch (which is two knit rows), ease these two rows into one stocking stitch row.
- Fairisle usually has a looser row tension than stocking stitch, so if you need to ease in some rows it is best to do this across fairisle rows, taking the needle under more of the stocking stitch rows than the fairisle rows.
These are my guidelines and do not have to be followed if you prefer to use your own method and calculations.
SEW STRIP 1 (squares 1-7) TO STRIP 2 (squares 8-14)
Sew Square 1 (52 rows) to Square 8 (48 rows): you need to ease 4 rows of Square 1 into Square 8.
Along the edge of Square 1 place a marker between Rows 26 and 27.
Along the edge of Square 8 place a marker between Rows 24 and 25.
Ease in 4 rows as evenly as you can across the whole length of the squares, making sure that the marker on Square 1 is matched to the marker on Square 8.
Sew Square 2 (48 rows) to Square 9 (47 rows): you need to ease 1 row of Square 2 into Square 9.
Along the edge of Square 2 place a marker between Rows 24 and 25.
Along the edge of Square 9 place a marker on Row 24.
Ease in 1 row where the marker on Square 2 matches to the marker on Square 9.
Sew Square 3 (48 rows) to Square 10 (48 rows): these squares have the same number of rows so there is no easing to be done.
Sew Square 4 (51 rows) to Square 11 (52 rows): you need to ease 1 row of Square 11 into Square 4.
Along the edge of Square 4 place a marker on Row 26.
Along the edge of Square 11 place a marker between Rows 26 and 27.
Ease in 1 row where the marker on Square 4 matches to the marker on Square 11.
Sew Square 5 (47 rows) to Square 12 (48 rows): you need to ease 1 row of Square 12 into Square 5.
Along the edge of Square 5 place a marker on Row 24.
Along the edge of Square 12 place a marker between Rows 24 and 25.
Ease in 1 row where the marker on Square 5 matches to the marker on Square 12.
Sew Square 6 (49 rows) to Square 13 (47 rows): you need to ease 2 rows of Square 6 into Square 13.
Along the edge of Square 6 place a marker on Row 25.
Along the edge of Square 13 place a marker on Row 24.
Ease in 2 rows as evenly as you can across the whole length of the squares, making sure that the marker on Square 6 is matched to the marker on Square 13.
Sew Square 7 (52 rows) to Square 14 (47 rows): you need to ease 5 rows of Square 7 into Square 14.
Along the edge of Square 7 place a marker between Rows 26 and 27.
Along the edge of Square 14 place a marker on Row 24.
Ease in 5 rows as evenly as you can across the whole length of the squares, making sure that the marker on Square 7 is matched to the marker on Square 14.
SEW STRIP 4 (squares 22-28) TO STRIP 5 (squares 29-35)
Sew Square 22 (48 rows) to Square 29 (52 rows): you need to ease 4 rows of Square 29 into Square 22.
Along the edge of Square 22 place a marker between Rows 24 and 25.
Along the edge of Square 29 place a marker between Rows 26 and 27.
Ease in 4 rows as evenly as you can across the whole length of the squares, making sure that the marker on Square 22 is matched to the marker on Square 29.
Sew Square 23 (47 rows) to Square 30 (49 rows): you need to ease 2 rows of Square 30 into Square 23.
Along the edge of Square 23 place a marker on Row 24.
Along the edge of Square 30 place a marker on Row 25.
Ease in 2 rows where the marker on Square 23 matches to the marker on Square 30.
Sew Square 24 (49 rows) to Square 31 (48 rows): you need to ease 1 row of Square 24 into Square 31.
Along the edge of Square 24 place a marker on Row 25.
Along the edge of Square 31 place a marker between Rows 24 and 25.
Ease in 2 rows where the marker on Square 24 matches to the marker on Square 31.
Sew Square 25 (52 rows) to Square 32 (51 rows): you need to ease 1 row of Square 25 into Square 32.
Along the edge of Square 25 place a marker between Rows 26 and 27.
Along the edge of Square 32 place a marker on Row 26.
Ease in 1 row where the marker on Square 25 matches to the marker on Square 32.
Sew Square 26 (47 rows) to Square 33 (48 rows): you need to ease 1 row of Square 33 into Square 26.
Along the edge of Square 26 place a marker on Row 24.
Along the edge of Square 33 place a marker between Rows 24 and 25.
Ease in 1 row where the marker on Square 26 matches to the marker on Square 33.
Sew Square 27 (47 rows) to Square 34 (48 rows): you need to ease 1 row of Square 34 into Square 27.
Along the edge of Square 27 place a marker on Row 24.
Along the edge of Square 34 place a marker between Rows 24 and 25.
Ease in 1 row where the marker on Square 27 matches to the marker on Square 34.
Sew Square 28 (47 rows) to Square 35 (52 rows): you need to ease 5 rows of Square 35 into Square 28.
Along the edge of Square 28 place a marker on Row 24.
Along the edge of Square 35 place a marker between Rows 26 and 27.
Ease in 5 rows as evenly as you can across the whole length of the squares, making sure that the marker on Square 28 is matched to the marker on Square 35.
THE MYSTERY CLUB MEETINGS AT ‘YARN LOFT’ IN NOTTINGHAM HAVE RESTARED. So if you live close to Nottingham and fancy meeting up with other members for a couple of hours of lively knit and chat, come and join us! Meetings are held on the first Wednesday of the month, with the next meeting scheduled on Wednesday 6th March.

Yarn Loft is at 118 Hucknall Road, Carrington, Nottingham, tel number 07825 702433, website: www.yarnloft.co.uk. Meetings are held between 4-6pm and to cover the costs of hosting the meeting there is a small sub to pay (£3.00), which can be paid to Doreen on the day.
I hope you will be able to join me!
FOLLOW US AND JOIN IN ALL THE FRIENDLY BANTER ON OUR SOCIAL MEDIA PLATFORMS!
If you are not already a Ravelry member, then it is very easy (and free!) to join. Just follow the instructions on their website: http://www.ravelry.com
The Debbie Abrahams Mystery Knitters group on Facebook is another fun way to keep in touch with other members. It was set up a couple of years ago and has grown in size to over 500 members, so that’s well worth joining too.
We also have our own Facebook page where you will find regular updates on everything we are doing from knitting kits to workshops and events!
Instagram: debbieabrahams_knitting
Pinterest: debbieabrahams@debbieabrahamsk
Facebook: Debbie Abrahams Mystery Knitters
Facebook: Debbie Abrahams Handknits
Ravelry: Debbie Abrahams Handknits
As we approach the end of the project, the excitement is rapidly building with the anticipation of the final batch of squares and the reveal of the blanket at the beginning of April. If you’ve kept up with the squares each month, then you are almost there. So keep up the momentum – the finishing line is in sight! – and very soon you will have your own completed blanket to treasure or gift to someone special! Remember that if you have any ideas about the title, then don’t forget to write in – we always love to hear from you! Until next month, take care and I will see you back here on 1st April when the 'mystery' of this year's Baby Blanket will be revealed to you all! Happy knitting everyone! Debbie x