
HELLO AND WELCOME TO THE FIRST INSTALMENT OF THE 2022 MYSTERY CUSHION CLUB! It is an absolute joy and pleasure to be launching my new ‘mystery’ KAL, and I hope that you are as excited as I am to be embarking on this brand new knitting adventure! It’s going to be a very colourful project so be prepared for bright splashes of colour, sparkling beads and some crazy, happy patterns!

There is plenty to keep you busy this month with three squares to knit which include fairisle, beads, cables and stripes. There are ten tech vids you can watch for guidance, an intro vid in which I talk about the project and what you can expect over the next five months. Plus, there are lots of tips and techniques and valuable information in this written blog to get you off to the best start!
So here we go, beginning with my intro vid and followed by ten tech vids to help you with this month’s knitting techniques:
- How to thread beads onto your yarn
- How to bead, the slip-stitch method
- How to bead, the hooking-in method
- How to pick up stitches along a cast-off edge (to knit the next square)
- Square 1, Hearts & Flowers: the fairisle technique
- Square 1, Hearts & Flowers: how to work rows 12-17
- Square 4, Crazy Cable: intarsia cast-on
- Square 4, Crazy Cable: how to cross yarns over on a right side row (with increases) and a wrong side row
- Square 4, Crazy Cable: intarsia cables (c7b) on a right side row
- Square 4, Crazy Cable: intarsia cables (c7b) on a wrong side row
ALL OF THE KNITTING KITS HAVE BEEN POSTED, so if you have not received your kit yet, it is on its way to you. We posted the overseas parcels a few weeks ahead of the UK with the hope that they would arrive by the 15th June. Once they leave the UK they are in the hands of the international postal services, who I am sure are doing their very best to get your parcel to you as soon as they can. We have a tracking number for each of the overseas parcels and we can give that to you upon request. Just email Sue at sue@debbieabrahams.com and she will assist you with this.
FOR THE MEMBERS WHO PAID FOR PRINTED PATTERNS, these have been posted in a separate card-backed envelope and should arrive very soon. As I mentioned in my intro, if you decide that you would like to add printed patterns to your order then it is not too late. Email Sue at sue@debbieabrahams.com and she will guide you through how to make your payment.

THE PATTERNS HAVE BEEN EMAILED TO EVERYONE ON 15th JUNE, but you can also download them from your account on our website:
- Log into the website with your username and password: https://debbieabrahams.com/account/login
- Under "MYSTERY CLUB DOWNLOADS" click "View all downloads"
- Your latest available mail-outs will be visible here in PDF format to download
On the 15th of the month each new set of patterns will be emailed to you and will be available to download them from your account as well.
PLEASE LET US KNOW IF YOU DON’T RECEIVE THE EMAILED PATTERNS – it might be because we have made an error with your email address in our database, which we can correct immediately. But sometimes our emails go into a spam folder instead of the inbox, so please make sure that you check this before contacting us.
These are some trouble-shooting steps that you can take to make sure that you are set up correctly to receive our Mailchimp newsletters:
- add our “From” email address to your email contact list or address book
- check any spam filter settings to be sure that your content isn't being flagged
- find the email in your spam folder (if this is the case), and mark it as “Not Spam” or “Not Junk”. This will help register that our content is safe for receiving into your inbox
If you do not receive the June patterns from us then please try some or all of these checks. And if you need further help then please contact Sue at: sue@debbieabrahams.com and we will investigate further.
BEFORE YOU START KNITTING IT WOULD BE A GOOD IDEA TO READ THROUGH THE WHOLE MAIL OUT SO THAT YOU ARE FULLY PREPARED! On page 3 there is some handy information about tension, construction, the finished size of the cushion cover and blocking and pressing. Later on in this blog I talk about how to knit a tension square and how to block and press, but the information on this page will give you an overall idea of how it all works.

IN EACH MAIL OUT ON PAGE 4 YOU ARE GIVEN A PIECING DIAGRAM WHICH SHOWS YOU WHICH SQUARES YOU ARE KNITTING and where they are positioned in the front and back panels. The Front Panel of the cushion cover is constructed from nine squares which are worked in three separate strips and then pieced together. The Back Panel is knitted in two halves – an Upper Back Panel and a Lower Back Panel. As we progress through each month, images will be added to the diagrams, which will enable you to see how the design is developing.

THERE IS A TIPS AND TECHNIQUES SECTION IN YOUR MAIL-OUT, it is at the back of your first set of patterns on pages 13-14, and it includes important information about the intarsia and fairisle techniques and knitting with beads. And on page 15 there is an Abbreviations list which explains what all of the abbreviations used in the patterns mean.

PLEASE NOTE THAT THE COLOURS IN THE MAIL OUTS MIGHT NOT BE COMPLETELY ACCURATE TO THE COLOUR OF THE ACTUAL YARNS – both in the printed paperwork and in the digital files. We have done our very best to make sure that the colours are as accurate as possible, however some discrepancies might still occur. Therefore, it is always best to read the name and shade number of the colours rather than going by the photographs of the knitting.
LOOK OUT FOR THE LITTLE COLOURED ENVELOPE IN YOUR KIT! –this has your woven label inside it. The label has the name of the cushion on it, so if you don’t want to spoil the surprise it would be best to put this in a safe place until you have guessed the theme.
YOU HAVE A COLOUR CODER IN YOUR PARCEL and it is important that you use it to identify the colours in the cushion. The shade numbers on the ball–bands correspond to those stated in the patterns, beside which I have written the Rowan name for each colour.

If you do not use the correct colour for the correct square then you may run out of some of the yarns, so please take some time to set up your colour coder to avoid getting the colours mixed up. Tie a small amount of each yarn onto the colour coder and also write the name of each yarn and its shade number beside it. And then remember to keep your colour coder near to you at all times when you are knitting so that you can make sure you have picked up the correct colours to work with!
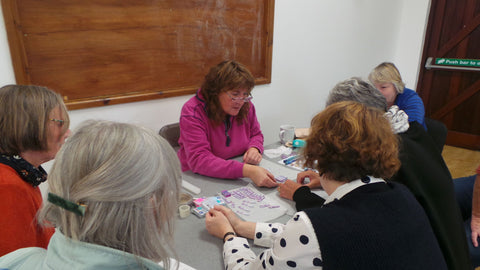
YOU HAVE A SMALL BROWN PAPER PACKET IN YOUR KIT THAT HAS A SET OF BUTTONS IN IT. These are the fastenings for your cushion cover. They have been handmade by the very talented button designer and maker Emma Humphries, who I first came across on a trip to the Hell Bay Hotel on the island of Bryher in the Isles of Scilly. She delighted our knitting group last year with a wonderful demonstration of how she makes her buttons and some of the ladies even had a go at it themselves.

They are made from Fimo polymer clay and are washable so there is no need to remove them if you need to wash your cushion cover. I sent Emma samples of all the yarns in the project and asked her to match the buttons to the colours, but I gave her free reign on the design. And I was absolutely thrilled with what she came up with! She made several different batches with subtle differences in the designs and colours which I think makes them all even more unique.

You can see more of Emma’s work on her website: https://www.popplestonestudio.com/ Emma makes all sorts of beautiful, bespoke items with Fimo including brooch pins and jewellery, so it’s definitely worth a look!
IT IS ADVISABLE NOT TO PURCHASE YOUR CUSHION INSERT UNTIL YOU HAVE COMPLETED KNITTING THE CUSHION COVER as the finished size of it will depend on your own tension. If your tension differs from what I achieved, then it will result in it knitting up slightly bigger or smaller than the size I have quoted in the pattern instructions.
IF AND WHEN WE HAVE ANY IMPORTANT NEWS TO TELL YOU, (such as an addendum), we will send all of the members an alert by email. So don’t forget to check your inbox on a regular basis so you don’t miss them. Our excellent test knitting team work hard to try and make sure that there are no errors in the patterns, but unfortunately they do sometimes still happen. So a quick check of our Addendum page before you start knitting is always a good thing to do.
REMEMBER THAT YOU ARE NEVER ON YOUR OWN IN A DEBBIE ABRAHAMS MYSTERY CLUB, and you can always get in touch if you have any queries. Please send your correspondence to Sue at sue@debbieabrahams.com and she will either answer it herself or forward it onto me. In addition to our services there is a Debbie Abrahams group set up on Ravelry and another on Facebook, both of which you can join free of charge. The groups on there are really lovely and are only too happy to pass on any help or advice they can give if you get stuck with your Mystery Cushion knitting.
I have an Instagram page too. So, if you want to keep ahead with all the latest news about the Club, please follow us on our social media platfoms. It’s a great way to keep up with what is happening!
Instagram: debbieabrahams_knitting
NEXT I AM GOING TO TALK ABOUT HOW TO KNIT A TENSION SWATCH – which is essential to do before you start knitting your first set of squares.
The tension for this project is 24 stitches and 34 rows to 10cm (4in) measured over stocking stitch using 3.50mm needles and using Debbie Abrahams Merino Light DK yarn.
I would suggest that you use Coral (shade 026) for your tension sample as you will have plenty of this in your kit.
Any discrepancies in your tension could lead to shortages of yarn, especially if you knit looser than the given tension. So please take time to do this. Here are some tips about measuring tension:
- the tension swatch should be longer and wider than the stated tension, so it is advisable to cast on a minimum of 36 stitches and work a minimum of 50 rows
- block and press your tension swatch so that the stitches are fully relaxed
- use a solid ruler rather than a tape measure to measure your stitches and rows
- start and finish counting the stitches and rows in from the edges of the knitting and not from edge to edge
- if your tension is too loose you will need to resample using a smaller metric size needle
- if you tension is too tight you will need to resample using a larger metric size needle
- if you need to change your needle size then you will need to change all of the other needles used in the project as well by the same number of sizes
- stitch tension is more important then row tension, so if you are unable to match both to the recommended tension, choose the needle size that gives you the closest match to the stitch tension.

You shouldn’t need to undo your tension swatch so you can keep this to one side, just in case you need to reference it while you are knitting.
THESE ARE THE SQUARES THAT YOU ARE KNITTING THIS MONTH - there are three for you to work on…
FRONT PANEL, Square 1: Hearts & Flowers – fairisle flower and heart motifs with hooked-in beads:
FRONT PANEL, Square 2: Rainbow – textured stripes with slip-stitch beads:

FRONT PANEL, Square 4: Crazy Cable – intarsia cables:

In addition to the tech vids, here’s some extra advice to help you with your squares this month:
SQUARE 1, HEARTS & FLOWERS: this square uses the fairisle technique and has a slip-stitch stripe pattern between the bands of flower and heart motifs.
Videos to watch for assistance with this square:
- How to bead, the hooking-in method
- Square 1: Hearts & Flowers, the fairisle technique
- Square 1: Hearts & Flowers, how to work rows 12-17
If you have never tried fairisle before then this a great introduction to the technique as it is worked within a small achievable square. First of all I would advise that you watch my fairisle video as this shows you how the technique works and includes advice on how to read the chart and stranding and weaving-in. There are also additional notes about fairisle on page 13 of your June mail out.
Different knitters may use slightly different techniques, and at the end of the day it’s important that you choose the method that works for you. My general rule for fairisle is that I do not allow unused yarns to strand across more than three stitches at the back of the work. This means that when there are 1-3 stitches in one block of colour I allow the unused colour to strand (lay) across the stitches and then I pick it up and use it again when it is needed. However, when there are more than three stitches in a block I weave the unused colour across the back of the work. This creates shorter strands which are important to keep the tension neat and even. It also means that they are less likely to get caught and pulled.

Another thing you will see me doing in the video is taking both yarns to the end of every row. Not only does this ensure that I have both colours ready for use at the beginning of the next row, but it also means that this whole section of fabric is double-thickness with the strands travelling all the way across each row from the first stitch to the last.
There are two slip-stitch stripes for which there is a video demo for if you need some extra guidance. Just watch out for Rows 12-17 where you are instructed to wind off a length of Electric Green yarn to knit three rows. This is to cut down on the amount of loose ends, which consequently will save you both time and yarn as there will be minimal wastage. Just remember to keep the stitches spread to the correct width on the needle as you work the slip-stitch row otherwise the knitting may pucker.
SQUARE 2, RAINBOW: this square is much easier to knit than Square 1, it’s a textured stripe with beads. And if you have not tried slip-stitch beading before, then this is your big opportunity to give it a go – it is great fun and once you get the hang of it, I think you will find it really easy to do!
Videos to watch for assistance with this square:
- How to pick up stitches along a cast-off edge (to knit the next square)
- How to thread beads onto your yarn
- How to bead, the slip-stitch method

To begin this square you need to pick up 37 stitches along the cast-on edge of Square 1, and if you are unsure about how to do this, check out my tech video – it shows you where to pick up the stitches and how to ‘miss’ stitches (Square 1 has 39 stitches and Square 2 has 37 stitches). You may wonder why you are not instructed to just ‘knit’ on the next square rather than casting off and picking up. It's all down to two things, the strength of the knitted fabric and the finish you get. The yarns in this project are lightweight and consequently they create a fabric that is quite flimsy, so the added seams between the squares give the knitting more strength. And in terms of finish, the squares will have better definition with the corners and edges sitting lovely and neat and straight where the stitches have been been picked up – you will have the perfect knitted square!
SQUARE 4, CRAZY CABLE: this colourful square combines cables with intarsia and is a bit of a rollercoaster ride in terms of technique, but it’s a very exciting one! However, if you feel you need some assistance with it then there are several tech videos to help you.
Videos to watch for assistance with this square:
- Square 4: Crazy Cable, intarsia cast-on
- Square 4: Crazy Cable, how to cross yarns over on a right side row (with increases) and a wrong side row
- Square 4: Crazy Cable, intarsia cables (c7b) on a right side row
- Square 4: Crazy Cable. Intarsia cables (c7f) on a wrong side row
First of all I would highly recommend that you watch the videos before you start knitting this square, beginning with the one which demonstrates how to cast on in several colours (intarsia cast-on). It is way too tricky to write how to do this in the blog, so the video will give you the best guidance. And if you want to cast on while you are watching it, then use the pause button if you need to stop and catch up at any point.
I think that it’s essential that you use bobbins for this square as they will help you to manage the nine balls of yarn more easily. There are many different types that are available but I prefer these Pony ones. They are sold in sets of ten and are very good value. You can wind a lot of yarn onto them and they can be ‘locked’ (as you will see in the video), which means they can be kept short and under control – there’s nothing worse than unruly bobbins! I filled each bobbin up and found that I had plenty of each colour to complete the square. You don’t want to run out of yarn as a join in the middle of the square would be difficult to hide and tricky to get neat. Any leftover yarns can be saved and used for other squares where small amounts are needed.

Above: this is Mary's Crazy Cable in progress. She is test knitting the project and found that the bobbins were an absolute lifesaver!
Once you have cast on all the stitches there is another video which shows you how to work Row 1, this is an increase row. This is probably the trickiest row in the square, but once you’ve completed this all of your stitches are set up and ready to go.
When you pull on the yarns after a colour change which I suggest you do to help close up the gaps and keep the stitches neat, be very careful with the Felted Tweed yarns as they are not very strong and could break if they are pulled too tightly. So just pull on them firmly but gently to avoid this happening.
From Row 3 onwards you can choose to work from worded instructions or from a chart. You might prefer one to the other, or you might choose to work from both. If you are unfamiliar with a cable chart but want to give it a go, you could read a row from the worded pattern and compare it to the same row on the chart, and then how the chart works should become clear.
The cables in this square are all c7b, and they occur on both right side and wrong side rows. There are two videos which demonstrate exactly how the cables are knitted, and you are also shown how to cross the yarns over so that there are no gaps between the colour changes. There is also an explanation of how to c7b (cable seven stitches to the back) in the Abbreviations list on page 15 of your June mail out.

There is a lot going on in this square, however if you use the videos to assist you with the techniques then you will be fine, and I think you will astonish yourself with what you can do! You need to be relaxed before you start this one, so make yourself a cuppa (a bit of cake would help too!), get yourself comfortable, take a deep breath and off you go!...
BLOCKING AND PRESSING YOUR SQUARES IS VERY IMPORTANT, and if you want a professional look to your cushion cover, then this will really help you to achieve it. Blocking your squares ensures that they are all a uniform size which will make the joining of them together so much easier to do. You might find that you have to ease some of them in or out to get them to the same measurements as your other squares, and this is fine - I had to do this with some of mine and they all blocked to the same size. If your individual squares measure slightly bigger or smaller than 13.5xm x 13.5cm, then this should not be a problem. But you will need to decide on what size you are going to block them all to and stick to this throughout the whole cushion front panel.

Above: I use a June Tailor blocking board for blocking my squares, the grid lines on it are very helpful for getting the measurements correct.
Blocking is the pinning out of your knitting, and, unless instructed otherwise, you should always pin it out with the wrong side facing upwards. Pin frequently along each edge, keeping all four edges as flat and even as possible. There is no need to use heat to press your squares. Much more preferable – and much safer too! – is cold water. So, if you have one available, fill up a plant spray bottle and use this to generously wet down the knitting, making sure that the water is dispersed right across the knitting from edge to edge. And then simply leave it to dry completely before removing the pins.
Pressing is the process of applying either heat or water to your knitting which relaxes the stitches and softens the fibres, resulting in a much more fluid and softer feeling fabric.
Blocking and pressing also helps the edges of the knitting stay flat rather than curling over, as is the tendency with most stitch structures.
I would suggest that you block and press your front panel squares after you have knitted each one. I think it’s far easier to do this as you go along rather than leaving them all to the end. It also ensures that as you work through the project they are all knitting up to the same measurements.
AND FINALLY FOR THIS MONTH, IT’S TIME TO HAVE A GUESS AT THE TITLE OF THE MYSTERY CUSHION! Each month I am going to give you a letter which is in the title. Then if you think you might know what it is, drop us a line and we will let you know if you are right.
This month the letter I am giving you is ‘R’:
_ _ R _ / _ _ _ _ _ _ _
If you think you might know what it is, please email your answer to Sue at sue@debbieabrahams.com to see if you are right. And if you are then with your permission we will include you in the list of correct guessers in the July blog. And if you are not, then it’s time to guess again!
It feels so good to get another 'mystery' project launched, and hopefully my super colourful knitting adventure is going to keep all of you happy and motivated for the next five months! We are always very keen to hear your thoughts and ideas about the theme of the cushion, so don’t forget to send in your guesses. And if you have any photos or stories about your Mystery Cushion knitting, then please send them in to us aswell so that they can be shared with the members in the next blog - it’s always lovely to hear from you and to see what you are getting up to! So, it's time now to get your knitting needles at the ready and make a start. I am going to sign off and wish you many hours of happy knitting this month. Take care everyone, enjoy your June squares, and I will see you back here in July when the next three squares will be revealed! Debbie, x


