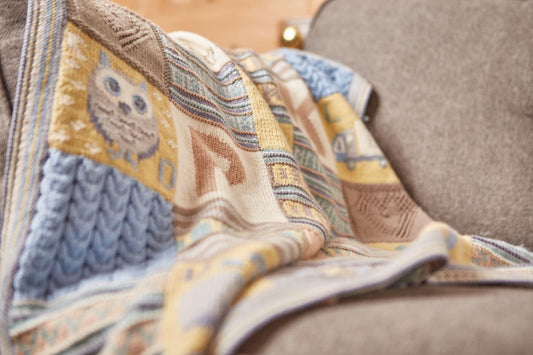
HELLO AND WELCOME TO THE AUGUST INSTALMENT OF THE 2022 MYSTERY CUSHION CLUB! This month you have the final three squares for the Front Panel to knit which are a mix of familiar squares and one completely new one, so prepare yourself for a busy and very colourful month!
There is no intro vlog from me this month, but you will find all the help and advice you need for the August instalment in the written blog, so please make sure you give it a good read before you start knitting. In addition to this there are four new tech vids to assist you, so these are worth a look too if you need some guidance. Here they are!
- Square 5: the Intarsia technique
- Square 5: how to knit contrast coloured bobbles
- Square 5: chain stitch
- Square 6: how to pick up stitches to knit Square 6
THIS IS THE REMINDER OF THE TECH VIDS THAT ARE IN THE JUNE BLOG:
- How to thread beads onto your yarn
- How to bead, the slip-stitch method
- How to bead, the hooking-in method
- How to pick up stitches along a cast-off edge (to knit the next square)
- Square 1, Hearts & Flowers: the fairisle technique
- Square 1, Hearts & Flowers: how to work rows 12-17
- Square 4, Crazy Cable: intarsia cast-on
- Square 4, Crazy Cable: how to cross yarns over on a right side row (with increases) and a wrong side row
- Square 4, Crazy Cable: intarsia cables (c7b) on a right side row
- Square 4, Crazy Cable: intarsia cables (c7b) on a wrong side row
THE SECOND SET OF PATTERNS WERE EMAILED TO ALL THE MEMBERS ON 15TH AUGUST, so you should find an email from us in your inbox with a link to the August file.

The printed patterns (for those who paid for them), were posted to overseas members on the 9th August and to the UK members on the 12th August.
You can also download your pattern files from your account on our website.
SO, WHO’S UP FOR ANOTHER MYSTERY KAL?!? ON FRIDAY 26TH AUGUST WE WILL BE OPENING SIGN-UPS FOR THE 2023 MYSTERY BLANKET CLUB! You will receive an email alert as soon as it goes live which will tell you all about the Club and there will be some snippets of information about the design and the colour palette too – without giving the game away of course!
We have an Early Bird offer for everyone who signs up before 30th September which will be revealed when we launch the sign-ups. So, with places limited to 500 members, it would be wise to sign up early – you won’t want to miss out!

Above: Mystery Blanket 2012, Celebration of Sport.
If preferred, you can choose to spread your payments over several months rather than paying in one go by opting for our Splitit payment plan. There will be no administration or interest fees for this so you will pay the same amount as those who make a single payment. Everyone who uses the payment plan will be entitled to our Early Bird special offer.
At the moment the yarns are still in the planning stage, so this is just a taste of the colours I’m playing about with. It’s a vibrant collection with plenty of depth and contrast. I’m loving those browns and greens combined with vivid turquoise and gold. And aren’t those purple shades just fabulous too!?!

And of course, there will be oodles of sparkling beads, knitted into stripes, fairisle and intarsia patterns and various stitch structures. I have some very exciting news as well about the yarns I am using for the project, which I will reveal when we launch the memberships. Intrigued?!? – then keep an eye on your inbox and from the 26th August you will be able to secure your place on my brand new and super exciting ‘mystery’ KAL!
THERE ARE THREE FRONT PANEL SQUARES TO KNIT THIS MONTH:
FRONT PANEL, Square 3: Leaves and Butterflies – fairisle butterfly and leaf motifs with hooked-in beads:

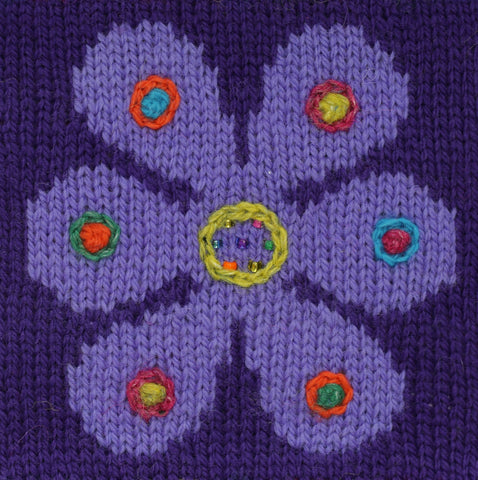
FRONT PANEL, Square 5: Bliss – intarsia flower motif with hooked-in beads, bobbles and chain stitch embroidery:
FRONT PANEL, Square 6: Crazy Cable 2 – intarsia cables:

In addition to the tech vids, here are some extra tips to help you with your knitting this month:
SQUARE 7, BUTTERFLIES AND LEAVES: this square uses the fairisle technique and has rows of a slip-stitch stripe pattern between the bands of leaf and butterfly motifs.
Videos to watch for assistance with this square:
- How to pick up stitches along a cast-off edge (to knit the next square) (JUNE blog)
- How to bead, the hooking-in method (JUNE blog)
- Square 1: Hearts and Flowers, the fairisle technique (JUNE blog)
- Square 1: Hearts and Flowers, how to work rows 12-17 (JUNE blog)
This square has the same leaf and butterfly fairisle patterns as Square 7, but the placement of the motifs and the colours have been swapped around.
I need to point out there is a small error in the fifth Pattern note and tip on page 5 of the August mail out. It says that one stitch is decreased on row 11 and one stitch is increased on row 35, but it should be the other way round. So it should read as:
- there is a variable stitch count with one stitch increased on row 11 and one stitch decreased on row 35.
These increases and decreases are to accommodate the difference in the number of stitches between the leaf fairisle pattern and the butterflies. On Row 11 on page 5, you are instructed to do the increase (m1), and although this row is shown on Chart 1 on page 7, the chart does not show the increased stitch.
Likewise, On Row 35 on page 6, you are instructed to do the decrease (skpo), and although this row is shown on Chart 3 on page 7, the chart does not show the decreased stitch.
SQUARE 5, BLISS: so, this is it, the centre square of the Front Panel! Did you guess what it was going to be? I decided to go for big and bold and the motif of a simplified flower seemed the perfect option – I hope you agree!
Videos to watch for assistance with this square:
- How to pick up stitches along a cast-off edge (to knit the next square) (JUNE blog)
- Square 5: the Intarsia technique (AUGUST blog)
- Square 5: how to knit contrast coloured bobbles (AUGUST blog)
- Square 5: chain stitch (AUGUST blog)
- How to bead, the hooking-in method (JUNE blog)
There’s a lot going on in this square, but there’s no need to panic as the four new tech vids this month will guide you through it. The Pattern notes and tips are also essential to read before you start knitting as they give lots of advice about the pattern and what to watch out for.
So, this square is intarsia, which means that you will need to knit each section of colour using a new bobbin or ball of yarn that you have wound off. Although you are only knitting with two colours (Amethyst and Garnet), you will need to wind off more than two bobbins. If we look at row 3 of the chart, there are five sections that each require a bobbin – three of Amethyst and two of Garnet. The tech vid for intarsia this month shows you how to knit this row using five yarn bobbins.

There are no hard and fast rules about where you should join in a new bobbin and ultimately, it’s up to you. However, you should always bear in mind that intarsia is a single thickness piece of multi-coloured knitting and therefore carrying yarns across the back of the work should be kept to a minimum – it’s not fairisle and using that technique for this square will severely affect the tension and yarn quantities too.
Having said that, you could opt to use one bobbin of Garnet when you get to chart row 11 and carry it across the single stitch of Amethyst in the centre – I did this, and it looks fine. Then you could continue to use one bobbin of Garnet when you reach chart row 16 where there are two new petal shapes. But you would need to carry Garnet across the back of Row 15 after using it on stitch 25 and leave it at stitch 29 or 30 so it is in the correct position to pick and use on Row 16. The sections of Amethyst at this point would benefit from being on separate bobbins - you would need four of them for chart rows 16-19.
The multi-coloured bobbins are knitted by introducing the contrast colour into the work on the purl row prior to the bobble, however this is not shown on the chart as it is already a little chaotic with chain stitch and bobble information. However, you will find these rows written out in full on page 9 of the August mail out, so you will need to read these rows alongside the chart.

The bobbles themselves are fairly easy to knit and are created by knitting several times into the same stitch using the contrast colour yarn – this is abbreviated in the pattern as ‘mb’. An explanation of how to make a bobble can be found in the Abbreviations on page 15. There is a tech vid this month which shows you how to join in the contrast yarns and how to knit the bobbles, so it’s worth a viewing before you have a go at them yourself.

Above: showing the wrong side of Square 5.
After the square has been knitted, blocked and pressed, a small circle needs to be embroidered around each bobble using the chart and image as guides. In addition to these there is one larger circle in the centre of the flower embroidered around the hooked-in beads using Sulfur yarn. Please note that this is not shown on the chart, but you can see it on the image on page 8.

Just to clarify, on the lower right petal it’s an Electric Green bobble with Coral chain stitch; lower left petal is a Sulfur bobble with Barbara chain stitch; centre right petal is a Barbara bobble with Turquoise chain stitch; centre left petal is a Coral bobble with Electric Green chain stitch; upper right petal is a Sulfur bobble with Barbara chain stitch; upper left petal is a Turquoise bobble with Coral chain stitch.
There, now you’re all set to make a start! So grab your bobbins and off you go!
SQUARE 6, CRAZY CABLE 2: this square is similar to Square 4, but the colours of the cables have been swapped round and they twist in the opposite direction.
Videos to watch for assistance with this square:
- Square 6: how to pick up stitches to knit Square 6 (AUGUST blog)
- Square 4: Crazy Cable, how to cross yarns over on a right-side row (with increases) and a wrong side row (JUNE blog)
If you can remember back to June when you knitted Square 4 then a lot of those same techniques apply to this square, you’ve just got a different set up of the colours, and you are beginning it by picking up stitches along the cast-off edge of Square 5 rather than casting on. There are a couple of tech vids to assist you, including one in this blog which shows you how to pick up the stitches. It uses long tails and the yarns are on bobbins, so it may be worth a watch if you have not done this before.

Above: showing the wrong side of Square 6.
The cables in this square are slightly different too and are all c7f instead of c7b, which means that they twist to the left instead of to the right. There is not a tech vid to show you how to c7f, however, the instructions for it can be found on page 15 of your August mail out. The tech vids from the June blog that show you how to cable can be watched to remind you how to change colour across the cabled rows. However, remember that it’s c7b that is demonstrated and not what you will be knitting for this square, so you will need to check the Abbreviations list for c7f instructions.
AFTER YOU HAVE COMPLETED THIS INSTALMENT ALL THE SQUARES FOR THE FRONT PANEL WILL BE COMPLETED, so the next task is to sew them together to create one block. I will include instructions for this in the fourth mail out next month. However, if you want to crack on and get ahead, that’s absolutely fine. You could refer to the tech vids in the August Mystery Blanket blog for sewing up guidance if needed, where you will find demos of both horizontal and vertical Mattress stitch. And here are some extra tips that you might find useful too…

I would recommend using Mattress stitch for sewing together your strips. Here are some tips on the technique if you have not tried it before.
Before you start sewing together the three strips for the Front Panel, it is advisable to make a note of the number of rows in each square. Then you will be able to work out where you need to ease in rows if one square has more rows in it than another
This is how Mattress stitch works vertically:
Vertical (to sew together your strips): with right sides facing and with two strips sitting next to each other, take the needle from the back to the front of the work under two bars at a time, inserting the needle under the bar between the edge stitch and the next stitch in. To keep the edges level at the bottom, begin by taking the needle under the first bar of the first square (the one on the left), then take the needle under the first bar and the next one up (two bars) of the second square (the one on the right). After this take the needle under two bars on each side, zig-zagging back and forth between the two strips, and making sure that your needle always goes back into the same gap between the bars each time you take it under the bars.
So how do you ease in rows? You can do this quite simply using Mattress stitch by taking the needle under one bar instead of two whenever you need to ease. If there is just one row to be eased, I would advise that you do this in the middle of the square. However, if with other squares there are more rows to ease in then you can repeat this as many times as required along the edge that needs to be eased in, dividing the number of easings as equally as possible along the seam.
SHEELAGH KENDRA FROM CATERHAM IN SURREY HAS A FABULOUS TIP FOR THE CRAZY CABLE SQUARE. She sent in some photos to show how she manages all those bobbins of yarn, and she thought it might be helpful to some of you. This is what she had to say:
“I’ve a helpful tip for the Crazy Cable square in the cushion. I used a tray and lined up my bobbins after each row then turned the tray round and was ready to start the next with no twisting of the yarns. The other bonus is that you can do it on your lap. I’m probably late to the party with this and everyone else is already doing it, but it might help someone. I knew that tray would come in useful one day!”


This is a super tip and one that looks easy to do. I am sure it will really help those who are struggling with keeping those unruly bobbins tidy. I’m definitely going to give it a go! Thanks Sheelagh!
THERE WILL BE SOME NEW KIT AND PRODUCT LAUNCHES IN OUR ONLINE SHOP VERY SOON, SO HERE ARE SOME DATES THAT YOU MIGHT WANT TO POP IN YOUR DIARY…
- Friday 26th August: Mystery Blanket 2023 launch!
- Friday 16th September: Cali Bag kit – a textured and beaded bag in soft shades of blue and cream using Rowan Revive, inspired by the seashore. Kit includes yarn, beads and a magnetic clasp.
- Friday 16th September: Cali Purse kit – a textured and beaded purse using Rowan Revive in soft shades of blue and cream, inspired by the seashore. Kit includes yarn, beads and a magnetic clasp.
- Friday 28th October: Festive Mystery Knit Boxes – the perfect idea for a gift or a treat for yourself. Debbie’s Mystery Box includes ten mystery gifts including a brand-new festive knitting kit.
- Friday 25th November: Let It Snow Wall-hanging kit – a fairisle and beaded design using Rowan Felted Tweed and Baby Cashsoft Merino in soft shades of purple, lilac and white. This was the kit that was included in the 2021 Festive Mystery Knit Box.

Above: Cali Purse, new kit for September.
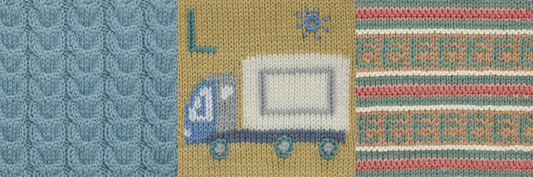
AND FINALLY FOR THIS MONTH’S BLOG, IT’S TIME TO HAVE ANOTHER GO AT GUESSING THE TITLE OF THE MYSTERY CUSHION! And with still no correct guesses so far, it looks like you are all in need of some help. So, this month I am going to give you two letters…which are ‘E’ and ‘A’:
_ _ R E / _ O _ _ E A _
Has that made it any easier? If you’ve had a lightbulb moment and think you know what it is, email Sue at sue@debbieabrahams.com to see if you are right. I am sure someone will guess it soon, there’s only a few more letters to go. Go on, have a go! And if you guess it correctly we will (with your permission) publish your name in the next Mystery Cushion blog.
I feel that we’ve reached a milestone this month with the Front Panel completed, leaving just the two back panels to knit before your Mystery Cushion is completed. Hopefully you are continuing to enjoy this journey with me and are learning lots of new knitting techniques along the way too! The recent hot weather here in the UK has not been ideal for knitting, but with cooler weather forecasted over the coming weeks (and hopefully some rain too), I am looking forward to getting stuck into sampling for some new projects for the Autumn. I’ve got lots of exciting new things in store for you, so make sure you keep an eye on your inbox for all our news alerts. And don’t forget to keep in touch with us and send in any stories, ideas or pics you have of your ‘mystery’ knitting – we always love to hear from you! Until next month, take care, keep cool and happy knitting! Debbie x