WELCOME TO THE PENULTIMATE INSTALMENT OF THE 2023 MYSTERY BLANKET! Apologies that this blog is launching mid-month, but the past few weeks have been extremely busy with two of my Mystery clubs coming to an end, a new Mystery club beginning and alongside that I’ve been out and about running workshops. So all in all it’s been a bit crazy! However, I’ve managed to find a few quiet hours today to catch up with you, so hopefully you will find some time in between all your knitting to take a rest and catch up with me!

The opening image is of all the lovely ladies and gentlemen who joined me in September for a fabulous knitting workshop break in Scotland. You can read more about that later in the blog and find out what we knitted during our stay at Lochside.
There is no intro vid from me this month, but I will return at the beginning of next month (yikes, that’s only about two weeks away!), for the reveal of this year’s Mystery Blanket. There are no new tech vids, so after a reminder of what is already out there for you to access, I’ll get straight on with all the news and advice for this month’s squares.
This is a reminder of the techniques that were covered in previous blogs:
- Square 8, Pixies & Nixies (both options): how to knit the decorative slip-stitch (February)
- Square 8, Pixies & Nixies (Option One): the Fairisle technique (February)
- How to knit the decorative loop stitch (February)
- How to bead, the hooking-in method (February)
- How to carry yarns up the side of the work (February)
- How to pick up stitches along a cast-off edge (February)
- Mattress stitch (horizontal) (February)
- How to cable (February)
- How to knit a contrast-coloured bobble (February)
- Square 16, Forager: how to knit the exaggerated decorative purl stitch (February)
- Understanding lace stitches (March)
- How to thread beads onto your yarn (March)
- How to bead, the slip-stitch method (March)
- The intarsia technique (March)
- How to add Chain stitch to your knitting (March)
- How to add Swiss darning to knitting (March)
- How to pick up stitches along a cast-off edge using several colours (April)
- Square 23, Dragonfly: Option Two (Rows 1-7) (June)
- Square 49, Flora (Option Two) (September)
- Mattress stitch (vertical) (September)
THE PRINTED PATTERNS HAVE BEEN POSTED TO THE MEMBERS WHO OPTED FOR THEM, with the overseas sent on Thursday 21st September and the UK on Wednesday 27th September. I am hearing from some of the members that the patterns are arriving in the post after the 1st of the month, and if this has affected you then I apologise for the delay.

Postal systems around the world differ so much in their speed and efficiency, and some arrive within a week, whilst others take 2-3 weeks to be delivered. If you are sitting waiting for your printed brochure to arrive then remember that you can always download the file and either work from the digital version or print off a few pages until your patterns arrive. At this point in the blanket there are lots of things that need doing such as sewing in ends and sewing strips together so you could always get on with these tasks in the meantime.
SIGN-UPS FOR THE 2024 MYSTERY BLANKET CLUB ARE OPEN SO IF YOU HAVEN’T SIGNED UP YET, THERE IS STILL TIME! Our sign-up deadline is 31st December, however, the Club will close as soon as all of the memberships are sold. So it’s best not to to delay and get yourself onboard today!
What’s in store for 2024?
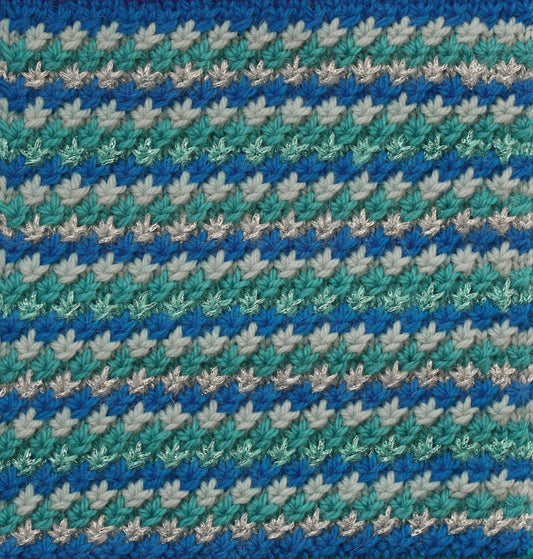
I am absolutely thrilled to be using my own bespoke Light Wool DK yarn again for this project which has been produced by the wonderful team at Laxtons in North Yorkshire, UK. I have combined it with a few of my most favourite Rowan yarns including Felted Tweed, Alpaca Soft, Kidsilk Haze and Soft Yak. Vibrant shades of teal and ocean blue graduate into bold purples and pinks, which are softened with pale turquoise, dreamy lilac and blush pink laced with flecks of cool silver and pale gold. There are plenty of sparkling beads in it too!

The blanket design includes the techniques of intarsia, fairisle, lace, textured stitches, stripes and beads, offering you a feast of squares to knit up over ten months. And there will be a choice of two options - as there is this year - for the trickier squares (fairisle and intarsia), enabling both novice and experienced knitters to participate in this unique knitting experience.

My monthly tech vids have been extremely popular this year, so I am pleased to say that I will continue with these in a dedicated monthly blog so that you have all the help and support you need as you work your way through the forty-nine squares.
The club begins on 1st February 2024 and runs for ten months until November 2024.
The finished size of the blanket is approximately 135cm x 135cm.
What does my membership include?
Each member will receive a knitting kit which includes over forty balls of premium quality yarn, ten sets of emailed patterns (with the option to purchase additional printed patterns), Debbie Abrahams size 6 beads and a woven label. The kit will be posted in two halves with the first one delivered in February, followed by the second one in May.
NEW! Download pattern option
For the first time we are offering the ten sets of patterns as monthly downloads enabling you to use yarns and beads from your own stash to knit the blanket. The list of yarns and beads for the first part of the kit will be released a week before the project begins. If you decide to purchase the yarn and beads for the project yourself, the cost of all the materials, like for like, is approximately £340. We are unable to guarantee that all of the colours in my Light Merino DK yarn will be available to purchase so substitutes may have to be used.
Choose to spread the cost of your payment
For those who would prefer to pay in instalments we have an easy-to-use payment system in place called Splitit which enables you to make your payment between 2-4 months. This means you can secure your membership today with a deposit with nothing more to pay until next month. Simply select Splitit at checkout when you make your first payment and then your remaining payments will be taken automatically from your account. If you choose this option you will still be included in the Early Bird Special Offer.
How do I make my purchase?
It’s really easy. You just need to visit the shop on our website and there you will find the 2024 Mystery Blanket Club for sale. There are several options to choose from starting with the basic package which includes the full knitting kit and emailed monthly pattens. Or you can upgrade and add on printed patterns (UK and overseas), and/or Special Delivery (UK only). All overseas parcels are posted by Tracked International Delivery.
Memberships are limited and when they have sold out the club will be closed. So if you want to be part of this unique knitting experience and don’t want to miss out on all the fun and excitement next year, pop across to our shop and get yourself signed up today. And then you’ll have peace of mind that you are onboard again for another great knitting adventure with me next year. I can hardly wait for it to begin!
SO, THIS IS YOUR LAST CHANCE TO HAVE A GO AT GUESSING THE TITLE. We have had one more correct guess, and this time the congrats go to Robyn Tommasini, so very well done to you!
With almost all of the letters revealed, the last one I am going to give you before the reveal of the title next month might just trigger the correct answer. Let’s see…
This month the letter (and final letter) I am giving you is... “C”:
T H _ / _ N C H A N T _ D / _ O R _ S T
Most of you have already guessed it, but if you are still unsure, here’s your opportunity to give it one more go. So what do you think?!? Email your answer to sue@debbieabrahams.com and if you are right, with your permission we will publish your name in the final blog. Good luck everyone!
THERE ARE FIVE SQUARES TO KNIT THIS MONTH, with alternative options for four of the squares:
Square 5, Goblin – cable pattern with slip-stitch beads (same for both options):

Square 6, Hawthorn (Option One) – fairisle pattern with stripes, textured stitches and hooked-in beads:

Square 6, Hawthorn (Option Two) – textured pattern with stripes and hooked-in beads:

Square 7, Flora 2 (Option One) – intarsia flower motifs with hooked-in beads and Swiss darned and chain stitch details:

Square 7, Flora 2 (Option Two) – textured pattern with mini cables and hooked-in beads:

Square 13, Deer (Option One) – intarsia deer with slip-stitch beads and Swiss darned and chain stitch details :

Square 13, Toadstool 2 (Option Two) – textured pattern with hooked-in beads:

Square 14, The Pixies & Nixies Are Back! (Option One) – fairisle pattern with stripes, textured stitches and hooked-in beads:

Square 14, The Pixies & Nixies Are Back! (Option Two) – textured pattern with stripes and hooked-in beads:

On each pattern page there is a list of Pattern notes and tips that are worth reading before you start to knit each square. These bits of advice will help you and give pre-warnings as to what look out for in the pattern instructions. Also take note of the description under the title of each square as this tells you what the stitch structure is.
You can use the tech vids from previous blogs to help you knit your squares. But here are a few extra tips to assist you:
SQUARE 6, GOBLIN: this is a repeat of a square you have knitted previously, it was in Mail Out 6 which was not too long ago, so hopefully you will remember the techniques. But if not then these tech vids will help you.
Videos to watch for assistance with this square:
- How to pick up stitches along a cast-off edge (February blog)
- Mattress stitch (horizontal) (February blog)
- How to cable (February blog)
- How to thread beads onto your yarn (March blog)
- How to bead, the slip-stitch method (March blog)
The beads are threaded on for this square, so take care to thread them on in the correct order. The instructions for this are on page 6 of your October mail out.

You can work from worded instructions or from a chart. If you have not knitted this square from a chart before then maybe give it a go this time. On the chart you can see very clearly on which rows the cables are worked, where the beads are placed and where the stitches are worked through the backs of the loops. And if you get stuck or are unsure about how to read a row, then you can reference the same row in the worded instructions which will spell out what you need to do.
SQUARE 6, HAWTHORN (Option One): this is a square you will be familiar with as it is the same as Square 44 and similar to Squares 2 and 48 from previous mail outs.
Videos to watch for assistance with this square:
- How to pick up stitches along a cast-off edge (February blog)
- Mattress stitch (horizontal) (February blog)
- Square 8, Pixies & Nixies (both options): how to knit the decorative slip-stitch (February blog)
- Square 8, Pixies & Nixies (Option One): the Fairisle technique (February blog)
- How to bead, the hooking-in method (February blog)
- How to carry yarns up the side of the work (February blog)
This is the original version that you knitted way back in April, it has Barn Red stripes rather than Ginger (which replaced Barn Red in squares 2 and 48).

It is advisable to choose the same option that you knitted for Square 44 to keep the design balanced.
SQUARE 6, HAWTHORN (Option Two): in this square the fairisle panels in Option One are replaced with a textured, beaded decorative stitch.
Videos to watch for assistance with this square:
- How to pick up stitches along a cast-off edge (February blog)
- Mattress stitch (horizontal) (February blog)
- Square 8, Pixies & Nixies (both options): how to knit the decorative slip-stitch (February)
- How to knit the decorative loop stitch (February blog)
- How to bead, the hooking-in method (February blog)
- How to carry yarns up the side of the work (February blog)
As with Option One, I would advise that you choose the same option that you chose for Square 44.
I think the biggest challenge with this square is probably remembering the needle size changes which can be easily missed – especially as you’ve knitted this square before and might only glance at the pattern as you are working through it rather than reading every row. They are in the pattern to keep the width of the square uniform when other stitch structures are being knitted. They swap between 2.50mm, 3.00mm and 3.50mm and are hi-lighted in the instructions to draw your attention to them.
SQUARE 7, FLORA (Option One): this square is very similar to Square 49 from last month’s mail out. However, if you look closely you will see that it is a mirror-image and therefore not identical.
Videos to watch for assistance with this square:
- How to pick up stitches along a cast-off edge (February blog)
- How to pick up stitches along a cast-off edge using several colours (April blog)
- Mattress stitch (horizontal) (February blog)
- The intarsia technique (March blog)
- How to bead, the hooking-in method (February blog)
- How to add Swiss darning to knitting (March blog)
- How to add Chain stitch to your knitting (March blog)
It would be wise to choose the same option that you knitted for Square 49 as this will keep the top corners of the blanket symmetrical (and you know how much I love symmetry!).
As with Square 49, you need to use several separate balls of yarn (or bobbins) to knit this square, remembering that it is a single thickness multi-coloured piece of knitting so carrying yarns across the back should only be done when absolutely necessary.

After knitting this square you will need to block and press it before adding the embroidery. If you chose to do your own colours of embroidery on Square 49 (which I suggested in the previous blog), then you could do the same again here. And if you prefer, they could be different to each other just to give it a unique twist!
SQUARE 7, FLORA (Option Two): this is the alternative square to knit which replaces intarsia with a textured stitch.
Videos to watch for assistance with this square:
- How to pick up stitches along a cast-off edge (February blog)
- Mattress stitch (horizontal) (February blog)
- How to bead, the hooking-in method (February blog)
- Square 49, Flora, Option Two (Rows 5 and 7)
I have had some feedback on this square that it is a tricky one to knit. However, I also know that there are some of you out there who enjoy a challenge. Both options are an investment of time (and patience!), but they are worth it and will finish off the top corners of your blanket beautifully!

Just one last thing to mention about this square is the needle size. It is one metric size smaller than the main needle and this is important otherwise your square will knit up too wide and too long. So make sure that you grab the right needles before you begin.
SQUARE 13, DEER (Option One): this is a new square and a new creature to challenge your intarsia skills!
Videos to watch for assistance with this square:
- How to pick up stitches along a cast-off edge (February blog)
- How to pick up stitches along a cast-off edge using several colours (April blog)
- Mattress stitch (horizontal) (February blog)
- The intarsia technique (March blog)
- How to thread beads onto your yarn (March blog)
- How to bead, the slip-stitch method (March blog)
- How to add Chain stitch to your knitting (March blog)
- How to add Swiss darning to knitting (March blog)
I would recommend that you opt for the same square you chose for Square 37, Option One, which was Wise Old Owl.
As with all intarsia patterns, the key to success is in the preparation. So take time before you cast on to study the chart and work out how many small balls or bobbins of yarn you need. I have been asked how to gauge the amount yarn for an area of colour, however this is a tricky one to answer as it is dependant on the weight of yarn and your own tension. What you want to avoid is running out of yarn halfway through one section, so my method is to fill up each bobbin and then I know I will have enough for that section, and anything left over can be used for other areas or for other squares. Oddments and lengths can also come in useful for embroidery or for sewing together the squares, so be sure never to throw anything away until the project is completed.

If you need a reminder about how to pick up stitches to begin the square using several colours, you can go back to the April blog where you will find a tech vid for this. But if you are casting on rather than picking up stitches, you could take a look at the tech vid from the 2021 Mystery Cushion Club which shows how you do this:
https://debbieabrahams.com/blogs/news/mystery-cushion-club-post-1-june
There is some chain stitch embroidery to add to the knitting around the eyes using Blackberry yarn, and there are glints of Simply White in the eyes too which can be Swiss darned. In the Pattern notes and tips on page 22 I give more details about the embroidery including the colours to be used. So have a read of this, especially if you find it difficult to see all of these details on the image and chart.
SQUARE 13, TOADSTOOL (Option Two): if you knitted Option Two for squares 9, 37 and 41 then you will be familiar with this all-over textured, beaded stitch. It’s a really fun square to knit and is the choice to make if you don’t want to knit intarsia.
Videos to watch for assistance with this square:
- How to pick up stitches along a cast-off edge (February blog)
- Mattress stitch (horizontal) (February blog)
- How to bead, the hooking-in method (February blog)
This is the square with a variable stitch count. So it’s a good idea to count the number of stitches at the end of every row after there have been increases or decreases made, just to make sure you haven’t missed any.
Don’t forget that this square uses a smaller needle than the suggested main needle size of 3.50mm. So make sure you grab your 3.25mm needles and not the slightly larger ones!
SQUARE 14, THE PIXIES & NIXIES ARE BACK! (Option One): this square is the same as Square 42 from Mail Out 7.
Videos to watch for assistance with this square:
- How to pick up stitches along a cast-off edge (February blog)
- Mattress stitch (horizontal) (February blog)
- Square 8, Pixies & Nixies (both options): how to knit the decorative slip-stitch (February blog)
- Square 8, Pixies & Nixies (Option One): the Fairisle technique (February blog)
- How to bead, the hooking-in method (February blog)
- How to carry yarns up the side of the work (February blog)
I would recommend that you choose the same option that you knitted for Square 42. This is most probably the same choices you made for Squares 8 and 36.

There are several changes to needle sizes throughout this pattern, and the bold type will draw your attention to them. The largest of the needles is 3.75mm and this is needed for the fairisle section towards the top of the square. This jump up in a needle size from the main one will help to keep your fairisle neat and even. But you will also need to make sure that when stranding yarns across the back of the work the stitches are spread to the correct width on the needle to avoid puckering.
SQUARE 14, THE PIXIES & NIXIES ARE BACK! (Option Two): this is the easier option of the two and should match the choice that you made for Square 42.
Videos to watch for assistance with this square:
- How to pick up stitches along a cast-off edge (February blog)
- Mattress stitch (horizontal) (February blog)
- Square 8, Pixies & Nixies (both options): how to knit the decorative slip-stitch (February blog)
- How to knit the decorative loop stitch (February blog)
- How to bead, the hooking-in method (February blog)
- How to carry yarns up the side of the work (February blog)
As with Option One, there are several changes to needle sizes which will help to maintain a uniform width all the way to the top of the square. These are written in bold so that you don’t miss them.
When you’ve completed all these squares it’s time to put the flags out because you’ve completed another strip! And if you want to get ahead, you could start work on getting some more of your strips sewn together. So if you are ready for that, here we go…
LET’S BEGIN WITH A QUICK REMINDER ABOUT SEWING YOUR SQUARES AND STRIPS TOGETHER. If you have knitted your squares separately then you will need to join them together first to create strips 1, 2 and 3 (these are the three vertical rows of squares on the left side of the Piecing diagram on page 4 (Squares 1-7, 8-14 and 15-21). If you need some guidance with this, check out the tech vid in the February blog for horizontal mattress stitch which demonstrates this technique.

Once you have your three strips completed you can make a start. This is a guide to how to sew the squares together using Mattress stitch. It is important to note that these are my suggestions as to how to sew together the squares, but please feel free to use your own method and sequence if preferred.
In this blanket all of the squares are facing in the same direction (in some of the previous Mystery Blankets the squares were turned upside down or were positioned on their side). So this makes it much easier to sew together. All you need to watch out for is the number of rows, which as you know does vary from square to square. This means that some easing in will be required.
These instructions are based on taking the needle under 2 ‘bars’ at a time as demonstrated in the tech vid for vertical mattress stitch. To ease in a row, you will need to take your needle under one less bar on the side you are easing the extra row into.
Before we make a start, these are some extra tips on easing in rows:
- Garter stitch rows have a tighter row tension than stocking stitch, so for every row of Garter stitch (which is two knit rows), ease these two rows into one stocking stitch row.
- Slip-stitch beads (and slip-stitch patterns) have a tighter row tension than stocking stitch, so if you need to ease in some rows it is best to do this across beaded rows, taking the needle under more of the beaded rows than the stocking stitch rows.
- Fairisle usually has a looser row tension than stocking stitch, so if you need to ease in some rows it is best to do this across fairisle rows, taking the needle under more of the stocking stitch rows than the fairisle rows.
- For a square that has an all-over pattern, such as Square 10 Bracken, any easings need to be spread out evenly across the total number of rows (and not eased in all at one end or unevenly).
When there are two options for a square, I have given separate instructions for each option, so make sure that you check which one you need to follow for your choice of squares. If you have mixed your options then you will have to work out some of the easings yourself, but the piecing diagram on page 4 will help you with this.
These are my guidelines and do not have to be followed if you prefer to use your own method and calculations.
SEW STRIP 1 (squares 1-7) TO STRIP 2 (squares 8-14)
Sew Square 1 (Option One) (60 rows) to Square 8 (Option One) (66 rows): you need to ease 6 rows of Square 8 (Option One) into Square 1.
Along the edge of Square 1 (Option One) place a marker between Rows 30 and 31.
Along the edge of Square 8 (Option One) place a marker between Rows 33 and 34.
Ease in 6 rows as evenly as you can across the whole length of the squares, making sure that the marker on Square 1 (Option One) is matched to the marker on Square 8 (Option One).
Sew Square 1 (Option Two) (69 rows) to Square 8 (Option Two) (74 rows): you need to ease 5 rows of Square 8 (Option Two) into Square 1 (Option Two).
Along the edge of Square 1 (Option Two) place a marker on Row 35.
Along the edge of Square 8 (Option Two) place a marker between Rows 37 and 38.
Ease in 5 rows as evenly as you can across the whole length of the squares, making sure that the marker on Square 1 (Option Two) is matched to the marker on Square 8 (Option Two).
Sew Square 2 (Option One) (60 rows) to Square 9 (Option One) (60 rows): there are no rows to ease in.
Along the edge of Square 2 (Option One) place a marker between Rows 30 and 31.
Along the edge of Square 9 (Option One) place a marker between Rows 30 and 31.
There are no rows to ease in, just make sure that the marker on Square 2 is matched to the marker on Square 9.
Sew Square 2 (Option Two) (82 rows) to Square 9 (Option Two) (60 rows): you need to ease 22 rows of Square 2 (Option Two) into Square 9 (Option Two).
Along the edge of Square 2 (Option Two) place a marker between Rows 41 and 42.
Along the edge of Square 9 (Option Two) place a marker between Rows 30 and 31.
Ease in 22 rows as evenly as you can across the whole length of the squares, making sure that the marker on Square 2 (Option Two) is matched to the marker on Square 9 (Option Two).
Sew Square 3 (62 rows) to Square 10 (85 rows): you need to ease 23 rows of Square 38 into Square 31.
Along the edge of Square 3 place a marker between Rows 31 and 32.
Along the edge of Square 10 place a marker on Row 43.
Ease in 23 rows as evenly as you can across the whole length of the squares, making sure that the marker on Square 3 is matched to the marker on Square 10.
Sew Square 4 (Option One) (66 rows) to Square 11 (Option One) (60 rows): you need to ease 6 rows of Square 4 (Option One) into Square 11 (Option One).
Along the edge of Square 4 (Option One) place a marker between Rows 33 and 34.
Along the edge of Square 11 (Option One) place a marker between Rows 30 and 31.
Ease in 6 rows as evenly as you can across the whole length of the squares, making sure that the marker on Square 4 (Option One) is matched to the marker on Square 11 (Option One).
Sew Square 4 (Option Two) (82 rows) to Square 11 (Option Two) (63 rows): you need to ease 19 rows of Square 4 (Option Two) into Square 11 (Option Two).
Along the edge of Square 4 (Option Two) place a marker between Rows 41 and 42.
Along the edge of Square 11 (Option Two) place a marker on Row 32.
Ease in 19 rows as evenly as you can across the whole length of the squares, making sure that the marker on Square 4 (Option Two) is matched to the marker on Square 11 (Option Two).
Sew Square 5 (61 rows) to Square 12 (85 rows): you need to ease 24 rows of Square 12 into Square 5.
Along the edge of Square 5 place a marker on Row 31.
Along the edge of Square 12 place a marker on Row 43.
Ease in 24 rows as evenly as you can across the whole length of the squares, making sure that the marker on Square 5 is matched to the marker on Square 12.
Sew Square 6 (Option One) (66 rows) to Square 13 (Option One) (60 rows): you need to ease 6 rows of Square 6 (Option One) into Square 13 (Option One).
Along the edge of Square 6 (Option One) place a marker between Rows 33 and 34.
Along the edge of Square 13 (Option One) place a marker between Rows 30 and 31.
Ease in 6 rows as evenly as you can across the whole length of the squares, making sure that the marker on Square 6 (Option One) is matched to the marker on Square 13 (Option One).
Sew Square 6 (Option Two) (82 rows) to Square 13 (Option Two) (60 rows): you need to ease 22 rows of Square 6 (Option One) into Square 13.
Along the edge of Square 6 (Option Two) place a marker between Rows 41 and 42.
Along the edge of Square 13 (Option Two) place a marker between Rows 30 and 31.
Ease in 22 rows as evenly as you can across the whole length of the squares, making sure that the marker on Square 6 (Option Two) is matched to the marker on Square 13 (Option Two).
Sew Square 7 (Option One) (60 rows) to Square 14 (Option One) (66 rows): you need to ease 6 rows of Square 14 (Option One) into Square 14 (Option One).
Along the edge of Square 7 (Option One) place a marker between Rows 30 and 31.
Along the edge of Square 14 (Option One) place a marker between Rows 33 and 34.
Ease in 6 rows as evenly as you can across the whole length of the squares, making sure that the marker on Square 7 (Option One) is matched to the marker on Square 14 (Option One).
Sew Square 7 (Option Two) (63 rows) to Square 14 (Option Two) (74 rows): you need to ease 11 rows of Square 14 (Option Two) into Square 7 (Option Two).
Along the edge of Square 7 (Option Two) place a marker on Row 32.
Along the edge of Square 14 (Option Two) place a marker between Rows 37 and 38.
Ease in 11 rows as evenly as you can across the whole length of the squares, making sure that the marker on Square 7 (Option Two) is matched to the marker on Square 14 (Option Two).
SEW STRIP 2 (squares 8-14) TO STRIP 3 (squares 15-21)
Sew Square 8 (Option One) (66 rows) to Square 15 (64 rows): you need to ease 2 rows of Square 8 (Option One) into Square 15.
Along the edge of Square 8 (Option One) place a marker between Rows 33 and 34.
Along the edge of Square 15 place a marker between Rows 32 and 33.
Ease in 2 rows as evenly as you can across the whole length of the squares, making sure that the marker on Square 8 (Option One) is matched to the marker on Square 15.
Sew Square 8 (Option Two) (74 rows) to Square 15 (64 rows): you need to ease 10 rows of Square 8 (Option Two) into Square 15.
Along the edge of Square 8 (Option Two) place a marker between Rows 37 and 38.
Along the edge of Square 15 place a marker between Rows 32 and 33.
Ease in 10 rows as evenly as you can across the whole length of the squares, making sure that the marker on Square 8 (Option Two) is matched to the marker on Square 15.
Sew Square 9 (Option One) (60 rows) to Square 16 (72 rows): you need to ease 12 rows of Square 16 into Square 9 (Option One).
Along the edge of Square 9 (Option One) place a marker between Rows 30 and 31.
Along the edge of Square 16 place a marker between Rows 36 and 37.
Ease in 12 rows as evenly as you can across the whole length of the squares, making sure that the marker on Square 9 (Option One) is matched to the marker on Square 16.
Sew Square 9 (Option Two) (60 rows) to Square 16 (72 rows): you need to ease 12 rows of Square 16 into Square 9 (Option Two).
Along the edge of Square 9 (Option Two) place a marker between Rows 30 and 31.
Along the edge of Square 16 place a marker between Rows 36 and 37.
Ease in 12 rows as evenly as you can across the whole length of the squares, making sure that the marker on Square 9 (Option Two) is matched to the marker on Square 16.
Sew Square 10 (85 rows) to Square 17 (57 rows): you need to ease 28 rows of Square 10 into Square 17.
Along the edge of Square 10 place a marker on Row 43.
Along the edge of Square 17 place a marker on Row 29.
Ease in 28 rows as evenly as you can across the whole length of the squares, making sure that the marker on Square 10 is matched to the marker on Square 17.
Sew Square 11 (Option One) (60 rows) to Square 18 (Option One) (77 rows): you need to ease 17 rows of Square 18 (Option One) into Square 11 (Option One).
Along the edge of Square 11 (Option One) place a marker between Rows 30 and 31.
Along the edge of Square 18 (Option One) place a marker on Row 39.
Ease in 17 rows as evenly as you can across the whole length of the squares, making sure that the marker on Square 11 (Option One) is matched to the marker on Square 18 (Option One).
Sew Square 11 (Option Two) (63 rows) to Square 18 (Option Two) (86 rows): you need to ease 23 rows of Square 18 (Option Two) into Square 11 (Option Two).
Along the edge of Square 11 (Option Two) place a marker on Row 32.
Along the edge of Square 18 (Option Two) place a marker between Rows 43 and 44.
Ease in 23 rows as evenly as you can across the whole length of the squares, making sure that the marker on Square 11 (Option Two) is matched to the marker on Square 18 (Option Two).
Sew Square 12 (85 rows) to Square 19 (61 rows): you need to ease 24 rows of Square 12 into Square 19.
Along the edge of Square 12 place a marker on Row 43.
Along the edge of Square 19 place a marker on Row 31.
Ease in 24 rows as evenly as you can across the whole length of the squares, making sure that the marker on Square 12 is matched to the marker on Square 19.
Sew Square 13 (Option One) (60 rows) to Square 20 (72 rows): you need to ease 12 rows of Square 20 into Square 13 (Option One).
Along the edge of Square 13 (Option One) place a marker between Rows 30 and 31.
Along the edge of Square 20 place a marker between Rows 36 and 37.
Ease in 12 rows as evenly as you can across the whole length of the squares, making sure that the marker on Square 13 (Option One) is matched to the marker on Square 20.
Sew Square 13 (Option Two) (60 rows) to Square 20 (72 rows): you need to ease 12 rows of Square 20 into Square 13 (Option Two).
Along the edge of Square 13 (Option Two) place a marker between Rows 30 and 31.
Along the edge of Square 20 place a marker between Rows 36 and 37.
Ease in 12 rows as evenly as you can across the whole length of the squares, making sure that the marker on Square 13 (Option Two) is matched to the marker on Square 20.
Sew Square 14 (Option One) (66 rows) to Square 21 (63 rows): you need to ease 3 rows of Square 14 (Option One) into Square 21.
Along the edge of Square 14 (Option One) place a marker between Rows 33 and 34.
Along the edge of Square 21 place a marker on Row 32.
Ease in 3 rows as evenly as you can across the whole length of the squares, making sure that the marker on Square 14 (Option One) is matched to the marker on Square 21.
Sew Square 14 (Option Two) (74 rows) to Square 21 (63 rows): you need to ease 11 rows of Square 14 (Option Two) into Square 21.
Along the edge of Square 14 (Option Two) place a marker between Rows 37 and 38.
Along the edge of Square 21 place a marker on Row 32.
Ease in 11 rows as evenly as you can across the whole length of the squares, making sure that the marker on Square 14 (Option Two) is matched to the marker on Square 21.
FOR THE FINAL MAIL OUT YOU WILL NEED CIRCULAR NEEDLES TO KNIT THE EDGINGS. So it would be a good idea to get yourself prepped and ready for it before the final mail out is sent to you. You will need:
- a circular 2.75mm (US 2) (UK 12) 100cm length needle
- a circular 3.50mm (US 4) (UK n/a) 100cm length needle
- one 3.50mm (US 4) (UK n/a) needle for casting off the stitches.
If you have had to change your main needle size for this project, then you will need to make the same changes to the needles for the edgings.
WE’VE GOT SOME NEW KIT LAUNCHES COMING UP SOON WHICH YOU MIGHT WANT TO MAKE A NOTE OF IN YOUR DIARY (some of these dates have changed since they were last published).
- Friday 20th October: Cowl kit promotion –the 2021 Hell Bay project, Fraggle Rock in its original colourway and last year’s Festive Mystery Box project, Snowflake will be available to purchase for the first time as kits. A second colourway of the Fraggle Rock Cowl will be available in a few weeks’ time.
- Friday 10th November: Festive Mystery Knit Boxes – the perfect idea for a gift or a treat for yourself. Debbie’s Mystery Box includes ten mystery gifts including a brand-new festive knitting kit.
- Friday 18th November: our Festive Kits promotion begins, and you can grab yourself a kit at a discounted price for a limited period (offer excludes Festive Mystery Knit Boxes).
TOWARDS THE END OF SEPTEMBER I HEADED UP TO THE LOCHSIDE SPA HOTEL IN SCOTLAND WITH SUE FOR AN INSPIRED MINDS WORKSHOP, where we were joined by 27 very excited knitters – many of which were Mystery Blanket Club members (past and present!). This was a new location for our workshops – we’d never ventured across the English border before! - but it ticked all the boxes with fabulous food, an amazing workshop room with stunning views of the Loch, very comfortable accommodation and a great team who looked after us superbly well.


Inspired Minds is an events company that is co-owned by Jane and Andy Crowfoot and me. We set it up to run regular knitting and crochet workshops and holidays across the UK and have been in business together for the past ten years. Jane looks after the crocheters and I look after the knitters. Sometimes we run joint workshops and others are knit or crochet only. This workshop was knit only and run by me (and Sue).

It was a global event with knitters flying in from several different countries to join in the fun. Sandra and Johan travelled from Sweden, Georgia and John, Mary-Beth, Sarah and Mary travelled all the way from the USA, Zita and Theo joined us from the Netherlands, and Allison Kingsbury came over from Germany! It was fantastic to have people from so many different backgrounds come together to knit.

Apart from indulging in fine food, enjoying the beautiful scenery and meeting other knitters, I designed a project for the participants to keep them busy during their stay. The Lochside Scarf was an exploration of colour in an end-to-end chevron stitch pattern. It combined nine colours of Rowan Felted Tweed with two of my Light Wool DK colours in a stripe that graduated from greens through to yellows and browns, purples and greys, before returning to greens again. And of course there were some beads in it too!

Each participant was given a kit, but I brought many extra colours with me that could be swapped in and out to create a more personal palette. Most people stuck to using the colours in the kit, but it was exciting to see some very different colourways being knitted up as well, with some opting to change all of the colours in the kit, whilst others added in a shot of another colour or two every now and then, just to give it an extra bit of spice! I was absolutely thrilled with all the progress that was made, everyone did so well!


It was a fabulous few days together and the only downside was when we had to go home – we all wished we could have stayed longer! However, the good news is that we are planning to return there next year and are in the process of sorting out some dates. So as soon as they are confirmed we will be sure to let you know. Just make sure that you are signed up to our Inspired Minds news alerts by visiting our website: www.inspiredminds-uk.com

Above: Trish with her completed Lochside Scarf!
We always mail out to our Inspired Minds database first before we contact our own databases. And usually these events sell out very quickly. So if you have not signed up to Inspired Minds yet, it would be a really good idea to do it now.
TOWARDS THE BEGINNING OF SEPTEMBER I ENJOYED A COUPLE OF HOURS WITH KERRY, ALISON, MARY AND VANESSA WHO JOINED ME AT YARN LOFT OUR REGULAR MYSTERY MEETING. I was very impressed to see how well the ladies were keeping up with the project, and many more rows were knitted while we were there (and not too many undone!).
Below, left to right: Kerry, Alison and Vanessa crack on with their blanket squares.

Doreen kept us going with hot drinks and cake, and there was much happy banter too as we knitted our way through the two hours. Guesses were made at what the centre square of the blanket might be…maybe a unicorn, or possibly a squirrel? Or could it be a fairy? Of course I said nothing – I’m certainly not going to give the game away this close to the end! But it was interesting to hear all the ideas. I wonder if anyone was right!?!...

Above, left to right: Mary and Kerry enjoy a bit of banter while knitting.
Our next meeting at Yarn Loft is on Wednesday 1st November which coincides with the launch of the final instalment. So after months of hiding it away, I will be bringing the blanket to the meeting with me. It begins from 4pm and runs until 6pm. Yarn Loft is at 118 Hucknall Road, Carrington, Nottingham, tel number 07825 702433, website: www.yarnloft.co.uk. To cover the costs of hosting the meeting there is a small sub to pay (£3.00), which can be paid to Doreen on the day.
Just send a quick email to me at debbie@debbieabrahams.com to let me know you are coming and we will make sure that we reserve a space for you!
IF YOU DON’T FOLLOW US ON OUR SOCIAL MEDIA PLATFORMS THEN PLEASE COME AND JOIN US, and enjoy the messages and photos that are shared between myself and the members:
Instagram: debbieabrahams_knitting
Pinterest: debbieabrahams@debbieabrahamsk
Facebook: Debbie Abrahams Mystery Knitters
Facebook: Debbie Abrahams Handknits
Ravelry: Debbie Abrahams Handknits
BEFORE THE PENULTIMATE PRIZE DRAW, I HAVE A FEW MEMBER STORIES TO SHARE WITH YOU, STARTING WITH ANNABEL CASEY FROM BANBURY IN OXFORDSHIRE (UK) WHO WAS OVERJOYED TO HAVE COMPLETED A PROJECT SHE BEGAN IN ITALY WITH ME LAST YEAR. Annabel joined me for a week at the glorious Watermill in Posara where we spent the week knitting the Tessera Bag. By the sounds if it she was over the moon to get it completed!


Annabel says: “FINALLY I finished my Tessera bag! Actually, I finished the knitting a week or two ago and it has been languishing in a basket awaiting lining and finishing. Typically I sat down to it today and finished it within an hour… Strap lined with grosgrain ribbon to stop it stretching and the bag with a remnant of curtain fabric. Really pleased with it - great pattern!”
It really is a huge relief to get a WIP completed so that you can move on with new projects. It is especially great to see a workshop project finished as I know how hard it is to keep the momentum going after the event. So well done Annabel, it looks stunning, and I LOVE the strap lined with grosgrain – what a super idea!
YOU MIGHT REMEMBER A FEW MONTHS AGO ALL THE WONDERFUL HATS THAT DAPHNE CAVANAH FROM WADEBRIDGE IN CORNWALL (UK) MADE AND SHARED WITH US. I was thrilled to hear that more hats have been knitted since then, including these two lovely creations.

Above: Hat #36
Below: Hat #37

Daphne says: “I thought you might like to see my two latest creations, hats #36 & #37. This is the first time I have been inspired to add some beads. Hat #37 is called Corn Snakes Cornucopia! and is going to the lady who loves snakes. She has rescued a few where they have escaped their homes and freaked out the owners of their chosen new homes!
If anyone needs to see the simple graphs I have made, they can email me and I will send them over.
And here are two more hats, #38 Water Lily Pond (eat your heart out Monet!), and #39 Moody Skies over Moorland. I hope you like them. You can see the Mystery Blanket influences weaving their way through my creative processes!

Above: Hat #38
Below: Hat #39

I’ve just had this photo sent to me from Pennsylvania. The hats are travelling far and wide! The lady wearing the hat is Lina, she is a talented woman in many ways. Check out her Facebook page, Lina Badaszewski, her garden was what inspired the design.

I have been enjoying my MBC23 immensely and look forward to picking up my printed patterns from my son when I am up in Devon next on 8th. My printer only prints black and white, not very helpful with all the colours in use. I have now signed up for MBC24! Thank you again for inspiring me with my knitting!”
Wow Daphne! What beautiful hats, and it’s so good to see them out and about and being worn in such faraway places! It’s lovely to hear about your inspiration for your designs. And thanks for offering to share your charts too. If anyone is interested please let me know and I will put you in contact with the lovely Daphne!
THE LAST MEMBER STORY THIS MONTH COMES FROM ALEX TREIBER WHO LOVES IN BURLINGTON IN ONTARIO (CANADA). Alex has found a super way to finish off her chain stitch embroidery, which results in an invisible join. This is what she suggests:
Alex says: “I have a tip you might like to share. I wasn't happy with the way I was finishing my little chain stitch circles, by just doing a sort of stab stitch after the last chain to return the needle and wool to the wrong side. That left a little blip that was visible.
I'm not an embroiderer, but it occurred to me that I could finish the chain circle by joining my last stitch to my first stitch in the same way as duplicate stitch, i.e. looping the thread of the last stitch through the two "legs" of the first chain. This creates a circle that has no visible beginning or ending.
I hope you like this tip! Now I am really happy with all the little circles!”
This is an excellent tip Alex, and I am sure it will be tried by anyone who is struggling to get their chain stitch circles looking perfect. I’ve tried it too and it works brilliantly. Thanks so much for sharing!
THE FURRY FRIENDS GALLERY WILL BE LIVE SOON! I did originally say it would be launched in October, but I am pushing this back to November after the Mystery Blanket has finished. So if you have any fun photos of your nearest and dearest cuddly companions, then there is still time to send them in. Send your pics and a few words directly to me at debbie@debbieabrahams.com and they will be shared in this very special blog in a few weeks’ time!
AND FINALLY, IT’S TIME TO ANNOUNCE THE WINNER OF THE NINTH 2023 MYSTERY BLANKET CLUB PRIZE DRAW!!! Each month a member is picked at random to win a Debbie Abrahams prize. So it is worth reading right the way to the end of each blog to see if you are that lucky member!
PRIZE DRAW NINE (OCTOBER): this month’s winner is member 554, Patricia Sorrentino from Tampa, Florida in the USA. Well done Patricia! Please choose a prize from the following selection:
- Your choice of one of Debbie’s knitting kits up to the value of £28.00 (take a look at them in our online shop).
- Five packs of Debbie Abrahams Beads (size 8/0 or 6/0) from the selection on http://www.debbieabrahamsbeads.co.uk
- A £25 voucher (or £25 refund) for a Debbie Abrahams Mystery Club membership: 2024 Mystery Blanket Club or 2024 Mystery Cushion Club.
- A Mystery bag of five gifts!
We will notify Patricia to let her know the good news!
So here we are, almost at the end of our 2023 Mystery Blanket adventure, with just four squares (and the edgings) left to do. Next month the centre square will be revealed as well as the title of the blanket. So next month’s blog will be a bit of a bumper edition, with the inspiration for the project discussed as well as tips and advice for those final few squares.
After an unusually warm start to October, the weather here is beginning to turn and today it’s beautiful - the sky is clear blue and the air is icy. This is my favourite time of the year and it’s perfect weather for knitting! Wherever you are knitting your blanket squares, whether it is sunny and hot or cold and icy, I wish you a fabulous October, and look forward to seeing you again in a couple of weeks’ time for the final instalment. I just can’t wait, can you?!? Debbie x